
Affiliate Disclosure: As an Amazon Associate I earn from qualifying purchases at no additional cost to you.
Why DIY Jewelry Repair Makes Sense
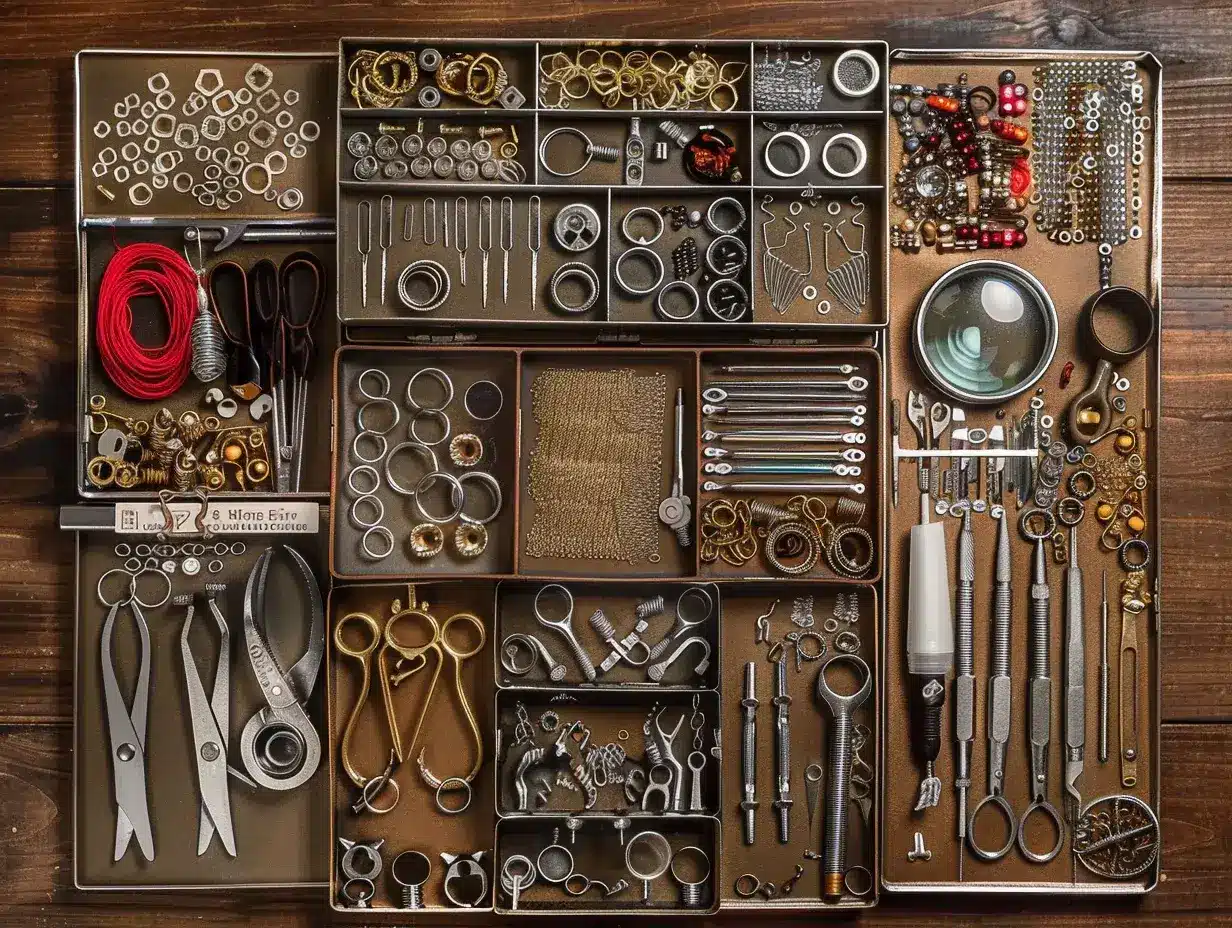
Jewelry repair professionals charge $30-150 for simple fixes – replacing clasps, connecting broken chains, restringing beads – repairs achievable at home with $20-40 tool investment. Learning basic jewelry repair saves money, extends jewelry lifespan, and empowers immediate fixes preventing complete jewelry loss. That broken necklace languishing in your jewelry box for months because professional repair seems expensive? Fixed in 15 minutes with proper tools and technique.
This comprehensive guide teaches practical DIY jewelry repair for common damage types: broken chains and missing links, faulty or broken clasps, lost earring backs and posts, broken beaded necklaces/bracelets, scratched or dull metal surfaces. We identify repairs suitable for home versus requiring professional expertise, provide step-by-step instructions with clear success criteria, and recommend specific tools and materials maximizing repair success.
Essential Jewelry Repair Tools
Complete Beginner Repair Kits
🔧 All-In-One Repair Kits
1. Anezus Jewelry Repair Kit (Complete Set)
- ✓ 3 essential pliers (chain-nose, round-nose, cutters)
- ✓ 450+ jewelry findings included
- ✓ Jump rings, clasps, earring hooks
- ✓ Elastic beading wire
- ✓ Tweezers and jump ring opener
- ✓ Complete starter solution
- ✓ Organized storage box
2. PAXCOO Jewelry Making Repair Kit
- ✓ 1260+ pieces total
- ✓ Assorted jump rings and clasps
- ✓ Professional pliers set
- ✓ Perfect for chain/clasp repair
- ✓ Budget-friendly comprehensive kit
Individual Essential Tools
If Building Custom Toolkit:
🛠️ Core Tools (Priority Purchase)
1. Jewelry Pliers Set (3-Piece)
- ✓ Chain-nose pliers (gripping, bending)
- ✓ Round-nose pliers (loop making)
- ✓ Wire cutters (clean cuts)
- ✓ Comfortable grip handles
- ✓ Essential tool trio
2. Jump Rings Assortment (1000+ pieces)
- ✓ Multiple sizes (4mm-10mm)
- ✓ Silver and gold tones
- ✓ Chain repair essential
- ✓ Lifetime supply for repairs
3. Lobster Clasps Assortment (120 pieces)
- ✓ Various sizes
- ✓ Silver and gold finishes
- ✓ Clasp replacement essential
4. Magnifying Glass with LED Light
- ✓ 10x magnification
- ✓ Hands-free stand
- ✓ LED illumination
- ✓ See fine details clearly
Repair #1: Fixing Broken Chains
Assess the Damage
Common Chain Problems:
- Single broken link
- Opened jump ring
- Multiple broken links
- Missing section of chain
Step-by-Step Chain Repair
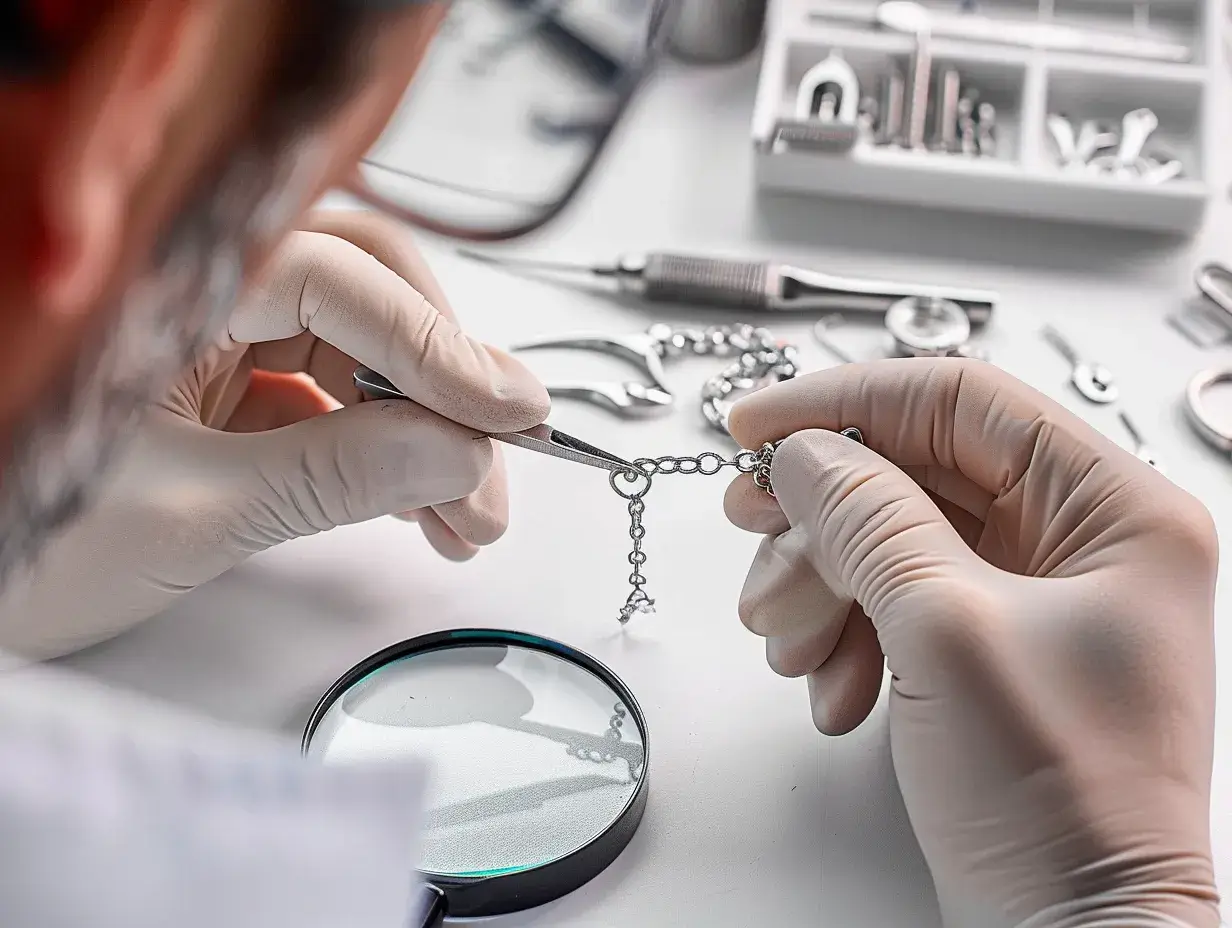
- Locate break point: Examine chain under magnification identifying exact damaged link
- Remove damaged link (if necessary):
- Use wire cutters cutting damaged link on both sides
- Remove broken piece completely
- Ensure cut ends clean and smooth
- Select appropriate jump ring:
- Match chain metal color (silver, gold)
- Choose size proportional to chain links (not too large/bulky)
- Larger diameter = stronger but more visible
- Open jump ring correctly:
- Hold jump ring with two pliers (one each side of opening)
- Twist sideways (NOT pulling apart – weakens metal)
- One side forward, one back creating opening
- Thread chain ends:
- Slide both chain ends onto open jump ring
- Ensure chain sits properly in jump ring
- Close jump ring securely:
- Reverse twisting motion bringing ends together
- Ends must meet perfectly with NO visible gap
- Slight overlap okay, gap creates weak point
- Test repair:
- Gently tug chain confirming secure connection
- Inspect jump ring – no gaps visible
- Chain should hang naturally without twisting
Time Required: 5-15 minutes
Success Rate: 90%+ with proper technique
Alternative: Chain Extenders
If break occurs near clasp, adding extender chain simpler than repairing original:
- Remove broken section
- Attach chain extender with clasp
- Bonus: Adjustable length
Repair #2: Replacing Broken Clasps
Types of Clasps
- Lobster clasps: Most common, reliable
- Spring ring clasps: Smaller, more delicate
- Toggle clasps: Decorative, two-part
- Magnetic clasps: Easy use, less secure
Clasp Replacement Process
- Remove old clasp:
- Open jump ring connecting clasp to chain
- Remove broken clasp
- Discard damaged component
- Select replacement clasp:
- Match metal color and finish
- Similar or slightly larger size (stronger)
- Ensure clasp mechanism works smoothly
- Attach new clasp:
- Open jump ring (twist sideways technique)
- Thread chain end and new clasp loop
- Close jump ring securely (no gaps)
- Test functionality:
- Open and close clasp multiple times
- Ensure smooth operation
- Verify secure attachment to chain
Time Required: 5-10 minutes
Difficulty: Easy – perfect beginner repair
Repair #3: Fixing Earring Problems
Common Earring Issues
- Lost earring backs
- Bent earring posts
- Broken earring hooks
- Loose dangles
Replacing Earring Backs
👂 Earring Components
Earring Backs Assortment (200+ pieces)
- ✓ Multiple sizes
- ✓ Clear and metal backs
- ✓ Hypoallergenic materials
- ✓ Secure grip designs
- ✓ Lifetime supply
- ✓ French hook style
- ✓ Silver and gold tones
- ✓ Replace broken hooks easily
Simple Replacement: Push new earring back onto post until secure. Test with gentle tug.
Fixing Bent Earring Posts
- Examine post under magnification
- Use chain-nose pliers VERY gently straightening
- Apply minimal pressure (posts delicate)
- Test fit in ear – should insert smoothly
⚠️ Warning: Excessive bending weakens metal. If post bent multiple times, professional replacement recommended.
Repair #4: Restringing Beaded Jewelry
When Restringing Needed
- Broken beading wire/cord
- Frayed or stretched cord
- Discolored thread
- Worn between beads
🧵 Beading Supplies
1. Jewelry Beading Wire (Complete Set)
- ✓ Multiple strand thicknesses
- ✓ Nylon-coated steel wire
- ✓ Flexible and strong
- ✓ Professional quality
2. Crimp Beads and Crimp Covers (600 pieces)
- ✓ Secure wire ends
- ✓ Multiple sizes
- ✓ Silver and gold finishes
- ✓ Professional finish
3. Bead Stopper Clamps (10 pieces)
- ✓ Hold beads while working
- ✓ Prevent accidental spills
- ✓ Essential for restringing
Restringing Process
- Prepare workspace:
- Lay out soft cloth (catches dropped beads)
- Organize beads in original order (photograph first if complex pattern)
- Gather wire, clasp, crimp beads
- Cut appropriate wire length:
- Measure desired finished length
- Add 6 inches for working room
- Cut clean with wire cutters
- Attach first crimp bead:
- Thread crimp bead onto wire
- Thread clasp loop
- Thread wire back through crimp bead creating small loop
- Use crimping pliers flattening crimp bead securely
- String beads:
- Thread beads in desired order
- Work carefully preventing tangles
- Use bead stopper on working end
- Finish second end:
- Thread crimp bead
- Thread opposite clasp component
- Thread wire back through crimp bead
- Adjust tension (snug but not tight)
- Crimp securely
- Trim excess wire close to crimp
- Add crimp covers (optional):
- Place crimp cover over crimped bead
- Gently close with chain-nose pliers
- Creates polished professional appearance
Time Required: 30-60 minutes depending on complexity
Skill Level: Intermediate (requires patience)
Jewelry Adhesives for Bonding Repairs
🧪 Professional Adhesives
- ✓ Industrial-strength bond
- ✓ Flexible when cured
- ✓ Waterproof
- ✓ Bonds metal, glass, stone, ceramic
- ✓ 24-72 hour cure time
- ✓ Best all-purpose jewelry adhesive
- ✓ Two-part epoxy system
- ✓ Strongest bond
- ✓ Quick-setting
- ✓ Gap-filling properties
- ✓ Perfect for metal repairs
When to Use Adhesives
Good For:
- Attaching findings to metal bases
- Securing loose rhinestones
- Bonding broken costume jewelry
- Pendant bail attachment
NOT Suitable For:
- Precious metal jewelry (use professional soldering)
- High-stress connections (use mechanical attachment)
- Porous gemstones (adhesive absorbs into stone)
Polishing and Finishing
After repair, restore jewelry’s shine:
✨ Polishing Supplies
Jewelry Polishing Cloth (2-Pack)
- ✓ Two-sided design
- ✓ Removes tarnish
- ✓ Restores shine
- ✓ Works on all metals
When to Seek Professional Repair
Always Professional
- Precious metal soldering: Gold, silver, platinum welding
- Ring resizing: Requires metalworking expertise
- Prong repair: Stone security critical
- Stone replacement: Gem-setting skills necessary
- Antique jewelry: Irreplaceable pieces warrant professional care
Consider Professional
- High-value jewelry ($500+)
- Sentimental heirlooms
- Complex multi-component repairs
- Insurance-covered pieces
Frequently Asked Questions
Can I repair jewelry myself at home?
Yes, many common jewelry repairs are achievable at home with basic tools and patience. DIY-FRIENDLY repairs: Replacing broken clasps (simple mechanical attachment), fixing broken chains using jump rings (no soldering required), replacing lost earring backs (push-on replacement), restringing beaded necklaces/bracelets (rethreading on wire/cord), tightening loose earring posts (gentle adjustment), polishing scratched metal (buffing technique). Required skills: Basic hand coordination, patience for detail work, following instructions carefully, gentle touch with delicate components. Typical success rate for beginners: 80-90% for simple repairs. PROFESSIONAL-ONLY repairs: Prong repair/retipping (requires soldering, specialized skills), ring resizing (precise metalwork, welding), stone replacement in settings (gem-setting expertise), cracked/broken precious metal repair (professional soldering), badly damaged antique jewelry (irreplaceable pieces). Cost comparison: DIY: $15-40 tool investment, repair completed 30 minutes-2 hours. Professional: $30-150+ per repair, turnaround 1-2 weeks. Recommendation: Start with low-value jewelry practicing technique before attempting repairs on precious/sentimental pieces. Investment in basic repair kit ($20-30) pays for itself after 2-3 repairs versus professional costs.
What tools do I need for basic jewelry repair?
Essential jewelry repair toolkit for beginners: MUST-HAVE TOOLS (Priority 1): Chain-nose pliers – flat inner jaws for gripping, bending, opening/closing jump rings ($8-12). Round-nose pliers – cone-shaped jaws creating loops, curves, spirals ($8-12). Wire cutters (flush-cut) – clean wire cutting without sharp ends ($8-12). Jump rings assortment – various sizes (4mm-8mm) in silver/gold tones for chain repair ($5-10). Lobster clasps assortment – replacement clasps various sizes ($5-10). RECOMMENDED ADDITIONS (Priority 2): Jewelry adhesive (E6000 or epoxy) – bonding broken components when soldering unavailable ($5-8). Magnifying glass or loupe – seeing fine details, inspecting damage ($10-15). Earring backs assortment – replacing lost backs ($3-5). Tweezers (fine-tip) – handling tiny components ($5-8). Bead/jewelry cord – restringing ($5-10). COMPLETE STARTER KIT OPTION: Pre-packaged jewelry repair kits available $25-40 including most essential tools, findings, storage case. More economical than buying individually. Professional-level tools (NOT needed for beginners): Jeweler’s torch (soldering – $50-150), ring mandrel ($15-30), specialized setting tools ($30-100+), professional-grade pliers ($40-80 per pair). Start basic, upgrade as skills develop and repair needs expand. Most common home repairs achievable with $30-50 basic toolkit.
How do I fix a broken necklace chain?
Broken chain repair depends on break location and type. STEP-BY-STEP CHAIN REPAIR: (1) Assess damage – Locate break point. Determine if link broken completely or just opened. Check if additional links damaged. (2) Gather supplies – Jump rings matching chain thickness/color, chain-nose pliers (2 pairs helpful), wire cutters if trimming needed. (3) Remove damaged link (if necessary) – Open jump ring or cut damaged link, remove from chain, discard broken piece. (4) Connect chain ends – Open new jump ring: grip one side with pliers, twist open sideways (don’t pull apart – weakens metal). Thread both chain ends onto open jump ring. Close jump ring: reverse twisting motion ensuring ends meet perfectly (no gap). (5) Test repair – Gently tug chain confirming secure connection. Inspect jump ring closure – properly closed ring shows no visible gap. ALTERNATIVE: Use connector/extender clasp if break near existing clasp – simpler than jump ring repair. COMMON MISTAKES TO AVOID: Pulling jump rings apart (correct: twist sideways), using wrong-size jump ring (too small = weak, too large = visible/catches), leaving gap when closing (creates weak point). Time required: 5-15 minutes for simple chain break. Success rate: 90%+ with proper technique. When to seek professional repair: Multiple breaks, very fine delicate chains (easy to damage further), expensive precious metal chains (professional soldering preferred).
What’s the best adhesive for jewelry repair?
Best jewelry adhesive depends on materials being bonded and repair type. TOP 3 JEWELRY ADHESIVES: E6000 CRAFT ADHESIVE (Most Versatile): Industrial-strength, flexible when cured, bonds metal, glass, stone, ceramic, wood, fabric. Drying time: 24-72 hours full cure. Best for: Bonding findings to metal, attaching flat-back rhinestones, securing pendant bails, repairing costume jewelry. Advantages: Very strong bond, remains slightly flexible (withstands movement), waterproof when cured, widely available. Disadvantages: Strong fumes (ventilation required), long cure time, can’t be used on porous stones (absorbs into material). TWO-PART EPOXY (Strongest Bond): Mix equal parts resin and hardener, creates permanent chemical bond. Types: 5-minute epoxy (quick-setting, slightly weaker) or 24-hour epoxy (strongest, longer working time). Best for: Metal-to-metal bonds, repairing broken rings/bracelets (non-precious), securing stone settings when re-setting not possible, heavy-duty repairs. Advantages: Strongest bond available without soldering, gap-filling properties, can be sanded/drilled after curing. Disadvantages: Mixing required, visible if overflows, very permanent (difficult to reverse). SUPER GLUE/CYANOACRYLATE (Quick Fixes): Instant bonding, thin consistency. Best for: Emergency temporary repairs, bonding smooth non-porous surfaces, securing loose rhinestones temporarily. Advantages: Instant bond, no mixing, inexpensive. Disadvantages: Brittle when cured (breaks with movement), not waterproof, difficult to control (bonds skin instantly), not suitable for long-term jewelry repair. RECOMMENDATION: E6000 for 80% of home jewelry repairs – best balance of strength, flexibility, ease of use. Keep 5-minute epoxy for quick strong repairs. Avoid super glue for permanent jewelry repair (too brittle).
When should I take jewelry to a professional instead of repairing it myself?
Seek professional jeweler for these repairs: ALWAYS PROFESSIONAL: Precious metal soldering – Broken gold/silver/platinum requiring welding. Ring resizing – Cutting, adding/removing metal, re-soldering band. Prong retipping/rebuilding – Worn prongs holding gemstones need professional metalwork. Stone setting/replacement – Requires specialized gem-setting tools and expertise. Cracked gemstones – Professional assessment whether repairable or replacement needed. Antique/heirloom jewelry – Irreplaceable sentimental value warrants professional care. Insurance-covered pieces – Document professional repair for claims. CONSIDER PROFESSIONAL: Chain soldering – Jump ring repair adequate for most, but soldering creates invisible seamless repair. Complex multi-strand repairs – Professional tools/expertise efficient. Jewelry requiring sizing/metalwork – Beyond DIY scope. Expensive jewelry ($500+) – Repair cost small compared to jewelry value, professional expertise worth investment. DIY ASSESSMENT QUESTIONS: Is jewelry replaceable if mistake made? (No = professional). Does repair require specialized equipment? (Yes = professional). Is jewelry high sentimental/monetary value? (Yes = professional). Am I confident in my ability? (No = professional or practice on similar low-value piece first). Cost consideration: Professional repair $30-150 depending on complexity. DIY risk on expensive piece may cost more if damaged further. Insurance: Some jewelry insurance policies require professional repair documentation for claims. Verify policy before DIY repair on insured items. Bottom line: When in doubt, consult professional jeweler for assessment. Many offer free estimates and can advise if DIY appropriate or professional expertise necessary.
Conclusion
Basic jewelry repair empowers immediate fixes for common damage – broken chains, faulty clasps, lost earring backs, broken beaded strands – saving professional repair costs while extending jewelry lifespan. Investment in $30-50 basic repair toolkit (pliers, jump rings, clasps, adhesive) pays for itself after 2-3 repairs versus $30-150 professional charges. Mastering fundamental techniques – proper jump ring opening/closing, secure crimp bead attachment, appropriate adhesive selection – builds confidence tackling increasingly complex repairs.
Success factors: Start with low-value practice pieces before attempting repairs on precious jewelry, invest in proper tools (quality pliers essential), work in good lighting with magnification for detailed work, and recognize limits (precious metal soldering, ring resizing, prong work require professional expertise). Most importantly: patience and gentle technique prevent additional damage during repair attempts.
That drawer full of broken jewelry represents repairable value waiting for simple fixes. With basic tools and techniques from this guide, transform damaged pieces back into wearable, cherished jewelry – saving money while gaining satisfying DIY skills!
Last Updated: December 2024 | This article contains affiliate links. As an Amazon Associate, I earn from qualifying purchases at no additional cost to you.

Hi, I’m Sara Hein, a passionate jewelry researcher and educator. I created Jewelry Carats to share well-researched insights on gemstones, precious metals, and jewelry care. My goal is making expert jewelry knowledge accessible to everyone.