
Affiliate Disclosure: As an Amazon Associate I earn from qualifying purchases. This means that if you click on a link and make a purchase, I may receive a small commission at no extra cost to you. I only recommend products I personally use or believe will add value to my readers.
The Complete Professional DIY Guide
Introduction: Why Replating Gold Jewelry Makes Economic and Sentimental Sense
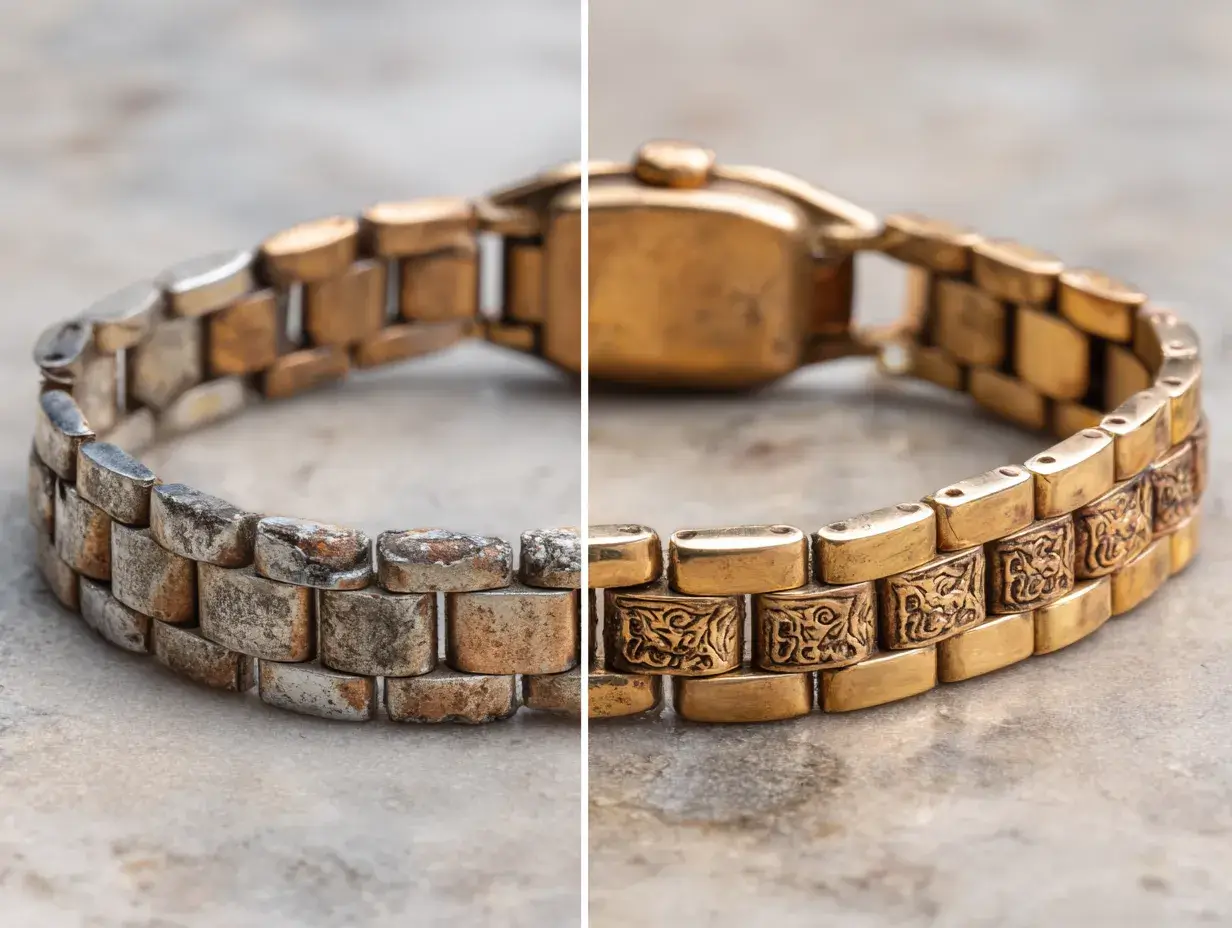
Gold plated jewelry offers the luxurious appearance of solid gold at accessible prices, but the thin coating inevitably wears away with time and use. Professional replating services cost $30-100 per piece—expenses that quickly accumulate for jewelry collections or frequently worn pieces. Learning to replate gold jewelry at home transforms this recurring cost into a one-time investment in equipment that serves for years.
Beyond economics, replating preserves sentimental jewelry that holds irreplaceable memories. That heirloom necklace from your grandmother, the bracelet commemorating a special occasion, or daily-wear pieces that define your style all deserve restoration rather than replacement. Home replating empowers you to maintain your collection’s beauty while exercising creative control over finish, thickness, and timing.
This comprehensive guide synthesizes professional jeweler techniques, electrochemistry principles, and practical home workshop methods to provide definitive instructions for successfully replating gold jewelry. Whether you’re restoring vintage costume jewelry, maintaining fashion pieces, or preserving meaningful keepsakes, this article equips you with professional-grade knowledge for optimal results.
🏆 Professional’s Choice: Complete Brush Plating Kit
For serious jewelry enthusiasts, the Goldsmith Brush Plating Kit by Gold Plating Services represents the gold standard in home replating. This complete professional system includes:
- ✓ Control console with precision voltage control
- ✓ Brush plating wand with fine-select pen tips
- ✓ 1 oz 24K gold plating solution (plates 300+ sq inches)
- ✓ Stainless steel brush anode with cotton sleeves
- ✓ Complete photo instruction manual + safety data sheets
- ✓ Toll-free technical support
Why professionals recommend this kit: Unlike tank plating systems requiring beaker immersion, brush plating allows selective application to worn areas without replating entire pieces. Perfect for intricate designs, gemstone jewelry, and large items.
Understanding Gold Plating: The Science of Electroplating
How Electroplating Works
Electroplating deposits a thin layer of gold onto conductive surfaces through electrochemical deposition. The process requires three essential components:
1. Plating Solution (Electrolyte): Gold dissolved in chemical solution (typically gold cyanide, gold chloride, or proprietary formulations) creates gold ions in suspension. Solution quality directly impacts final appearance, durability, and color.
2. Electrical Current: Direct current (DC) power source drives the electrochemical reaction. The jewelry piece connects to the negative terminal (cathode), while the plating wand or anode connects to the positive terminal. Current strength (voltage/amperage) controls plating speed and quality.
3. Conductive Contact: Jewelry must provide continuous electrical connection throughout plating. Poor contact creates uneven plating or bare spots.
During electroplating, positive gold ions migrate toward the negatively charged jewelry surface, where they gain electrons and deposit as metallic gold. This creates a metallurgical bond—the gold literally fuses to the base metal at the molecular level.
Types of Gold Plating Solutions
Home plating kits offer various gold types, each producing distinct appearances:
- 24K Pure Gold: Bright yellow, maximum corrosion resistance. Softer, scratches more easily. Ideal for decorative pieces with minimal wear.
- 18K Gold: Slightly paler yellow, harder than 24K. Good balance of appearance and durability.
- 14K Gold: Lighter yellow-white tone, increased hardness. Best for high-wear items like rings.
- Rose Gold: Pink-copper hue created by gold-copper alloy. Trendy alternative to yellow gold.
- White Gold: Actually rhodium plating in most cases. Creates bright silver-white appearance.
Essential Equipment and Materials for Home Replating
Complete Home Plating Workshop Setup
Successful home replating requires specific equipment and supplies. Quality tools produce professional results; cheap shortcuts create frustration and wasted materials.
Primary Equipment:
- Plating Kit: Brush plating system (recommended) or tank plating setup
- Power Source: Regulated DC power supply, 0-12V, 0-2A minimum
- Plating Wand/Brush: Titanium or stainless steel anode with cotton sleeve
- Gold Plating Solution: Professional-grade 24K, 18K, or 14K as preferred
- Cleaning Solutions: Electro-cleaner, surface activator, rinse water
💰 Budget-Friendly Starter Option
For beginners or occasional use, the Mini Plater 24K Gold Plating Kit offers an affordable entry point:
- ✓ Compact single-speed plating machine
- ✓ Simple operation ideal for beginners
- ✓ Residential use design transforms homes into workshops
- ✓ Genuine 24K gold plating capability
- ✓ Significant cost savings vs professional services
Best for: Small jewelry items, simple designs, learning plating basics before upgrading to professional systems.
Supporting Equipment:
- Glass or plastic beakers (3-5): For holding cleaning and plating solutions
- Copper wire: For creating jewelry hangers/connections
- Titanium or graphite bus bars: For suspending jewelry during tank plating
- Thermometer: Many solutions require specific temperatures (90-120°F)
- Hot plate or heater: For temperature control
- Distilled water: For rinsing and solution preparation
- pH test strips: For solution monitoring
Safety Equipment (Non-Negotiable):
- Nitrile gloves (chemical resistant, not latex)
- Safety glasses or goggles
- Respirator mask or well-ventilated workspace
- Chemical-resistant apron
- First aid supplies
- Eye wash station or bottle
Pre-Plating Preparation: The Foundation of Quality Results
Step 1: Jewelry Assessment and Stripping
Replating success depends on thorough surface preparation. Contaminated or poorly prepared surfaces produce uneven, weak plating that fails quickly.
Initial Inspection Protocol:
- Examine jewelry under strong lighting for structural damage
- Identify all materials (base metal, stones, enamel, adhesives)
- Check for loose stones that require tightening before plating
- Assess existing plating condition—can it be cleaned or must it be stripped?
- Test magnetic attraction to identify ferrous metals (iron, steel)
Old Plating Removal (When Necessary):
Severely worn, flaking, or discolored plating should be completely stripped before replating. Two primary methods exist:
Method 1: Chemical Stripping
Gold stripping solutions dissolve old gold plating without damaging base metal. Process:
- Heat stripping solution to manufacturer-specified temperature (typically 130-160°F)
- Submerge jewelry completely for specified time (30 seconds to 5 minutes)
- Agitate gently to accelerate stripping
- Monitor visually—remove when gold has dissolved
- Rinse immediately in cold distilled water
- Neutralize if required by solution type
Method 2: Reverse Electroplating
Uses electro-cleaner in reverse polarity mode. Safer for delicate items but slower than chemical stripping.
🧼 Essential Pre-Plating Cleaning
Before any replating, jewelry must be absolutely clean. The CONNOISSEURS All-Purpose Jewelry Cleaning Kit provides professional-grade preparation:
- ✓ 8 oz delicate jewelry cleaner solution
- ✓ Professional dip tray and soft-bristle brush
- ✓ Gold and silver polishing cloths
- ✓ Removes oils, cosmetics, and oxidation
- ✓ Ammonia-free formula safe for gemstones
Critical importance: Even microscopic oils prevent plating adhesion. Commercial jewelry cleaners remove contaminants that household soaps miss.
Step 2: Thorough Cleaning (Electro-Cleaning)
Even jewelry that appears clean harbors invisible oils, skin residues, and oxidation that prevent proper plating. Electro-cleaning uses electrical current to release contaminants molecularly bonded to metal surfaces.
Electro-Cleaning Protocol:
- Solution Preparation: Heat electro-cleaner solution to 125°F
- Connection: Connect jewelry to negative terminal (cathode)
- Treatment: Submerge in solution for 60-90 seconds at 5 volts
- Agitation: Gently move piece to dislodge bubbles
- Inspection: Remove and examine for water breaking (water forming droplets indicates remaining oils)
- Re-clean if necessary: Repeat until water sheets evenly across entire surface
- Rinse: Immediately rinse in flowing distilled water for 30 seconds minimum
CRITICAL: Never touch cleaned jewelry with bare hands after this stage. Skin oils instantly contaminate the surface. Use tweezers, clean gloves, or copper wire hangers exclusively.
Step 3: Surface Activation
Acid activation removes the last traces of oxidation and creates the chemically active surface necessary for gold adhesion. This step makes the difference between plating that lasts years versus weeks.
Activation Process:
- Prepare acid activator solution (typically dilute sulfuric or proprietary blend)
- Submerge jewelry for 5-15 seconds
- Remove immediately—over-activation etches base metal
- Rinse thoroughly in distilled water
- Proceed directly to plating without delay (activated surfaces oxidize within minutes)
Gold Replating Methods: Brush vs. Tank Plating
Brush Plating Technique (Recommended for Home Use)
Brush plating, also called selective plating or swab plating, applies gold coating using an electrified wand wrapped in absorbent material saturated with plating solution. This method offers significant advantages for home use:
Advantages of Brush Plating:
- Selective application to worn areas only
- No size limitations—can plate items too large for beakers
- Uses minimal solution compared to tank methods
- Safe for gemstone jewelry with careful technique
- Allows multiple colors on single piece
- Easy to achieve thick plating through repeated passes
- Room temperature operation
Brush Plating Step-by-Step Protocol:
- Setup: Secure jewelry to work surface with clip connected to negative terminal
- Solution Loading: Saturate brush sleeve with gold plating solution—wet but not dripping
- Voltage Setting: Set power supply to 3-6 volts (manufacturer specifications vary)
- Initial Contact: Touch brush to jewelry surface—you should see slight bubbling/foaming indicating current flow
- Application Technique:
- Move brush in steady circular or back-and-forth motions
- Maintain constant contact but avoid excessive pressure
- Keep brush moving—stationary contact creates burning/buildup
- Refresh solution on brush every 30-60 seconds
- Building Thickness: Make 3-8 passes over same area, rinsing between passes with distilled water
- Even Coverage: Overlap passes to ensure no gaps or transitions
- Final Rinse: Thoroughly rinse in distilled water for 1 minute minimum
- Stabilization: Some kits recommend brief electro-clean treatment to stabilize plating
⚡ Professional-Grade Precision Kit
For intricate work and electronics-grade results, the Gold Plating Services 24K PCB Plating Kit offers exceptional precision:
- ✓ Fine-select pen tips (3 ultra-fine + 3 medium)
- ✓ High-concentration pen plating solution
- ✓ Analog voltage control to 1/10 volt resolution
- ✓ Cobalt-hardened 24K gold (Type 1&2, Grade C)
- ✓ Plates thousands of contacts per bottle
Ideal for: Detailed restoration, tiny areas, precise color matching, professional-quality finishes on valuable pieces.
Tank Plating Method (For Complete Immersion)
Tank plating submerges entire jewelry piece in gold solution, producing the most uniform coating. Best suited for simple designs without gemstones or delicate components.
Tank Plating Setup Requirements:
- Heat-safe beaker large enough to submerge jewelry completely
- Titanium or graphite anode (must not dissolve during plating)
- Heating element to maintain solution temperature
- Bus bar system to suspend jewelry
- Significantly more plating solution (500ml-1 liter minimum)
Tank Plating Procedure:
- Heat plating solution to specified temperature (typically 110-120°F)
- Suspend jewelry from cathode bar using copper wire
- Place anode in solution opposite jewelry
- Set voltage (typically 2-5 volts depending on solution)
- Monitor current—should remain steady throughout plating
- Plate for specified time (40-120 seconds for standard thickness)
- Remove, rinse, and inspect
- Repeat process for additional thickness if desired
Strike Layer Application (For Difficult Metals)
Certain base metals—particularly brass, copper, and nickel alloys—require an intermediary “strike” layer to ensure proper gold adhesion. The strike layer prevents base metal contamination of gold solution and provides superior bonding surface.
When Strike Layers Are Necessary:
- Copper or brass base metals
- Previously failed plating attempts
- Jewelry showing heavy oxidation or corrosion
- Situations requiring maximum plating durability
Common Strike Materials:
- Nickel: Most common. Excellent adhesion, corrosion protection. Note: Can cause allergic reactions in sensitive individuals.
- Copper: Alternative for nickel-sensitive users. Requires additional gold thickness to prevent copper migration.
- Palladium: Premium option. Hypoallergenic, superior adhesion, expensive.
Achieving Professional Finish Quality
Controlling Plating Thickness
Plating thickness determines durability and appearance. Too thin wears quickly; too thick looks unnatural and may crack. Thickness is measured in microns (µm) or micro-inches (µin).
Recommended Thickness by Jewelry Type:
- Earrings (minimal wear): 0.5-1.0 microns
- Necklaces/Pendants (moderate wear): 1.0-2.0 microns
- Bracelets (high wear): 2.0-3.0 microns
- Rings (maximum wear): 2.5-4.0 microns
Thickness control methods:
- Time: Longer plating = thicker coating (approximately 0.5 microns per minute varies by solution)
- Current Density: Higher voltage/amperage = faster deposition
- Multiple Passes: Building layers gradually produces smoother, more durable finishes than single heavy coating
Troubleshooting Common Plating Defects
Problem: Patchy or Uneven Coverage
Causes & Solutions:
- Insufficient cleaning → Re-clean with electro-cleaner
- Poor electrical contact → Improve connection points
- Inconsistent brush movement → Maintain steady motion with brush plating
- Oxidation during process → Work faster, rinse between steps
Problem: Rough, Grainy, or “Burnt” Appearance
Causes & Solutions:
- Excessive voltage/current → Reduce to manufacturer specifications
- Solution too cold → Heat to proper temperature
- Contaminated solution → Filter or replace
- Stationary brush contact → Keep brush moving continuously
Problem: Plating Won’t Adhere (Wipes Off Easily)
Causes & Solutions:
- Inadequate activation → Increase activation time
- Delay between activation and plating → Work faster, minimize air exposure
- Base metal incompatibility → Apply strike layer first
- Expired plating solution → Replace with fresh solution
Post-Plating Care and Protection
Immediate Post-Plating Treatment
Freshly plated jewelry requires specific care in the first 24-48 hours while plating fully stabilizes:
- Final Rinse: Rinse thoroughly in distilled water for 1-2 minutes to remove all solution residue
- Gentle Drying: Pat with lint-free cloth or air dry. Never use heat.
- Optional Stabilization: Some professionals recommend brief electro-clean treatment in reverse to “lock in” plating
- Curing Time: Allow 24 hours before wearing or applying protective coatings
- Avoid Contact: Don’t expose to chemicals, cosmetics, or moisture during curing
✨ Professional Finishing Touch
After replating, enhance shine with the LIFETIME JEWELRY Professional Polishing Cloth:
- ✓ Two-in-one cleaning and polishing system
- ✓ Specifically formulated for gold plating
- ✓ Removes minor imperfections and fingerprints
- ✓ No messy liquids or pastes required
- ✓ Compact travel size for maintenance
Application: Wait 24 hours after replating, then gently polish to brilliant shine. Use light pressure to avoid wearing new plating.
Protective Sealant Application
Applying protective sealants after replating extends plating life 2-3x by creating barriers against moisture, chemicals, and abrasion.
🛡️ Long-Term Protection Options
Option 1: Nano-Ceramic Protection
Eternal Jewelry Coating bonds molecularly with plated surfaces:
- ✓ Nano-ceramic technology for superior durability
- ✓ Invisible, non-yellowing formula
- ✓ Water and dust repellent surface
- ✓ Prevents allergic reactions to base metals
- ✓ Easy application: brush on, wait 5 minutes, polish
- ✓ Coats 100+ pieces per bottle
Option 2: Industrial-Grade Coating
ProtectaClear 4oz Metal Coating for maximum wear resistance:
- ✓ Professional jewelry industry coating
- ✓ Extremely durable clear finish
- ✓ Ideal for high-wear items (rings, bracelets)
- ✓ Multiple application methods (brush, dip, spray)
- ✓ Food-safe and skin-safe after curing
Advanced Techniques for Specialty Applications
Plating Jewelry with Gemstones
Gemstone jewelry requires special care during replating to prevent damage or discoloration:
Hard Gemstones (Diamonds, Sapphires, Rubies):
- Can tolerate plating solutions and electrical current
- Use brush plating to avoid unnecessary stone exposure
- Clean thoroughly after plating to remove solution residue from facets
- Inspect settings afterward—plating may fill in prong details requiring cleanup
Soft/Porous Gemstones (Pearls, Opals, Turquoise, Coral, Emeralds):
- MUST be protected from plating solutions
- Apply nail polish or microcrystalline wax coating before plating
- Use brush plating exclusively for maximum control
- Remove protective coating immediately after plating with acetone or gentle heating
- Consider professional service for valuable pieces
Creating Multi-Color or Two-Tone Effects
Brush plating enables creative multi-color designs impossible with tank methods:
- Design Planning: Sketch desired color placement
- First Color Application: Apply primary color using standard brush technique
- Masking: Cover areas to remain first color with liquid mask or tape
- Second Color Application: Apply second gold color to unmasked areas
- Mask Removal: Carefully remove masking materials
- Cleanup: Blend transition areas if desired
Replating Antique or Vintage Jewelry
Antique jewelry requires extra consideration to preserve value and historical integrity:
Before Replating Antiques:
- Research piece value—replating may decrease worth of certain collectibles
- Document original condition with detailed photographs
- Consider whether original patina adds character/value
- Consult antique jewelry experts when uncertain
- Never strip original mercury gilding (pre-1900s) or fire gilding
Maintenance and Long-Term Care of Replated Jewelry
Maximizing Plating Longevity
Even perfectly executed replating eventually wears. These practices extend plating life:
Daily Wear Protocols:
- Apply “last on, first off” rule—jewelry goes on after cosmetics, comes off before cleaning
- Remove before showering, swimming, exercising, sleeping
- Avoid contact with household chemicals, perfumes, lotions, hairspray
- Wipe with soft cloth after each wear to remove skin oils
Proper Storage:
- Store individually in anti-tarnish pouches or compartmentalized boxes
- Maintain consistent temperature and humidity (60-75°F, 40-60% humidity)
- Include anti-tarnish strips in storage containers
- Avoid bathroom storage—humidity fluctuations accelerate degradation
Regular Maintenance Schedule:
- Weekly (daily wear pieces): Gentle wipe with polishing cloth
- Monthly: Mild soap and water cleaning
- Quarterly: Protective sealant reapplication
- Annually: Professional inspection for wear patterns
- As Needed: Touch-up replating of high-wear areas
Cost Analysis: DIY Replating vs. Professional Services
Breaking Down the Economics
Professional Replating Costs:
- Small items (earrings, simple rings): $30-50
- Medium items (bracelets, pendants): $50-75
- Large items (necklaces, elaborate pieces): $75-150
- Rush service premium: +50-100%
- Additional services (polishing, stone setting): $15-50 each
Home Replating Kit Investment:
- Brush plating starter kit: $150-250
- Professional complete kit: $300-400
- Additional gold solution: $40-80 per ounce (plates 300+ sq inches)
- Supporting chemicals: $30-50
- Safety equipment: $20-40
Break-Even Analysis:
With professional replating averaging $60/piece and home kit investment around $250-300 total, break-even occurs at approximately 5-6 pieces. Collections of 10+ items or jewelry requiring frequent replating (every 1-2 years) recover investment quickly while gaining immediate on-demand service.
Safety Considerations and Best Practices
Chemical Safety Protocols
Gold plating involves potentially hazardous chemicals requiring respect and proper handling:
Mandatory Safety Measures:
- Ventilation: Always work in well-ventilated areas. Fumes from plating solutions and activators can irritate respiratory systems. Outdoor work ideal; indoor work requires exhaust fan or respirator.
- Protective Equipment: Wear nitrile gloves, safety glasses, and chemical-resistant apron without exception. Solutions can burn skin and permanently damage eyes.
- Storage: Store all chemicals in original containers with intact labels. Keep locked away from children and pets. Never store near food or food preparation areas.
- Disposal: Never pour plating solutions down drains. Contact local hazardous waste disposal facilities for proper disposal methods. Gold-containing solutions can be recycled.
- Spill Response: Keep neutralizing agents and absorbent materials readily accessible. Have documented spill response plan posted in workspace.
- First Aid: Keep eye wash station, emergency shower access, and first aid kit immediately available. Post emergency contact numbers prominently.
- Safety Data Sheets (SDS): Read and understand SDS for all chemicals before use. Keep copies accessible in workspace.
Electrical Safety
Electroplating combines electricity with conductive liquids—dangerous if improperly handled:
- Use only DC power supplies designed for electroplating (not AC adapters)
- Ensure all electrical connections are insulated and waterproof
- Never touch electrical connections with wet hands
- Install ground fault circuit interrupter (GFCI) outlets in workspace
- Keep power supplies away from plating solutions
- Disconnect power before adjusting connections or adding solutions
Frequently Asked Questions (Interactive)
How much does it cost to replate gold jewelry at home vs professionally?
Professional replating services typically cost $30-100 per piece, depending on size and plating thickness. Home replating kits range from $150-400 for complete setups but can replate dozens of pieces, bringing per-piece costs down to $5-15. A complete brush plating kit costs approximately $200 and can replate 50+ jewelry pieces, making it cost-effective for collections or frequent maintenance. Additional gold solution costs $40-80 per ounce, which plates approximately 300 square inches of surface area.
How long does home-replated jewelry last?
Home-replated jewelry durability depends on plating thickness and care practices. Flash plating (0.175 microns) lasts 3-6 months with daily wear, standard plating (0.5-1 micron) lasts 6-18 months, and heavy plating (2-3 microns) lasts 2-5 years. Professional-quality home kits can achieve 1-2 micron thickness comparable to commercial services when proper techniques are followed. Protective sealant application extends life by 2-3x. High-wear items like rings require thicker plating (2.5-4 microns) than low-wear pieces like earrings.
Can I replate jewelry with gemstones at home?
Yes, most gemstone jewelry can be safely replated at home using brush plating techniques. Hard gemstones (diamonds, sapphires, rubies) tolerate plating solutions and electrical current well. Soft or porous stones (pearls, opals, turquoise, emeralds) require careful masking with nail polish or microcrystalline wax before plating to prevent solution absorption and discoloration. The brush plating method allows precise application around settings without submerging entire pieces, making it safer for gemstone jewelry than tank plating. Always clean stones thoroughly after plating to remove solution residue from facets.
What metals can be replated with gold at home?
Most common jewelry metals accept gold plating: brass, copper, nickel silver, sterling silver, stainless steel (with special preparation), and previously gold-plated items. Chrome and aluminum require advanced preparation that most home kits cannot provide—these typically need professional service. Base metals often need a nickel or copper strike layer applied first for proper gold adhesion and corrosion protection. Previously plated jewelry should ideally be stripped completely before replating for best results, though cleaning and direct overplating can work for items in good condition. Ferrous metals (iron, steel) can be plated but corrode quickly beneath thin gold layers.
Do I need special safety equipment for home gold plating?
Yes, safety equipment is absolutely essential and non-negotiable. Required equipment includes: nitrile gloves (chemical resistant, not latex), safety glasses or goggles, well-ventilated workspace or respirator mask for fume protection, chemical-resistant apron or old clothing, and proper chemical storage containers. Gold plating solutions contain acids and metal salts requiring careful handling—they can burn skin and permanently damage eyes. Work in well-ventilated areas away from food preparation, ideally outdoors or near exhaust fans. Keep eye wash station, first aid supplies, and emergency contact numbers readily accessible. Always read and understand Safety Data Sheets (SDS) provided with plating kits before beginning work. Proper disposal of used chemicals through hazardous waste facilities is also required.
Conclusion: Mastering the Art of Home Gold Replating
Learning to replate gold jewelry at home represents both practical economy and creative empowerment. The initial investment in quality equipment—approximately $250-400 for professional-grade systems—provides years of service while transforming recurring $50-100 professional service fees into $5-15 material costs. More significantly, home replating grants immediate control over your jewelry collection’s maintenance, eliminating wait times and enabling perfect timing for special occasions.
Success in home replating requires three essential elements: quality equipment, proper technique, and patience through the learning curve. The Goldsmith Brush Plating Kit or similar professional systems provide the tools; this guide supplies the technique; your commitment to careful practice develops the skill.
Remember that professional jewelers spend years perfecting their craft. Your first few replating attempts may show imperfections—accept this as normal learning progression. Start with inexpensive practice pieces before tackling valuable jewelry. Each project teaches lessons about solution behavior, proper technique, and problem prevention. Within 5-10 pieces, most home platers achieve results indistinguishable from professional services.
The safety protocols detailed in this guide protect your health and prevent property damage—follow them without exception or shortcut. Proper ventilation, protective equipment, and chemical handling aren’t suggestions; they’re requirements for safe electroplating practice.
As your skills develop, home replating opens creative possibilities beyond simple restoration. Experiment with multiple gold colors for custom designs, apply heavy plating for maximum durability, or maintain your entire jewelry collection in pristine condition year-round. The knowledge and equipment investment serves you indefinitely, making every jewelry piece in your collection a candidate for refreshing restoration whenever desired.
Begin your replating journey today. Gather equipment, study techniques, practice diligently, and soon you’ll possess a valuable skill serving both practical needs and creative expression. Your jewelry collection will thank you with renewed beauty and extended life.
Last Updated: December 2024 | This article contains affiliate links. As an Amazon Associate, I earn from qualifying purchases at no additional cost to you. All product recommendations are based on professional jeweler techniques, electrochemistry principles, and verified effectiveness for home gold replating applications. Safety information provided for educational purposes—always follow manufacturer instructions and local regulations.

Hi, I’m Sara Hein, a passionate jewelry researcher and educator. I created Jewelry Carats to share well-researched insights on gemstones, precious metals, and jewelry care. My goal is making expert jewelry knowledge accessible to everyone.