DIY jewelry making has become a popular trend in recent years, allowing individuals to unleash their creativity and express their unique style. One form of DIY jewelry that has gained particular popularity is personalized alphabet jewelry.
These pieces not only add a personalized touch to any outfit but also serve as a means of self-expression. In this tutorial, we will guide you through the process of creating your own alphabet jewelry, allowing you to showcase your creativity and make a statement with every piece.
The appeal of personalized alphabet jewelry lies in its ability to reflect one’s individuality and story. Whether you choose to wear the initials of a loved one or embody your personality with meaningful words or phrases, each piece becomes a wearable representation of who you are. This makes DIY alphabet jewelry all the more appealing, as it allows you to customize every aspect of your creation.
To get started on your DIY alphabet jewelry journey, you will need specific materials and tools. The materials typically include alphabet beads, cords or chains, and various clasps and findings.
Don’t worry if you’re not sure where to find these supplies – we’ll provide you with information on where they can be purchased online or at local craft stores. Additionally, we encourage you to explore different variations such as necklaces, bracelets, or earrings for even more ways to showcase your personalized creations.
In the next section, we will walk you through the step-by-step instructions on how to make your very own alphabet jewelry. With clear visuals and detailed guidance, even those new to DIY projects can follow along easily. Get ready for an exciting journey into the world of jewelry making where creativity knows no bounds.
Materials and Tools Needed
To create your own personalized alphabet jewelry, you will need the following materials and tools:
Materials:
1. Alphabet beads: These beads are available in various colors, sizes, and fonts. They typically have a hole through the middle for stringing onto cords or chains. You can find alphabet beads at craft stores, online bead suppliers, or even in some children’s toy sections.
2. Cords or chains: Depending on your preference, you can use cords or chains to string the alphabet beads. Several options are available, such as leather cords, suede cords, nylon cords, or metal chains. Choose a cord or chain that complements the style you want to achieve.
3. Jewelry findings: These include essential components like clasps, jump rings, and crimp beads. Clasps are used to fasten the ends of the cord or chain together securely. Jump rings are small circular connectors that join different elements of your jewelry piece. Crimp beads help secure the ends of cords by creating a tight grip when flattened with pliers.
Tools:
1. Pliers: Round-nose pliers and flat-nose pliers are essential for jewelry making. Round-nose pliers have rounded tips suitable for creating loops and shaping wire while flat-nose pliers have flat jaws for gripping and bending wire or jump rings.
2. Wire cutters: Use these to cut cords to your desired lengths or trim excess wires from jump rings.
3. Beading mat or tray: This will help keep your workspace organized and prevent beads from rolling away.
4. Scissors: Necessary for cutting cords neatly and accurately.
Now that you know what materials and tools you’ll need to create DIY alphabet jewelry let’s move on to the step-by-step instructions on how to make them.
Step-by-Step Instructions
To create your own personalized alphabet jewelry, follow these step-by-step instructions. With clear visuals or images included, you’ll be able to easily follow along and create stunning necklaces, bracelets, or earrings.
Materials Needed
- Alphabet beads: Choose beads that feature each letter of the alphabet. These can be found at craft stores or online.
- Cords: Select cords in different colors and materials such as leather, suede, or nylon. The thickness of the cord will depend on your preference.
- Jewelry findings: Gather various findings like jump rings and clasps to secure your jewelry pieces.
- Scissors: You’ll need a pair of scissors to cut the cord to the desired length.
Step 1: Stringing the Beads
- Select a cord and cut it to your desired length for the type of jewelry you want to make (necklace, bracelet, or earrings).
- Begin stringing the alphabet beads onto the cord in any order you like. You can spell out names, initials, words, or phrases with the beads.
- If desired, incorporate other types of beads between the alphabet beads for added variety and personalization.
Step 2: Adding Clasps
- Once all the beads are strung onto the cord, it’s time to add a clasp so that your jewelry piece can be easily worn.
- If making a necklace or bracelet, attach a jump ring to one end of the cord using pliers.
- Screw an appropriate-sized clasp onto the jump ring to complete one end of your jewelry piece.
- Repeat this process on the other end by attaching another jump ring and clasp.
- For earrings, attach an earring hook to each end of the cord using jump rings.
Step 3: Creating Variations
- To create a necklace, choose a longer cord length, typically between 16 to 24 inches, depending on personal preference.
- For a bracelet, opt for a shorter cord length that wraps comfortably around your wrist.
- To make earrings, use a cord length of about 2 to 3 inches, allowing enough room for the beads to hang freely.
With these step-by-step instructions, you can easily create your own personalized alphabet jewelry. Whether it’s a necklace, bracelet, or earrings, have fun experimenting with different bead combinations and styles. Let your creativity shine as you design unique pieces that reflect your personality and style.
Personalization Ideas
When it comes to DIY alphabet jewelry, personalization is key. Adding unique touches to your creations not only showcases your individuality but also allows you to create meaningful pieces that hold sentimental value. Here are some creative ways to personalize your alphabet jewelry and make them truly one-of-a-kind:
- Birthstone Beads: Incorporating birthstone beads into your alphabet jewelry adds a touch of personalization and symbolism. Whether it’s your own birthstone or that of a loved one, these colorful gems can enhance the significance of your piece.
- Mixing Different Alphabets: Don’t be limited to using just one type of alphabet beads. Experiment with mixing different alphabets to create interesting patterns or messages in multiple languages. This allows you to express various facets of your identity and showcase your linguistic interests.
- Charms and Pendants: Adding charms or pendants alongside the alphabet beads can further personalize your jewelry. Choose symbols that hold special meaning to you, such as hearts, stars, or even small initials of loved ones. These additional elements create visual interest and make each piece more unique.
- Colorful Accents: Enhance the vibrancy of your alphabet jewelry by incorporating colorful accent beads into the design. From bright hues to pastel shades, these beads can represent different moods, seasons, or simply add a fun pop of color.
| Personalization Idea | Description |
|---|---|
| Birthstone Beads | Incorporate birthstones for personal significance. |
| Mixing Different Alphabets | Create unique patterns or messages in multiple languages. |
| Charms and Pendants | Add symbols or initials that hold sentimental value. |
| Colorful Accents | Incorporate beads of various colors for visual interest. |
Remember, these are just a few ideas to get you started. Feel free to experiment and let your imagination run wild. The beauty of DIY jewelry making lies in its limitless potential for personal expression. Whether you’re creating a piece for yourself or as a gift, embrace the opportunity to tell a unique story through your alphabet jewelry.
Tips and Tricks
Tips and Tricks: Offer useful tips and tricks to make the jewelry-making process more efficient and enjoyable.
Making personalized alphabet jewelry can be a fun and creative activity, but sometimes it can be challenging to keep the beads from slipping off or creating secure knots. Luckily, there are several tips and tricks that can help you overcome these challenges and make your jewelry-making process more efficient and enjoyable.
One helpful technique to prevent beads from slipping off is using a bead stopper. This small apparatus clamps onto the end of the cord, acting as a barrier that keeps the beads in place while you work. Another option is to use clear nail polish or glue on the tip of the cord. This creates a slight tackiness that helps hold the beads in position.
Creating secure knots is essential for any type of jewelry making, including alphabet jewelry. One effective method is using a surgeon’s knot. To tie this knot, start with a simple overhand knot, but pass the cord through twice instead of just once before tightening it. This adds an extra loop for more security. You can also apply clear nail polish or adhesive to knots after they’re tightened to ensure they don’t come undone.
Arranging beads in a specific pattern can add visual interest to your alphabet jewelry designs. Consider using different colors, sizes, or shapes of beads to create unique patterns or letter combinations. Experiment with alternating colors, adding spacer beads between letters, or incorporating themed charms for added personalization.
By utilizing these tips and tricks, you’ll be able to enhance your jewelry-making skills and create stunning personalized alphabet jewelry pieces that reflect your unique style and personality. Remember to have patience and enjoy the process as you explore different techniques and experiment with various designs. Happy crafting.
Maintenance and Care
Maintenance and Care: Advise readers on how to care for their DIY alphabet jewelry to ensure longevity and prevent damage. Include tips on cleaning, storage, and how to make repairs if necessary.
Once you’ve created your beautiful DIY alphabet jewelry, it’s important to take proper care of it to ensure its longevity and prevent any damage. Here are some essential tips on maintenance and care:
Cleaning: Regularly clean your alphabet jewelry to keep it looking its best. You can use a soft cloth or a gentle jewelry cleaner specifically designed for delicate pieces. Avoid using harsh chemicals or abrasive materials that can damage the beads or cords.
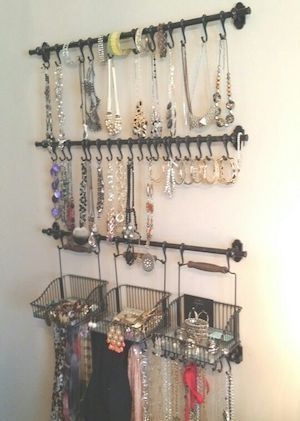
Storage: Proper storage is key in keeping your DIY alphabet jewelry safe from scratches and tangles. Ideally, store each piece separately in a soft pouch or jewelry box with compartments to avoid any friction between them. This will help maintain the shine and integrity of the beads.
Avoid Moisture: Keep your alphabet jewelry away from water, as exposure can cause damage to both the beads and the cords. Remove your jewelry before swimming, bathing, or engaging in any activities where it may come into contact with moisture.
Handling with Care: When handling your DIY alphabet jewelry, be mindful of being gentle with the beads and cords. Avoid pulling or stretching them excessively, as this can weaken the materials over time.
Repairs: If you notice any loose beads or fraying cords, it’s essential to address them promptly to prevent further damage. You can easily repair minor issues by restringing loose beads or replacing damaged cords. Additionally, if you’re unsure about making repairs yourself, consider taking your jewelry to a professional jeweler who specializes in beadwork.
By following these maintenance and care tips, you can enjoy your DIY alphabet jewelry for years to come while preserving its quality and appearance.
| Maintenance Tips | Care Tips |
|---|---|
| Regularly clean your alphabet jewelry | Avoid harsh chemicals or abrasive materials |
| Store each piece separately in a soft pouch or jewelry box with compartments | Avoid exposure to moisture |
| Handle the beads and cords gently, avoiding excessive pulling or stretching | Promptly address loose beads or fraying cords to prevent further damage |
Inspiration Showcase
Showcasing Unique Styles
One of the most exciting aspects of DIY alphabet jewelry is the endless opportunity for creativity and self-expression. With a wide range of styles, colors, and combinations available, this section aims to inspire readers with a showcase of various alphabet jewelry designs. Whether you prefer a minimalist look or want to make a bold statement, there’s a design to suit every individual taste.
For those who appreciate simplicity, a delicate necklace featuring a single initial bead can be an elegant choice. This minimalist style allows the letter to take center stage, creating a personalized piece that is perfect for everyday wear. Paired with a dainty chain in silver or gold, it adds a touch of sophistication to any outfit.
If you prefer something more eye-catching and playful, consider mixing different alphabets to spell out words or names. Experiment with different color combinations for each letter bead to create a unique visual effect. This style is perfect for expressing your personality or sending a special message through your jewelry.
Colorful Combinations and Birthstone Accents
Another way to personalize alphabet jewelry is by incorporating birthstone beads into the design. Select the birthstones corresponding to your loved ones’ birthdays and intersperse them between the letter beads. This not only adds vibrant pops of color but also creates a meaningful piece that symbolizes important relationships in your life.
For individuals who enjoy adding extra charms to their jewelry, consider attaching small symbolic charms that represent personal interests or passions. For example, an artist may choose tiny paintbrush or palette charms along with their initial bead, whereas an animal lover may opt for miniature animal-shaped charms. These additional elements can transform simple alphabet jewelry into unique conversation starters.
Mixing Materials and Creating Patterns
In addition to playing with colors and charms, experiment with different materials to add depth and texture to your creations. Combine alphabet beads made from various materials such as wood, glass, or acrylic to create striking contrasts. This allows for a personalized design that resonates with your preferred aesthetic.
If you want to take your DIY alphabet jewelry to the next level, consider creating patterns or motifs with the letter beads. For instance, arrange them in a checkerboard pattern or alternate between two contrasting colors to create an eye-catching design. This adds a fun and artistic element to your jewelry while showcasing your attention to detail.
By featuring these different alphabet jewelry designs, readers can gain inspiration and ideas for their own creations. The versatility of this DIY project allows for endless possibilities, ensuring that each piece is unique and tailored to the individual’s personal style and preferences. Get ready to unleash your creativity and make one-of-a-kind alphabet jewelry that speaks volumes about who you are.
Personal Testimonials
Emily’s Experience: A Personal Touch to Gift-Giving
Emily, a DIY enthusiast and avid jewelry maker, shares her experience of using the STMT Diy Alphabet Jewelry Tutorial to create personalized gifts for her friends and family. She reveals that what initially attracted her to this tutorial was the idea of adding a personal touch to gift-giving through customized alphabet jewelry. Emily explains how easy it was to follow the step-by-step instructions, even as a beginner in jewelry making.
One highlight of Emily’s experience was exploring different personalization ideas. She shares how she incorporated birthstone beads corresponding to each recipient’s birth month into their respective bracelets. Not only did this add a special touch, but it also made each piece unique and meaningful. Emily encourages others to experiment with various personalization ideas, such as mixing different alphabets or adding charms that hold sentimental value.
Furthermore, Emily mentions that she found the tips and tricks section extremely helpful during her crafting process. One particular tip she found valuable was securing beads with a small dab of clear nail polish to prevent them from slipping off over time. She also advises others to take their time when stringing the beads and double-checking the spelling before finalizing their design.
Amanda’s Success Story: Unleashing Creativity and Confidence
Amanda shares her success story of trying out the STMT Diy Alphabet Jewelry Tutorial and discovering not only a new hobby but also a boost in creativity and self-confidence. Initially drawn to this project as a way to express herself through fashion, Amanda soon realized that jewelry making allowed her to unleash her imagination and create unique pieces that reflected her personality.
Amanda highlights how the tutorial provided clear instructions on stringing alphabet beads onto cords, creating professional-looking clasps, and assembling different variations of jewelry like necklaces, bracelets, or earrings. This gave her the confidence to not only recreate designs from the tutorial but also experiment with her own innovative ideas.
In addition, Amanda found inspiration from the showcase section of the tutorial. Seeing the range of designs and combinations sparked her creativity and pushed her to create more adventurous pieces. She advises others to not be afraid to step outside their comfort zones and try different color schemes, bead arrangements, and mix-and-match techniques.
Overall, Amanda expresses gratitude for the STMT Diy Alphabet Jewelry Tutorial for introducing her to a new hobby that has become both fulfilling and empowering. She encourages others to embrace their creative side and let their jewelry creations serve as an extension of self-expression.
Tips from Seasoned Jewelry Makers: Expert Advice on Enhancing DIY Alphabet Jewelry
To complement the personal testimonials, seasoned jewelry makers offer additional tips and advice on how to enhance DIY alphabet jewelry beyond what is covered in the tutorial. These experts provide insights gained through years of experience in crafting exquisite pieces.
One common tip shared by these skilled artisans is to experiment with different materials alongside alphabet beads. For example, combining gemstones or pearls with alphabet beads can elevate the overall design and add an elegant touch. They also suggest incorporating unique elements like spacer beads or small pendants to increase visual interest.
When it comes to personalization ideas, these experts encourage readers to think outside the box by customizing each piece based on its intended recipient’s interests or hobbies. For instance, someone passionate about music might appreciate a necklace made with alphabet beads that spell out song lyrics or album titles.
Moreover, these experienced crafters emphasize the importance of investing in quality materials such as sturdy cords and durable clasps. By using high-quality components, the finished jewelry will have a longer lifespan and withstand regular wear without damage.
The wisdom shared by these seasoned jewelry makers serves as invaluable guidance for those looking to take their DIY alphabet jewelry projects to the next level. Their expertise encourages readers to explore new techniques, push their creative boundaries, and create unique jewelry pieces that truly reflect their personal style.
Conclusion
The beauty of DIY jewelry making lies in its ability to be customized according to personal preferences. This tutorial also emphasizes the importance of personalization ideas such as adding birthstone beads, mixing different alphabets, or incorporating charms. By infusing one’s personality or significant symbols into the designs, these pieces become truly meaningful and special.
As you embark on your journey of creating alphabet jewelry, remember to embrace your creativity and try out different techniques suggested in the tips and tricks section. Don’t be afraid to experiment with patterns or color combinations that speak to you personally. These unique creations can then be proudly shared with friends or showcased on social media platforms for others to admire.
In addition, maintaining and caring for your DIY alphabet jewelry is crucial for ensuring its longevity. Follow the maintenance tips provided in this tutorial regarding cleaning, storage, and occasional repairs if needed. By taking proper care of your handmade pieces, they will continue to bring joy and serve as cherished accessories for years to come.
For further inspiration, we have curated an inspiration showcase featuring a collection of different alphabet jewelry designs that highlight the versatility of this DIY project. Lastly, we encourage you to share your own creations with family and friends or even join online communities focused on jewelry making where you can connect with like-minded individuals and exchange ideas.
Remember, the sky’s the limit when it comes to creating personalized alphabet jewelry. So, unleash your creativity and enjoy the process of making beautiful, meaningful pieces that truly reflect your unique style and personality. Happy jewelry-making.
Resources and Further Reading
In this concluding section, we have explored the exciting world of DIY alphabet jewelry making. We discussed the rising trend and the appeal of personalized jewelry, emphasizing the importance of creativity and self-expression.
Throughout this tutorial, we provided step-by-step instructions on how to create your own alphabet jewelry, including stringing beads, adding clasps, and creating different variations like necklaces, bracelets, or earrings. We also shared various ideas for personalization to make each piece unique and encouraged readers to let their imagination run wild.
To make the jewelry-making process more efficient and enjoyable, we offered useful tips and tricks such as preventing beads from slipping off or making a secure knot. We also advised readers on how to care for their DIY alphabet jewelry to ensure its longevity.
For further inspiration, we showcased a curated collection of different alphabet jewelry designs in various styles and colors. These examples highlighted the versatility of this DIY project and encouraged readers to push their creative boundaries.
We are confident that with this tutorial and the resources provided throughout this article, readers can continue expanding their skills in jewelry making. Whether it’s exploring recommended books, websites, or YouTubers focused on DIY projects or sharing their creations on social media or with friends, there are countless opportunities for individuals to further explore this craft.
So go ahead – unleash your creativity and dive into the world of DIY alphabet jewelry.

Welcome to my jewelry blog! My name is Sarah and I am the owner of this blog.
I love making jewelry and sharing my creations with others.
So whether you’re someone who loves wearing jewelry yourself or simply enjoys learning about it, be sure to check out my blog for insightful posts on everything related to this exciting topic!


