Are you a jewelry maker looking to showcase your beautiful handmade pieces in the best possible light? Learning how to take pictures of handmade jewelry is an essential skill that can greatly enhance the appeal and sales of your products. High-quality photos not only capture the intricate details and unique characteristics of your jewelry but also serve as powerful marketing tools, attracting potential customers and setting your creations apart in a crowded market.
Capturing professional-looking photos of handmade jewelry requires more than just a good camera. It involves understanding the importance of lighting, composition, styling, and post-processing techniques.
In this article, we will delve into the essential tools and equipment needed for photographing handmade jewelry, as well as provide tips on setting up the perfect shooting environment, utilizing different lighting techniques, mastering composition and angles, styling and accessorizing the jewelry for photoshoots, and editing and retouching techniques to create polished final images.
By mastering the art of photography for your handmade jewelry, you can effectively convey the beauty and craftsmanship of your pieces to potential customers. Whether you’re using a DSLR camera or a smartphone, this guide will help you elevate your product photography skills and showcase your handmade jewelry in the best possible light.
Equipment Needed
Capturing high-quality images of handmade jewelry requires the right equipment to showcase the beauty and details of each piece. One of the essential tools needed is a good camera, preferably a DSLR or a mirrorless camera with a macro lens to capture intricate details and produce sharp images. Additionally, using a tripod can help stabilize the camera and reduce any blurriness, especially when shooting in low light conditions or using slower shutter speeds.
In addition to the camera, proper lighting is crucial for achieving professional-looking jewelry photos. Natural light is often preferred for its soft, diffused quality, so setting up near a large window or using an outdoor environment can be beneficial.
However, artificial lighting sources such as LED lights or ring lights can also be used to create consistent and controllable lighting setups. It’s important to consider the color temperature of the light source to ensure accurate color reproduction in the photos.
When it comes to the backdrop for your jewelry photos, choosing a clean and simple background that complements the jewelry without distracting from it is key. A plain white or black backdrop works well for most pieces, but experimenting with textured or colored backdrops can add visual interest and complement specific styles of jewelry. Props such as fabric swatches, decorative elements, or natural elements like flowers can also enhance the overall aesthetic of the photoshoot.
| Equipment | Description |
|---|---|
| Camera | DSLR or mirrorless camera with macro lens |
| Lighting | Natural light, LED lights, ring lights |
| Backdrop | Plain white or black backdrop; fabric swatches; decorative props |
Having all these equipment mentioned above plays an essential role in producing stunning pictures of handmade jewelry that will attract potential customers and highlight the craftsmanship behind each piece.
Setting Up the Perfect Shooting Environment
In addition to creating a DIY lightbox, arranging lighting is also essential for achieving professional-looking photos of handmade jewelry. Whether you’re using natural light or artificial light sources, proper lighting setup can make a significant impact on the overall outcome of your photographs. When arranging lighting, it’s important to consider factors such as intensity, direction, and color temperature to accurately capture the colors and details of the jewelry.
Furthermore, choosing the right backdrop is another crucial aspect of setting up a perfect shooting environment for photographing handmade jewelry. The backdrop serves as the canvas for your compositions, providing a clean and visually appealing background that allows the jewelry to stand out.
Whether you opt for solid colored backdrops, textured surfaces, or thematic backgrounds, selecting the appropriate backdrop can enhance the overall aesthetics of your photos and complement the style of your jewelry. By paying attention to these essential elements and implementing effective techniques in setting up your shooting environment, you can significantly improve the quality of your jewelry photographs.
Overall Tips:
Here are some additional tips: Set up near natural light sources if possible; experiment with different backdrops to find what works best for each piece; make sure to have all necessary props or accessories readily available while taking pictures; experiment with different angles and compositions to capture unique features; practice good photo composition by following principles like rule-of-thirds.
Lighting Techniques
When it comes to capturing stunning photos of handmade jewelry, lighting is a critical factor that can make a significant difference in the quality of the images. Properly illuminating the jewelry is essential for bringing out its intricate details, enhancing its colors, and creating eye-catching photographs that attract potential buyers. Here are some essential lighting techniques to consider when photographing handmade jewelry:
- Natural Light: Utilizing natural light can be incredibly effective for photographing jewelry as it helps to showcase the true colors and sparkle of the pieces. When using natural light, it’s best to position the jewelry near a window where diffused sunlight can gently illuminate the subject without causing harsh shadows.
- Artificial Light: In situations where natural light may not be sufficient or consistent, artificial light sources such as photography lamps or continuous lighting can provide a controlled and steady illumination for capturing detailed shots of the jewelry. It’s important to experiment with different angles and intensities of artificial light to achieve the desired look.
- Light Reflectors: Using light reflectors can help enhance the overall lighting setup by bouncing light onto specific areas of the jewelry, filling in shadows, and creating a more balanced and flattering illumination. Reflectors come in various shapes and sizes and are particularly useful for highlighting certain aspects of the jewelry.
Understanding how to harness these different lighting techniques effectively can greatly impact the visual appeal of handmade jewelry photos, making them more enticing to potential customers.
In addition to selecting the right lighting techniques, it’s crucial to pay attention to how shadows interact with your jewelry pieces when capturing images. Shadows can significantly impact the mood and atmosphere of your photographs and may add depth and dimension to your compositions when used intentionally.
Remember that experimentation is key when working with lighting techniques. Don’t be afraid to try different setups, angles, or combinations of natural and artificial light until you achieve an optimal result that beautifully showcases your handmade jewelry.
Ultimately, mastering various lighting techniques will allow you to consistently produce high-quality photos that authentically represent your unique handmade creations while attracting attention from potential customers browsing online marketplaces or social media platforms.
Composition and Angles
When it comes to showcasing handmade jewelry through photography, mastering composition and choosing the right angles are crucial for capturing the unique beauty and intricate details of each piece. Here are some tips and techniques for effectively highlighting the craftsmanship and design of handmade jewelry:
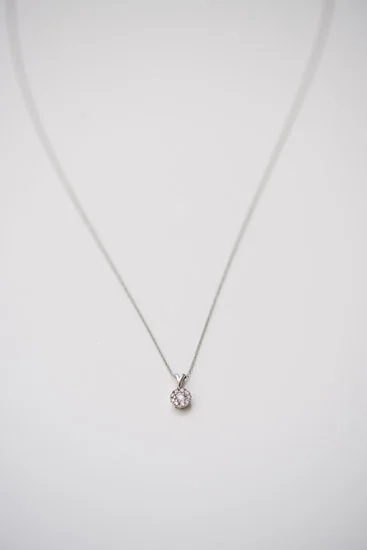
- Close-up Shots: Taking close-up shots is a great way to showcase the fine details and textures of handmade jewelry. Use a macro lens or utilize the macro mode on your camera to capture the intricate elements such as engravings, gemstones, and delicate metalwork.
- Flat Lays: Flat lay photography is a popular style for displaying jewelry, especially when featuring multiple pieces in one image. To create an appealing flat lay, arrange the jewelry on a clean, neutral background and experiment with different layouts to highlight each piece’s unique characteristics.
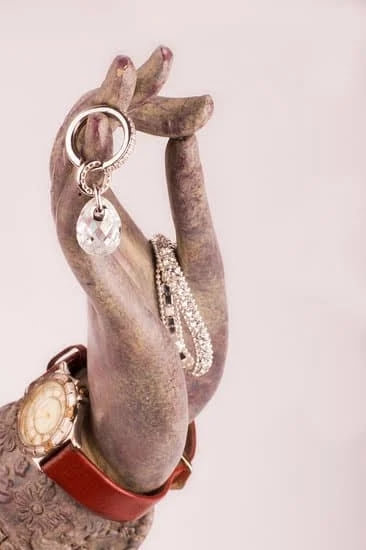
- Different Perspectives: Experimenting with various angles and perspectives can add visual interest to your jewelry photos. Try shooting from different heights, tilting the camera slightly, or incorporating unconventional angles to capture the jewelry from fresh and dynamic viewpoints.
In addition to these specific techniques, it’s important to consider proper framing in your compositions. Pay attention to how the jewelry fills the frame and ensure that each element is positioned thoughtfully within the image. By finding the right balance between showcasing the overall piece and highlighting its intricate details, you can create compelling compositions that effectively draw attention to the handmade jewelry.
Ultimately, honing your composition skills and exploring different angles will allow you to present handmade jewelry in an engaging and visually appealing manner. Whether you’re aiming for striking close-ups that emphasize detail or captivating flat lays that showcase an entire collection, thoughtful composition and creative use of angles can elevate your jewelry photography.
Photographing handmade jewelry presents its own set of challenges but with careful consideration of composition techniques and thoughtful approach towards angles selection would definitely payoff when capturing timeless pieces of art using any type of camera including smartphone photography without compromising quality results.
Styling and Props
One way to enhance the appeal of handmade jewelry in photoshoots is by styling and accessorizing the pieces effectively. By carefully considering props, backgrounds, and textures, you can create visually captivating images that showcase the unique qualities of the jewelry. This section will provide ideas and tips on how to style and accessorize jewelry for photoshoots to elevate the overall visual impact of your product photography.
Choosing Props
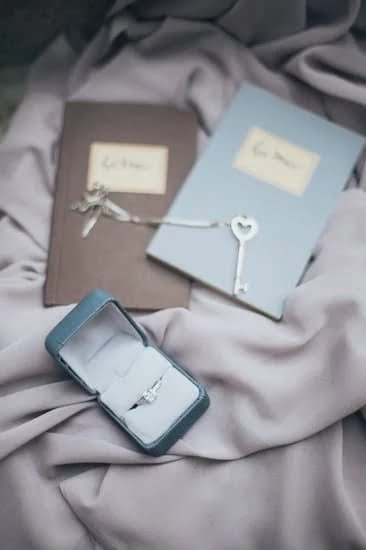
When selecting props for your jewelry photoshoot, it’s important to consider items that complement the style and aesthetic of the pieces. For example, if you’re photographing a bohemian-inspired necklace, incorporating natural elements like feathers or floral arrangements can enhance the overall theme. Additionally, using minimalist props such as delicate fabric or vintage books can add an elegant touch to the photos while keeping the focus on the jewelry.
Background Selection
The background plays a crucial role in highlighting the details of handmade jewelry. Opt for clean and uncluttered backgrounds that allow the jewelry to take center stage. Solid-colored backdrops in neutral tones like white, black, or pastel shades work well for showcasing intricate designs. Consider experimenting with textured backgrounds like marble, wood grain, or fabric to add visual interest and depth to your photos.
Incorporating Textures
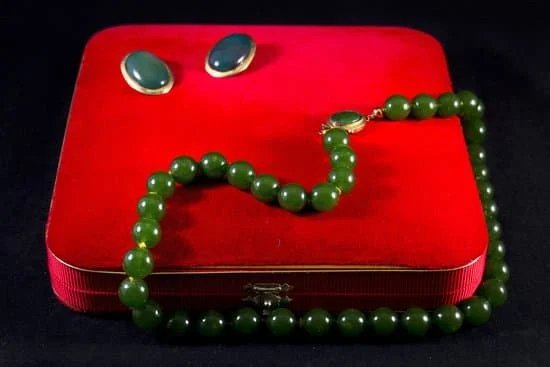
Incorporating different textures into your jewelry photoshoots can add dimension and visual appeal to the images. Consider including textured fabrics like lace or velvet as a backdrop or draping them strategically around the jewelry to create an artistic composition. Additionally, mixing in elements such as metallic accents, gemstones, or floral arrangements can add an extra layer of detail that elevates the overall look of the photographs.
By carefully selecting props, backgrounds, and textures while styling and accessorizing handmade jewelry for photoshoots, you can create visually compelling images that effectively showcase the beauty and craftsmanship of your pieces. Experimenting with different elements and paying attention to detail will help you capture stunning photographs that resonate with potential customers and enhance the overall presentation of your handmade jewelry products.
Editing and Retouching
When it comes to capturing stunning photos of handmade jewelry, editing and retouching play a crucial role in perfecting the final images. After all, even the most well-composed and perfectly lit photographs may benefit from a bit of post-processing to truly make them shine. In this section, we will delve into the essential guidance on post-processing techniques using editing software to enhance your jewelry photos, adjust colors, remove imperfections, and create a polished final image.
Enhancing Photos Through Editing
Editing software such as Adobe Photoshop or Lightroom offers a wide range of tools and features to enhance the overall look of your jewelry photos. From adjusting brightness and contrast to fine-tuning sharpness and clarity, these programs allow you to make precise edits that bring out the beauty and detail of your handmade pieces. Utilize these tools to ensure that your jewelry shines in every photo.
Color Correction and Adjustment
One of the key elements in jewelry photography is accurately representing the colors of the pieces. Editing software provides the ability to correct and adjust colors, ensuring that gemstones sparkle with their true hues and metals showcase their luster. Whether it’s correcting white balance or enhancing vibrancy, mastering color correction can significantly elevate the visual appeal of your jewelry photos.
Removing Imperfections and Final Touches
Even with careful staging and shooting, imperfections such as dust particles or minor scratches may still appear in your images. With editing software, you can easily remove these imperfections while also refining small details to achieve a flawless final image. Additionally, adding final touches such as sharpening specific areas or adding subtle vignettes can further enhance the overall aesthetic appeal of your handmade jewelry photos.
Mastering these post-processing techniques is essential for creating professional-quality images that truly showcase the beauty of your handmade jewelry. By utilizing editing software effectively, you can ensure that your jewelry photos have a polished look that captivates potential customers and showcases your creations in the best possible light.
Tips for Smartphone Photography
In today’s digital age, the demand for high-quality product photography has become essential, especially for small businesses and artisans selling handmade jewelry. Capturing stunning images of your jewelry not only showcases the intricate details and unique craftsmanship but also plays a crucial role in attracting potential customers and driving sales. Whether you’re using a professional camera or a smartphone, mastering the art of jewelry photography is within reach with the right equipment, techniques, and creativity.
When it comes to taking pictures of handmade jewelry using a smartphone, there are several tips and tricks that can help you achieve professional-looking results without investing in expensive photography gear. One of the key aspects is utilizing the phone’s features effectively, such as adjusting focus and exposure, utilizing built-in grids for composition, and experimenting with different settings to optimize image quality.
Additionally, there are numerous photo editing apps available that can enhance your jewelry photos by adjusting exposure, color balance, sharpness, and adding filters for a polished look.
Maximizing the built-in camera capabilities of your smartphone is crucial in capturing clear and detailed images of your handmade jewelry. While professional photographers may rely on advanced equipment like DSLR cameras and studio lighting setups, smartphones have evolved to offer impressive features such as macro mode for close-up shots, portrait mode for creating depth of field effects, and even manual control over settings like ISO and white balance.
By familiarizing yourself with these features and making the most out of them during your photoshoots, you can elevate the visual appeal of your jewelry pieces through captivating photographs that stand out to potential customers.
In conclusion, mastering the art of photographing handmade jewelry is an investment worth making for artisans looking to showcase their work effectively in today’s competitive market. Whether you opt for traditional photography equipment or harness the capabilities of your smartphone camera, understanding how to take pictures of handmade jewelry can be a game-changer in presenting your products in their best light.
With the right tools, setup techniques, creative styling ideas, post-processing skills, and a dash of innovation, you can create compelling imagery that highlights the beauty and craftsmanship of your unique creations.
Frequently Asked Questions
How Do You Take Good Pictures of Handmade Jewelry?
Taking good pictures of handmade jewelry requires attention to detail and lighting. Using a plain, neutral background with good natural or artificial light can help showcase the jewelry’s craftsmanship. Experimenting with different angles and close-up shots can also capture the unique elements of the jewelry.
How Can I Take Pictures of Jewelry at Home?
You can take pictures of jewelry at home by creating a small photography setup. Find a well-lit area near a window or use artificial lights to illuminate the jewelry. Use a clean, neutral backdrop and a tripod to stabilize your camera or phone for clear, focused shots. Experiment with different angles and compositions to showcase the jewelry’s details.
How Do I Take Good Pictures of Jewelry With My Iphone?
To take good pictures of jewelry with your iPhone, utilize natural light or invest in a small box light for consistent illumination. Clean the jewelry and use the iPhone’s built-in grid feature to frame your shots accurately. Experiment with different angles, perspectives, and editing tools to enhance the images before sharing them online.

Welcome to my jewelry blog! My name is Sarah and I am the owner of this blog.
I love making jewelry and sharing my creations with others.
So whether you’re someone who loves wearing jewelry yourself or simply enjoys learning about it, be sure to check out my blog for insightful posts on everything related to this exciting topic!

