Are you wondering how to make melted bead jewelry? Melted bead jewelry involves using heat to create unique and beautiful pieces made from a variety of different types of beads. This exciting craft allows for endless creativity and customization, making it a popular choice for jewelry makers of all skill levels. In this article, we will explore the different techniques and methods used to create stunning melted bead jewelry, from melting the beads to designing and assembling the finished pieces.
Melted bead jewelry can be made using a wide range of materials, including plastic, glass, and acrylic beads. Each type of bead requires a different melting technique, such as oven melting, torch melting, or using a heat gun. By learning and mastering these techniques, you can create one-of-a-kind jewelry pieces that are sure to impress.
Safety is an important consideration when working with melted beads. Proper preparation of your work area, ventilation, and protective equipment are essential to ensure a safe crafting experience. Additionally, understanding how to cure and cool your melted bead jewelry is crucial in ensuring that it sets and hardens correctly. Join us as we delve into the world of melted bead jewelry and discover how you can unleash your creativity to design unique and stunning pieces.
Materials Needed
Melted bead jewelry is an incredibly versatile and creative craft that allows you to make beautiful pieces of jewelry using a variety of materials. To get started with making melted bead jewelry, you will need a range of materials and supplies to ensure that your creations turn out just the way you want them. Here is a detailed list of all the materials and tools you will need to begin creating your own unique melted bead jewelry:
1. Beads: You will need a variety of beads in different shapes, sizes, and colors. These can include plastic pony beads, acrylic beads, glass beads, or any other type that catches your eye.
2. String or Wire: Depending on the specific design of your jewelry, you will need string or wire to thread your beads onto. Beading wire comes in different thicknesses and strengths and can be used for more complex designs, while elastic cord or fishing line may be suitable for simpler projects.
3. Pliers: To help manipulate the wire and open/close jump rings when assembling your jewelry.
4. Bead Mat: A soft surface where beads won’t roll away is essential when designing your pieces.
5. Baking Pan: For melting plastic beads in the oven.
These are the basic items needed for creating melted bead jewelry; however, depending on the complexity of your designs, you may require additional tools such as needle-nose pliers, wire cutters, clasps for closures, and hooks for earrings.
Whether it’s delicate floral patterns or bold geometric designs that catch your fancy-having these essential materials at hand makes every handmade bead project possible. Now let’s dive into how to make melted bead jewelry using these items.
Another great thing about making melted bead jewelry is that most basic supplies are easily available from craft stores or online-just order what tickles your fancy. Below is a list covering various essential items required:
| Item | Description |
|---|---|
| Beads | A variety in shapes (round/oval) hues (opaque/tranlucent) material (plastic/glass) |
| String/Wire | Elastic cord/wire based on design complexity |
| Pliers | Needle-nose ones for bending/looping/hooking metal wire |
Preparation and Safety
When working with melted beads, it is important to take the proper precautions to ensure safety and protect yourself from potential hazards. Here are some tips on how to properly prepare the work area and ensure safety when working with melted beads.
First and foremost, it is essential to work in a well-ventilated area. Fumes from melting plastic or acrylic beads can be harmful if inhaled, so be sure to open windows or use a fan to circulate air. Additionally, wearing a protective mask can provide an extra layer of defense against any potentially harmful fumes.
Another important aspect of preparation is organizing your workspace. Be sure to have all necessary tools and materials within easy reach, including pliers, string or wire, beads, and any other supplies needed for the project. This will help you avoid the need to move around too much while working with hot materials.
In terms of personal safety, wearing heat-resistant gloves when handling melted beads directly can prevent burns and other injuries. It’s also important to have a fire extinguisher nearby in case of any accidents involving the heated materials. Taking these precautions will help ensure that your experience making melted bead jewelry is both enjoyable and safe.
| Preparation Tips | Safety Measures |
|---|---|
| Work in a well-ventilated area | Wear protective mask during melting |
| Organize workspace for easy access | Use heat-resistant gloves when handling hot materials |
| Avoid unnecessary movement while working with hot materials | Have a fire extinguisher nearby as precaution |
Taking these steps demonstrates how proper preparation and safety measures are crucial when creating beautiful melted bead jewelry while ensuring that both you and your finished pieces stay protected.
Bead Melting Techniques
When it comes to making melted bead jewelry, one of the most crucial steps is melting the beads themselves. This process allows for creativity and personalization, as different types of beads and melting methods can result in unique and stunning jewelry pieces.
In this section, we will delve into the step-by-step instructions on how to melt different types of beads, including plastic, glass, and acrylic, using methods such as oven melting, torch melting, and melting with a heat gun.
For plastic beads, the most common method of melting is using an oven. To do this, preheat your oven to a temperature between 400-450 degrees Fahrenheit. Place your plastic beads on a lined baking sheet in a single layer. Be sure to keep an eye on them as they melt quickly – around 10-15 minutes. Once melted to your desired shape or design, remove them from the oven using protective gloves and let them cool before handling.
Glass beads can be melted using a torch or heat gun. When using a torch, hold the bead with pliers and heat it evenly until it begins to soften and melt according to your desired shape. If using a heat gun instead, point the nozzle at the bead until it starts to soften and take on the desired form.
Acrylic beads can also be melted using either an oven or heat gun. Follow similar steps as you would for plastic or glass beads when using these methods.
By understanding these various bead melting techniques, jewelry makers can experiment with different materials and methods to create truly unique pieces that reflect their personal style and creativity.
Overall, learning how to make melted bead jewelry involves understanding the intricacies of different materials and techniques for achieving beautiful results that are both personalized and long-lasting. Whether you choose plastic, glass, or acrylic beads for your designs – mastering the art of bead melting is sure to result in stunning wearable art pieces that are bound to turn heads wherever you go.
Designing Your Jewelry
When it comes to designing melted bead jewelry, the possibilities are truly endless. Whether you are a beginner or an experienced crafter, there are countless creative ideas and inspiration to help you craft unique and stunning pieces. Here are some creative ideas to get you started on making your own personalized melted bead jewelry:
- Create colorful and unique patterns by arranging different colored beads in a specific order before melting them. This can result in beautiful swirls, stripes, or geometric designs.
- Experiment with different shapes and sizes of beads to create one-of-a-kind pendants for necklaces or statement earrings.
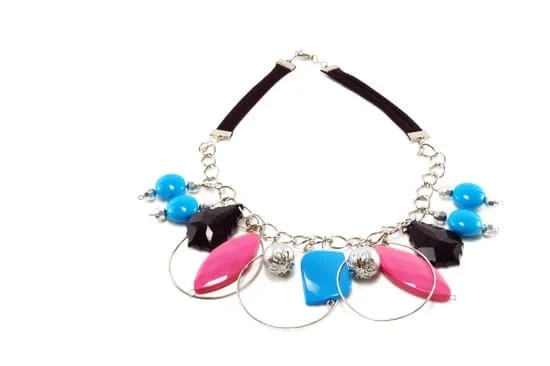
- Combine melted beads with other materials such as metal charms, crystals, or gemstone beads to add extra flair and texture to your jewelry pieces.
No matter what technique or design you choose for your melted bead jewelry, the key is to let your creativity flow and have fun with the process. There is no right or wrong way to design melted bead jewelry – it’s all about expressing your own personal style and creating pieces that are truly unique.
Once you have your creative ideas in mind, gather all the necessary materials such as colorful beads, string or wire, pliers, and any additional embellishments you want to incorporate into your designs. With these simple steps and creative inspiration in mind, you’ll be well on your way to crafting beautiful melted bead jewelry that showcases your creativity and individuality.
Start experimenting with different techniques and styles now. Try different colors and bead arrangements when melting them together. Don’t be afraid of being adventurous – experiment until you find what works best for the statement piece of jewelry that matches what you’re trying to achieve.
Don’t hesitate-get started today. Experiment with colors; mix clear acrylics with opaque whites for depth in a colorful manner yet cost-effective methodology. When collaborating this way-allow one color section within the pendant’s perimeter overlap another section – producing a diffused two-tone effect that’s breathtaking.
With these inspirational ideas at hand-it’s easy kneeling; willing yourself down new avenues toward inspiring innovative artistic exquisiteness in beading. So why not jump into this crafting world headfirst-and learn engrossingly-now-how-to make melted bead jewelry?
Assembling and Finishing
When it comes to assembling your melted bead jewelry, there are a few important steps to keep in mind. First, make sure that your beads have cooled and hardened properly before attempting to handle or assemble them. This will help prevent any damage or distortion to the beads as you work with them. Once your beads are ready, you can start assembling your pieces using either string, wire, or other suitable materials for jewelry making.
One of the key components of assembling melted bead jewelry is attaching clasps and findings. This is what will allow you to wear and enjoy your beautiful creations. When choosing clasps and findings for your jewelry, consider the type of design and functionality you want for your piece. Whether it’s a lobster clasp for a necklace or fish hook earrings for dangling earrings, there are plenty of options to choose from.
To add an extra touch of creativity and flair to your melted bead jewelry, consider incorporating embellishments into your designs. This could include adding small charms, metal spacers, or even additional beads in complementary colors or shapes. Just be mindful not to overwhelm the design; sometimes less is more when it comes to embellishing melted bead jewelry.
Finally, it’s essential to ensure that your assembled melted bead jewelry is durable enough to withstand everyday wear. This means securing all beads and findings tightly and checking for any weak points in the design. If you’re working with wire or string, make sure that all connections are secure by using appropriate techniques such as crimping or knotting.
By following these tips on assembling and finishing melted bead jewelry, you can create stunning pieces that not only look great but also hold up well over time.
Curing and Cooling
Proper Curing Process
After you have finished assembling your melted bead jewelry, it is important to properly cure and cool it to ensure that the beads set and harden correctly. The curing process will depend on the type of beads you have used, as different materials may require different temperatures and durations for curing. It is essential to carefully follow the manufacturer’s instructions for curing beads, whether they are plastic, glass, or acrylic.
Cooling Techniques
Once the curing process is complete, it is crucial to allow your melted bead jewelry to cool down properly. Rapid changes in temperature can cause the beads to crack or warp, so it is best to let them cool gradually at room temperature. Avoid placing your newly cured jewelry in a cold or breezy area, as this can also affect the cooling process. Additionally, be mindful of any specific cooling instructions provided for the type of beads you have used.
Checking for Proper Hardening
Before handling or wearing your melted bead jewelry, be sure to check for proper hardening. Gently tap on a bead with your fingernail – if it sounds solid and does not flex under pressure, then your jewelry has likely hardened correctly. However, if you notice any soft spots or flexibility in the beads, they may need additional curing time. It is important not to rush this step in order to avoid potential breakage or damage to your beautiful creations.
Properly curing and cooling your melted bead jewelry is essential for ensuring its longevity and structural integrity. By following these tips and paying attention to any specific instructions for the type of beads you are using, you can create stunning pieces that will stand the test of time.
Care and Maintenance
In conclusion, learning how to make melted bead jewelry can be a fun and rewarding creative outlet. By exploring the various techniques and materials involved, you can create unique and beautiful pieces that reflect your personal style. It’s important to remember the necessary safety precautions when working with melted beads, as well as taking care to properly cure and cool your jewelry for optimal results.
Once you have created your melted bead jewelry, it is essential to know how to care for and maintain it properly. Regular maintenance can help keep your pieces looking beautiful and ensure their longevity. This may include gently cleaning them with a soft cloth or mild soap, storing them in a safe place to prevent damage, and avoiding exposure to extreme temperatures or harsh chemicals.
Overall, making melted bead jewelry allows for endless possibilities in design and creativity. Whether you choose to make necklaces, bracelets, earrings, or other accessories, the process of creating these unique pieces can be both enjoyable and fulfilling. With the appropriate care and maintenance, your melted bead jewelry can continue to bring joy for years to come.
Frequently Asked Questions
How Do You Make Melted Beads?
To make melted beads, you will need to preheat your oven to 400 degrees Fahrenheit and line a baking sheet with parchment paper. Then, arrange the beads in a single layer on the baking sheet, making sure there are no gaps between them.
Place the sheet in the oven and monitor it closely as the beads start to melt and fuse together. Once they have melted to your desired level, remove the sheet from the oven and let it cool before carefully removing the melted bead creation.
What Kind of Beads Can You Melt?
You can melt various types of beads including plastic pony beads, perler beads, or melty beads. These types of beads are specifically designed to be melted and fused together when exposed to high heat. It’s important to use beads that are labeled as suitable for melting in order to achieve the desired results.
How Do You Melt Beads to Make Suncatchers?
Melted bead suncatchers can be made by arranging colorful plastic pony or perler beads in a single layer on a metal cookie cutter placed on parchment paper on a baking sheet. Once melted and cooled, carefully remove the cooled suncatcher from the cookie cutter, punch a hole at the top, and attach a string for hanging it in a sunny window.
The natural sunlight will beautifully illuminate the vibrant colors of your creation.

Welcome to my jewelry blog! My name is Sarah and I am the owner of this blog.
I love making jewelry and sharing my creations with others.
So whether you’re someone who loves wearing jewelry yourself or simply enjoys learning about it, be sure to check out my blog for insightful posts on everything related to this exciting topic!


