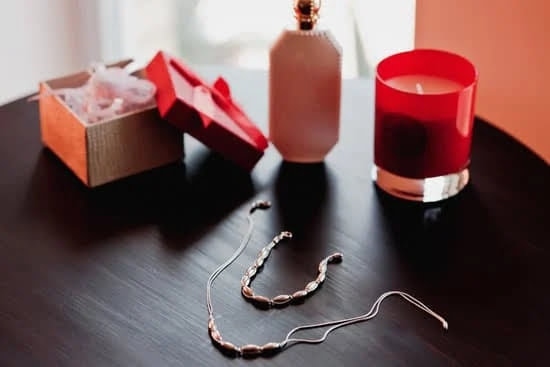
Introduction to Cellulose Acetate Jewelry
Cellulose acetate is a popular, versatile material that is used to create beautiful jewelry pieces. It is a bioplastic derived from sources like cotton and wood pulp, and can be shaped and molded into a variety of forms. This makes it an especially popular material for jewelry making — it’s lightweight, durable, and best of all doesn’t cost too much.
Cellulose acetate is often used to make pendants, earrings, bracelets, necklaces and even intricate body chains. This is because it has the versatility to be carved into different shapes and sizes while still maintaining its malleability; this allows for unique designs without compromising the structural integrity of the piece.
Because cellulose acetate is so easy and affordable to work with, it has become increasingly popular as an accessible medium for beginner or hobbyist jewelers as well as professional jewelers. Professional jewelers may opt for finer materials like precious metals or gemstones but still find great use for cellulose acetate in their designs – with its malleability being a great resource when creating prototypes before investing in more expensive versions or components.
For those looking to work with cellulose acetate for jewelry production there are various online stores available where sheets can be purchased in various thicknesses. Many YouTube tutorials provide step-by-step guidance through the entire crafting process – from sketching out your design on paper to using basic tools such as scissors, a soldering gun or hand saws – focusing on techniques like welding and embossing cellulose acetate pieces together.
Gather Materials
In order to make cellulose acetate jewelry, you’ll need to gather some supplies. Aside from common tools found in most homes, such as scissors and sandpaper, here’s a list of tools and materials that are recommended for this project:
1. Cellulose acetate sheets: This is the material used to produce cellulose acetate jewelry. It comes in many different colors and thicknesses. You can get these sheets at most craft stores or online.
2. Jewelry saw frame with jewelry saw blades: This specialized tool is essential for cutting into specific shapes for the jewelry pieces. The frame is adjustable and comes with several sharp blades of different sizes.
3. Sandpaper/Polishing cloths: Use fine-grade sandpaper to smooth out rough fibers along the edges of your finished jewelry pieces; polishing cloths will give them a shine when finished.
4. Crafting glue: This type of adhesive works best to attach finding like jump rings, earrings posts, etc., onto the jewelry pieces created with cellulose acetate.
Safety Tips: Before working with wooden tools and supplies such as those listed above, always wear safety goggles and protective gloves to protect your eyes and skin from particles that may become airborne while cutting or sanding. While working with any adhesives, also be sure to work in an area that is well-ventilated as fumes may be harmful if breathed in over time.
Start with a Blank Piece
1. Obtain a blank piece of raw cellulose acetate to use as your base. You can find these online or at craft stores and other local retailers. Be sure to check for quality material before purchasing – examine the texture, weight and clarity of the material.
2. Cut out the desired shape from your blank piece – use a specialized blade designed for cutting through cellulose acetate in order to ensure clean, precise cuts.
3. Sand down any rough edges with fine-grit sandpaper to improve its smoothness and appearance. If you would like more intricate details in your jewelry such as a pattern or design, consider etching it into the piece using a rotary tool with a pointed attachment.
4. Polish the jewelry to bring out its luster and brightness – use a polishing cloth or soft brush combined with some specialized polishing compound made specifically for cellulose acetate materials.
5. Attach any necessary clasps, beads, charms or other findings onto your jewelry piece using strong adhesive glue suitable for plastics such as E6000 glue or similar products designed for crafting purposes.
6. Finally, seal your newly created jewelry by coating it with clear acrylic varnish to help protect it from dirt, dust and damage caused by everyday wear and tear.
Create a Beaded Piece
To create a beaded necklace or earrings using cellulose acetate, begin by gathering the tools and materials necessary for the job. You will need beads made of cellulose acetate, wire cutters, round-nose pliers and an eye pin. Start by taking the eye pin and use the round-nose pliers to carefully form a loop at one end of the pin. Next, take your bead and slide it onto the pin, through the loop created at one end. Then repeat this process with each bead you wish to add to your jewelry piece. Measure out how long you would like your necklace or earrings to be by laying out all of your beads in a single line or circle on your work surface. When satisfied with the length of your jewelry piece, take two additional eye pins maintaining that same distance between them as all of your other beads from earlier. Carefully form another loop in each pin as you did before and then attach one end of both pins to each other making sure it is secure by using the pliers once more. Finally attach a jump ring or clasp for easy closure when wearing and enjoy your handmade cellulose acetate jewelry!
Make a Focal Piece
1. Begin by purchasing cellulose acetate sheets. There are many colors and textures available, so choose the one that best suits your design.
2. Decide on a focal point for the jewelry piece and sketch out its shape on a piece of paper. This will make it easier to cut out the shape accurately using a knife or scissors.
3. Place the cellulose acetate sheet on a cutting surface, tape down the template, and gently trace around it with a sharp blade or pair of scissors to create the focal point shape.
4. Smooth out any rough edges of the focal point with fine sandpaper if necessary.
5. Drill small holes in strategic points along one side of the cut-out shape for connecting jump rings or other components to create your design for attaching beads, charms, and other pieces later on.
6. Choose an interesting texture to add dimension to the focal point by lightly pressing various textured stamps (woodburning tools, rubber stamps, etc.) over certain areas of it or use a soldering iron with various patterns (starbursts, squiggles) for intricate designs on unique pieces or with finer shapes as seen popularly with welding industry supplies/tools like stencils wrapped around round objects snugly but not tightly to make a nice imprint onto metal without damaging it; you can also try stamping images from magazines onto fabric that’s been backed onto cardstock by tracing over each line slowly & carefully without pressing too hard so you don’t shred any fibers while transferring those images almost exactly!
7. Cut additional pieces in different sizes and colors to begin constructing the rest of your design and connect them using jump rings or other methods of attachment — such as stringing them through wire loops attached to a chain base; glue gun adhesives also work well when creating at home jewelry projects!
8. Finally add beads as desired, attach clasps at either end for closure purposes depending upon what type of jewelry item is being created (bracelet/necklace/etc), then allow plenty time before attempting wear — preferably overnight –in order both cement adhering materials securely & assure all connected parts are as durable possible so they’ll last longer without hazards!
Finishing Touches
To achieve the most professional look, give your cellulose acetate jewelry a coat of craft varnish. This will help protect the surface from moisture and wear. To apply, use a brush or roller to paint on an even layer of craft varnish, allowing time to dry between coats. Afterwards, buff with a soft cloth to give your jewelry pieces a glossy sheen.
You may also want to consider sealing your work in a resin compound to protect it more thoroughly. Castin’ Craft Resin is one type of product that can be used for this purpose. Follow the instructions carefully and use gloves when working with any resins. The finished look should be glossy and let you appreciate how lovely each piece of cellulose acetate jewelry is!
Tips and Tricks
Design Ideas:
– Combine colors of Cellulose Acetate to create contrasting earrings, pendants, and bracelets.
– Experiment with different shapes such as hexagons, flowers, stars, and spirals.
– Incorporate printed images on the Cellulose Acetate to add texture and depth to your jewelry design.
– Use gold or silver beads for an elegant finish.
Care Instructions:
– To keep your jewelry looking like new, avoid getting it wet or exposing it too harsh chemicals.
– Use a soft cloth and mild soap solution to gently clean any dirt residue off the cellulose acetate when needed.
Storage Advice:
– Store Cellulose Acetate jewelry individually in protective bags or boxes away from other pieces as the delicate material is prone to scratching. Wrap each piece in bubble wrap for added protection during travel or storage.
Additional Best Practices:
– When working with Cellulose Acetate, use appropriate cutting tools designed for plastics so as not to damage the material. – Take care when sanding raw edges after cutting so that the edges remain smooth and even throughout.
Conclusion
Working with cellulose acetate is a great way to add new, vibrant colors and shapes to your jewelry design. With the right tools and techniques, you can create beautiful pieces that will stand out in any collection. To get started, make sure you have the proper supplies such as heat source, protective eye wear and ventilation. After preparing your work area, select the appropriate dyes and shape the plastic into ornaments before setting it with an acetone vapor bath or flame treatment. After finishing touches such as polishing are completed, you’ll have a one-of-a-kind piece of jewelry that may be even more valuable than store-bought designs! To further enhance your learning experience, there are many resources available online that provide tutorials and guidance specific to working with cellulose acetate jewelry. With practice and patience, this creative hobby can provide endless hours of enjoyment!

Welcome to my jewelry blog! My name is Sarah and I am the owner of this blog.
I love making jewelry and sharing my creations with others.
So whether you’re someone who loves wearing jewelry yourself or simply enjoys learning about it, be sure to check out my blog for insightful posts on everything related to this exciting topic!


