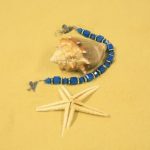
E6000 Jewelry and Bead adhesive is a versatile and reliable glue that is essential for any jewelry-making or bead project. In this article, we will delve into the various aspects of using E6000 adhesive, from understanding its properties to providing tips for effective application. If you’re wondering how to use E6000 jewelry and bead in your creations, you’ve come to the right place.
E6000 adhesive is known for its strong bond, flexibility, and ability to work on a variety of materials commonly used in jewelry making such as metal, glass, plastic, and more. Before diving into your project, it’s crucial to grasp the unique properties of E6000 to ensure successful results. This adhesive is perfect for securely attaching beads, charms, or other embellishments to your jewelry pieces.
To start using E6000 effectively, it’s important to prepare your work area accordingly. Keeping a clean and well-ventilated workspace will facilitate a smooth application process. With our step-by-step guide on applying E6000 to jewelry and bead projects, you’ll be able to create stunning pieces with ease. Stay tuned for valuable tips and tricks that will enhance your experience with this versatile adhesive.
Understanding the Properties of E6000 Adhesive
E6000 adhesive is a popular choice for jewelry and bead projects due to its strong bonding properties and versatility. Understanding the key properties of E6000 adhesive is essential for ensuring successful outcomes in your crafting endeavors. One of the standout features of E6000 is its flexibility once cured, making it ideal for jewelry pieces that may experience some movement or bending without losing adhesion. This flexibility sets E6000 apart from many other types of adhesives on the market.
Another important property of E6000 adhesive is its waterproof nature, making it suitable for jewelry pieces that may be exposed to moisture or worn in different weather conditions. This feature ensures that your creations will remain intact and beautiful over time, without the risk of the adhesive breaking down or deteriorating due to water exposure.
Additionally, E6000 provides a strong bond not only to metal but also to various materials like glass, ceramics, and plastic, allowing you to get creative with your designs.
When using E6000 for jewelry and bead projects, it is crucial to follow the manufacturer’s instructions carefully. The adhesive requires proper ventilation during use and sufficient curing time for optimal bonding strength. It is recommended to apply E6000 in a well-ventilated area and allow your project to cure for at least 24 hours before wearing or handling it extensively. By understanding these key properties of E6000 adhesive, you can create stunning and long-lasting jewelry pieces with confidence.
| Properties of E6000 Adhesive | Benefits |
|---|---|
| Flexibility | Ideal for jewelry pieces with movement |
| Waterproof | Suitable for pieces exposed to moisture |
| Strong Bond | Bonds well to metal, glass, ceramics, and plastic |
Preparing Your Work Area for Using E6000
Gather Your Supplies
Before starting any jewelry or bead project using E6000 adhesive, it is essential to gather all the necessary supplies. Make sure you have your E6000 adhesive tube, your jewelry or beads that you will be working on, disposable gloves to protect your hands, a well-ventilated work area, and some paper towels for clean-up. Having everything ready before you start will help streamline the process and ensure a successful outcome.
Protect Your Work Surface
E6000 adhesive is known for its strength and durability, but it can also be messy if not used with caution. To prevent any spills or accidents, it is important to protect your work surface before applying the adhesive. You can use a disposable tablecloth, wax paper, or even an old newspaper to cover your workspace. This will not only make clean-up easier but also protect your furniture from any accidental spills or drips during the project.
Ensure Proper Ventilation
One of the key safety precautions when using E6000 adhesive is to ensure proper ventilation in your work area. The fumes from the adhesive can be strong and may cause irritation if inhaled for an extended period of time. Work in a well-ventilated room with open windows or use a fan to improve air circulation. Additionally, wearing a mask can also help reduce exposure to the fumes while working on your jewelry or bead projects using E6000 adhesive.
Step-by-Step Guide to Applying E6000 to Jewelry and Bead Projects
E6000 Jewelry and Bead adhesive is a versatile and strong glue that is perfect for creating beautiful jewelry pieces. To use E6000 effectively on your jewelry and bead projects, follow these simple steps:
1. Prepare your work area: Before starting your project, make sure to clean the surface where you will be applying the glue. This will ensure a strong bond between the materials. Additionally, have all your supplies ready including the E6000 adhesive, your jewelry pieces, and any other materials you will be working with.
2. Apply the glue: Squeeze a small amount of E6000 adhesive onto a disposable surface or piece of cardboard. Using a toothpick or a small brush, apply the glue to one of the surfaces that you will be bonding together. Make sure to apply an even layer of adhesive for the best results.
3. Press and hold: Once you have applied the E6000 adhesive to one surface, carefully press the two surfaces together. Hold them firmly in place for about 5-10 minutes to allow the glue to set properly. Avoid moving or adjusting the pieces during this time to prevent shifting.
When using E6000 jewelry and bead adhesive, it is essential to follow these steps for a successful and long-lasting bond between your jewelry pieces. With proper application and care, you can create stunning DIY jewelry projects that are sure to impress.
| Steps | Description |
|---|---|
| Prepare Work Area | Clean the surface and gather supplies |
| Apply Glue | Use a toothpick or brush to apply evenly |
| Press and Hold | Hold pieces together for 5-10 minutes without moving them |
Tips and Tricks for Using E6000 Effectively
E6000 adhesive is a versatile and reliable glue that is commonly used in jewelry making and bead projects. To utilize this adhesive effectively, there are several tips and tricks that can help you achieve the best results. One key tip is to ensure that the surfaces you are bonding are clean, dry, and free of any dust or debris. This will help the E6000 adhesive adhere properly and create a strong bond.
Another tip for using E6000 effectively is to apply the adhesive sparingly. A little goes a long way with this powerful glue, so avoid using too much as it can lead to excess squeeze-out when bonding your jewelry or bead pieces together. It’s also important to work quickly once you have applied the E6000 as it has a relatively short open time before it starts to set.
Additionally, when working with E6000 adhesive, it’s helpful to use small amounts at a time and work in sections if you have a larger project. This can prevent the adhesive from drying out before you’re able to bond all of your pieces together. By following these tips and tricks, you can ensure that your jewelry and bead projects using E6000 turn out beautifully and securely bonded for long-lasting wear.
Curing and Drying Time for E6000 Adhesive
E6000 adhesive is a versatile and durable glue that is commonly used in jewelry making and bead projects. One important aspect to consider when using E6000 is the curing and drying time to ensure that your creations are securely bonded and ready for wear or display. Here is a step-by-step guide on how to properly handle the curing and drying process when using E6000 adhesive:
- Apply the E6000 adhesive to your jewelry or bead project according to the instructions provided. Make sure to apply the adhesive sparingly yet evenly to create a strong bond.
- Once you have applied the E6000, allow it to set for at least 24 hours. During this time, refrain from touching or moving the project to ensure that the adhesive can fully cure.
- After 24 hours have passed, check the project to see if the E6000 has dried completely. You can gently touch a small inconspicuous area of the adhesive to test its tackiness. If it feels dry and firm, then your project is ready for use.
It’s important to follow these steps diligently in order to achieve optimal results when using E6000 adhesive in your jewelry and bead projects. By allowing the proper curing and drying time, you can ensure that your creations are securely bonded and will last for a long time.
Safety Precautions When Using E6000
Use in a Well-Ventilated Area
When working with any type of adhesive, including E6000, it is crucial to ensure that you are working in a well-ventilated area. This will help minimize the inhalation of potentially harmful fumes that can be released during the application and curing process. If possible, consider working near an open window or using a fan to improve air circulation.
Wear Protective Gear
Another important safety precaution when using E6000 is to wear protective gear, such as gloves and safety goggles. Gloves will help protect your skin from coming into direct contact with the adhesive, while safety goggles can prevent any accidental splashes from reaching your eyes. Additionally, consider wearing a mask to further protect yourself from inhaling any fumes.
Keep Out of Reach of Children and Pets
E6000 adhesive should always be stored in a secure location out of reach of children and pets. The strong bonding properties of this adhesive make it potentially dangerous if ingested or mishandled by curious little hands or paws. Be sure to store the adhesive in its original container with the cap securely fastened after each use to prevent any accidental spills or exposure.
Clean-Up and Storage of E6000 Adhesive
E6000 adhesive is a powerful and versatile glue that many crafters and jewelry makers rely on for their projects. Once you have finished using the adhesive, it is important to properly clean up and store it to ensure its longevity and effectiveness for future use. Here are some tips on how to effectively clean up and store your E6000 adhesive:
- Start by wiping away any excess adhesive from the nozzle of the tube using a clean cloth or paper towel.
- Securely screw the cap back onto the tube of E6000 to prevent air from entering and drying out the adhesive inside.
- Store the tube in a cool, dry place away from direct sunlight or extreme temperatures. This will help maintain the quality of the adhesive over time.
When it comes to cleaning up any spills or messes created during your project, it’s important to act quickly to prevent the adhesive from permanently bonding with surfaces. Here’s how you can clean up E6000 adhesive effectively:
- If you accidentally get E6000 on your skin, use acetone or nail polish remover to gently remove it. Wash your hands thoroughly afterwards.
- For surfaces like countertops or tools that have come into contact with E6000, use rubbing alcohol or an adhesive remover to clean them. Wipe away any residue with a damp cloth.
- Make sure to dispose of any used cloths or paper towels that have come into contact with E6000 in a sealed plastic bag to prevent accidental exposure to pets or children.
By following these guidelines for cleaning up and storing your E6000 adhesive, you can ensure that this versatile glue remains in prime condition for all your future jewelry and bead projects. Remember that proper care and maintenance of your crafting supplies is key to producing high-quality creations every time.
Inspiration for DIY Jewelry and Bead Projects Using E6000
E6000 Jewelry and Bead adhesive opens up a world of possibilities for DIY enthusiasts looking to create unique, personalized jewelry pieces. By understanding the properties of E6000 adhesive and following the correct steps for application, you can bring your creative visions to life with ease. Whether you are a beginner or experienced crafter, mastering the use of E6000 will allow you to craft beautiful jewelry and bead projects that stand out.
When it comes to using E6000 for jewelry and bead projects, preparation is key. Ensuring your work area is clean and well-ventilated will help to create the ideal environment for successful adhesive application. Following a step-by-step guide will also help you achieve professional-looking results in your projects. With the right techniques and tools at your disposal, you can confidently embark on a journey of creativity with E6000 adhesive.
To make the most of E6000 adhesive when working on your DIY jewelry and bead projects, it’s essential to know the curing and drying times for optimal results. By allowing sufficient time for the adhesive to set, you can prevent any mishaps during the creation process.
Additionally, always prioritize safety precautions when handling E6000 adhesive to protect yourself from any potential harm. With these considerations in mind, you can dive into creating stunning jewelry pieces that reflect your individual style and creativity.
Frequently Asked Questions
What Is E6000 Jewelry and Bead Glue Used For?
E6000 Jewelry and Bead Glue is commonly used to securely bond various types of materials in jewelry making, such as metal, glass, beads, ceramics, and more. It provides a strong and durable hold, making it ideal for creating intricate designs like beaded bracelets or necklaces.
What Should You Not Use E6000 On?
It is not recommended to use E6000 on surfaces that will come into direct contact with food or beverages, as the adhesive may not be food-safe. Additionally, it should not be used on porous surfaces like foam or fabric, as it may not adhere properly or could damage the material.
Is E6000 Safe for Jewelry?
E6000 is generally considered safe for jewelry-making purposes when used correctly according to the manufacturer’s instructions. However, it is important to allow the glue to fully cure before wearing the jewelry to ensure there are no harmful fumes released. As with any adhesive, it is advisable to work in a well-ventilated area and avoid skin contact.

Welcome to my jewelry blog! My name is Sarah and I am the owner of this blog.
I love making jewelry and sharing my creations with others.
So whether you’re someone who loves wearing jewelry yourself or simply enjoys learning about it, be sure to check out my blog for insightful posts on everything related to this exciting topic!

