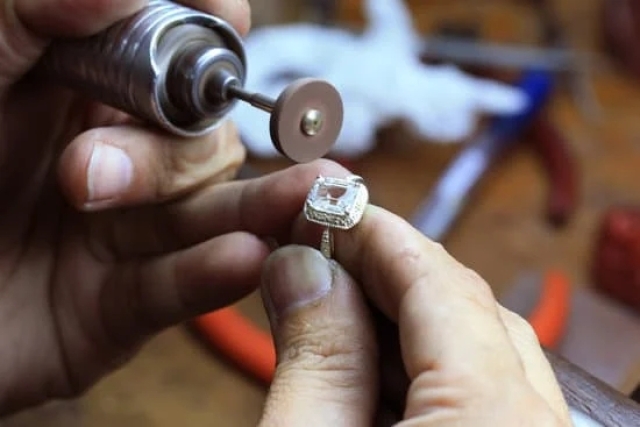
Soldering is a process whereby two or more items of metal jewelry are joined together using small amounts of molten metal. It can be used for a variety of purposes and it is an ideal way to join costume jewelry pieces such as pendants or earrings. It can also be used to make repairs to existing metal jewelry in the event that it becomes damaged.
Soldering costume jewelry has become increasingly popular due to its simplicity and cost-effectiveness. The process may seem intimidating at first but when broken down into easy steps, anyone with basic DIY skills can undertake the task themselves quite easily.
Essential Tools and Materials Required
In order to soldering costume jewelry effectively, there are several essential tools and materials that you will need. Firstly you’ll need flux, solder, a soldering iron or torch, pickle solution (or vinegar), borax and a heat sink for safety purposes. The types of metals that will be used will influence which type of solder needs to be selected – silver solder for silver-based pieces and brass or tin based solder for other materials such as copper or bronze etc.
Steps Involved
Once all the necessary tools and materials have been sourced, the actual process of soldering can begin. First up it’s important to ensure that the pieces of jewelry requiring repair are clean and free from any dirt, grease or oxidation prior starting – this is especially important because if foreign contamination is left on the surface then this could prevent successful soldering bonds being formed later on in the process.
Once cleaned they should be clamped so they remain steady during soldering – protective eye wear is also highly recommended particularly when working with hot materials like those involved in soldering.
The flux should then be carefully applied via a brush – this helps create an improved bond between the various components being used – after which one or two small droplets of molten metal (the solder) should then be added where required at each point that needs to me joined together. Particular attention must be paid here as incorrect positioning could cause problems during subsequent heating stages.
Lastly comes heating – this should by carried out slowly using either a low powered soldering Iron or even open flame torch – once satisfied with the union produced by melting, allow the piece to cool slightly before submerging it in pickle solution formula come away impurities caused by oxide build up during heating stage (vinegar could also substitute). Finally buff up affected areas using some fine sand paper and finish off with borax if desired – now everything is ready for use.
Understanding the Soldering Process
Soldering is the process of fusing two pieces of metal together at a molecular level. It is an invaluable skill for anyone who wants to repair costume jewelry. To solder properly, one needs to be familiar with the tools, supplies, and techniques involved.
The basic supplies needed for soldering costume jewelry are flux, solder wire, pickle solution and tweezers. Flux helps to clean metal surfaces before applying solder, ensuring that all dirt and impurities are removed beforehand. Solder wire, usually made from lead or copper alloy based on the type of metal being worked on, holds two pieces of metal together when melted.
The pickle solution can be used to clean metals after soldering and takes place after cooling off the work piece. A pair of tweezers can help move hot items and provide precision when manipulating small parts during the soldering process.
Now that you’ve got the necessary supplies it’s time to start the actual soldering process. Start by cleaning up any debris or residue from surfaces where you intend to join using flux if necessary; make sure it’s dry before any further steps are taken.
Use tweezers or other helpful tools to hold down whichever piece you wish in place before using a soldering iron (or torch) on setting appropriate for your given project; adjust flame size if applicable as well depending on what part is being touched by heat and intensity needed for it to fuse without being damaged itself.
Once touching upon both surfaces evenly with proper amount of heat, put your desired solder wire between them until both materials meet and bond together; let cool off afterwards but keep in mind that too much waiting could cause irreversible damage; you will know when ready so watch out closely while working. Finally rinse off in pickling solution or wipe away excess flux material if necessary once completing work completely before ending task – great job.
Inspecting and Preparing the Jewelry for Soldering
When you need to repair costume jewelry solder, the first step is to carefully inspect it. Upon first inspection, look for any chips or breaks in the pieces that will be soldered. Additionally, it’s important to inspect any clasps or wires that may be connected to the main piece of jewelry as these can be points of failure as well. If you find any issues, they should be fixed before moving on to the actual soldering process.
Once you have found any flaws and issues that need fixed, it’s time to prepare the piece with a degreaser. This will remove any oils or dust particles which can cause problems if not removed before beginning the soldering process. A cotton swab and some water-based degreasing solution can help with this step, but you may also choose to use specialized alloy cleaning solutions depending on what type of metal you are working with.
Before starting your soldering project, it is important to lay down a protective surface so that no damage comes to the jewelry through drips or splatters of hot solder. A stainless steel bench block is ideal for this task as its surface conducts heat evenly and provides enough protection from direct contact with hot tools and fluxes.
It is best practice to dampen the surface of your steel bench block with either water or alcohol before starting your project as oxidation can occur when exposed directly to flame or extreme heat during prolonged periods of time. Doing so helps dissipate some of that heat away from the metals being worked on, ensuring a better outcome for your jewelry repair project.
Applying Flux and Soldering Metal Accents
If you have costume jewelry that needs to be repaired, it may require the use of solder. Soldering is a process used to join two metals together by melting and joining their surfaces with a type of metal called solder.
The material is usually an alloy of tin and lead, often mixed with small amounts of other metals such as silver or copper. When soldering costume jewelry, it’s important to take special care in order to ensure that your piece looks as good as new when completed.
Before beginning your repair, collect all the supplies that you need. These items include flux (a type of chemical cleaner used to prepare the surfaces for soldering), a soldering iron, fine tweezers for handling components as well as two pieces of extra-fine emery paper.
This abrasive material will remove any dirt or particles on your jewelry before beginning the repair process. Additional items such as flux brushes and welding gloves may also be helpful but not completely necessary depending on what you are repairing.
Once you have prepared all of your tools, begin by adding a small amount of flux onto each piece of metal that needs to be joined together. Use a clean brush to spread an even layer over the relevant sections before heating up the soldering iron. Keep in mind that temperatures needed for repairing costume jewelry are typically much lower than those necessary for regular welding processes so adjust accordingly.
When both sections have been heated sufficiently there should be a bright melted pool between them; this indicates that the bond has been made and you simply need to allow everything to cool down before wiping away any excess flux residue. From here on out its simply a case of repeating these steps based on how many sections need repairing on your costume jewelry item.
At times it can seem daunting moving from beginner projects into something like repairing costume jewelry with solder but don’t worry – once you understand the process it will become less intimidating each time. With practice and patience any project can be accomplished with ease.
Finishing and Cleaning the Repaired Jewelry
Once the costume jewelry solder has been completed, it is important to take the time to clean and finish the piece. Finish refers to the polishing or refine of any parts that have been connected via soldering. It can also refer to adding extra flourishes that give the design a polished look.
Cleaning takes hand polishing or steaming techniques, depending on the materials used in the jewelry piece. Hand polishing, for example, might involve polishing any sharp edges with a cloth designed specifically for this purpose. Steaming can help remove blockages from within a piece, such as residue from setting gemstones and pearls.
After completing all necessary steps of cleaning and finishing the repaired jewelry piece, it is important to apply a protective coating or sealer over it. This helps ensure that the solder joints cannot oxidize or create any unwanted color change due heavy wear and usage over time.
Finding an appropriate sealant will depend slightly on what type of material was used in crafting your costume jewelry; but some general choices could consist of waxes and lacquers. Waxes are ideal for slightly porous stones and metals like copper while lacquers are ideal for harder materials like gold or silver alloyed base metals in costume jewelry designs.
Finally inspect your costume jewelry piece very carefully after applying this sealing finish; making sure there are no visible defects or imperfections that may be cause for concern over its wearability in everyday situations or use for a long period of time afterwards. This last stage can bring an entire costumer Jewelry project full circle and make sure your friends admire you for wearing exquisite pieces even if they may be labeled as “costume” in category.
Tips for Troubleshooting Common Problems
When it comes to repairing costume jewelry solder, proper knowledge and tools are essential. Soldering with soft or low-temperature alloys requires delicate work by an experienced technician. An important tip involves prepping the stone before soldering begins. This ensures that the stone won’t be damaged during the process. Cleaning the area thoroughly with mild soap and warm water helps create a solid joining between the metal pieces and keeps stones from shifting out of their settings.
Another tip when welding costume jewelry solder is to select the right size of flux for projects. Different sizes require different forces for a proper join, so check labels on flux bottles when shopping for a product to ensure you choose one that matches your needs. Flux should never be submerged in water after it has been used as contaminants can become trapped in the metal, interfering with welds and weakening the join over time.
Lastly, choosing an appropriate alloy depends on factors such as equipment type and temperature levels during operation. Home-based jewelry makers can often use silver or copper alloys; however clip repairs often call for more expensive alloys because extra metal must be added to restore clips back into shape, thus necessitating a stronger bond between metals.
Reaching higher melting points does require specialty tools but prevents any unfortunate gems from falling out through improper joins or previously weakened solder connections caused by exposure to high temperatures during soldering operations. Heeding these tips will ensure successful application of costume jewelry solder and prevent costly mistakes from being made at home or in professional settings alike.
Finding Resources
For those seeking to learn more about how to repair costume jewelry solder, there are several resources available. To begin your journey in the world of jewelry repairs, you will need access to the necessary supplies. Basic supplies such as soldering tools and a torch will be needed for all repairs.
Some craft stores carry these in stock along with solder that is specifically formulated for costume jewelry. Of course, it’s possible to purchase higher quality items online should you require them.
It’s also necessary to gain some knowledge regarding the material you’ll be working with when repairing costume jewelry solder. That material is typically non-precious metals such as steel or brass rather than true silver or gold jeweler’s grade metals.
Understanding the different types of conductive surfaces and how they respond to heat may be important factors in success when attempting your own repairs. It also helps to have insight into the underlying concepts that go into making reliable connections so that future repairs can be undertaken with confidence.
In addition to physical resources, it can also be helpful to look into educational materials on repair techniques for costume jewelry soldering. Handbooks exist offering detailed explanations concerning equipment use and the fundamental principles behind this type of workmanship. Many of these are specifically geared towards novice hobbyists who are just getting started out on their journey learning about this craft form and its related processes.
YouTube videos created by experienced craftsmen can also provide valuable visual instruction when attempting certain repairs and specialized projects involving cast stones, soldering gems onto necklaces, rings, brooches etc., even certain cold enameling techniques. The wealth of information currently available makes it simpler than ever before for individuals to become proficient at various jewelry crafts without having any prior experience or training classes.
Conclusion
Solder is a great tool for repairing costume jewelry and can help keep these items looking great. The soldering process starts by heating the metal that needs to be repaired. This can be done with a torch, soldering iron or electric gun, depending on the tools and skills the user has available.
Once heated, more solder can then be added to create a strong bond between the two pieces of metal that are being joined. It is important to work quickly when using solder, as it cools down almost instantly once applied. Following this step, it is necessary to use flux in order to keep any remaining parts together securely.
To avoid damaging the piece being repaired, it is important to avoid overheating metals like brass or copper which can cause them to discolor while they are being soldered. It’s also recommended that protective eyewear be worn when doing any kind of soldering as sparks from the flame are not only dangerous but can damage the surface of delicate items like costume jewelry.
Additionally, work must always be done in a well-ventilated area or outside as breathing in fumes from soldering lead metal can be very hazardous for one’s health over time.
When repairing costume jewelry with solder, perfecting technique is essential for getting good results and making sure precious pieces look their best for years to come. For beginner jewelers who may not have access to professional tools and materials, practice makes perfect – taking some time to try out different techniques before attempting a difficult repair job is key.
Finally, when handling these types of items it’s always good practice to wear gloves so as not to expose oneself unnecessarily to harmful chemicals used during the process. Solder itself is relatively harmless if handled properly however following all safety protocols associated with its use should still be taken into consideration at all times.

Welcome to my jewelry blog! My name is Sarah and I am the owner of this blog.
I love making jewelry and sharing my creations with others.
So whether you’re someone who loves wearing jewelry yourself or simply enjoys learning about it, be sure to check out my blog for insightful posts on everything related to this exciting topic!


