Introduction
Photo jewelry pendants are a fun, creative way to display your favorite photos. By turning a favorite photo into a unique one-of-a-kind pendant you can showcase it in an interesting and unique way that allows you to wear it with pride! People often have important memories attached to the photos they take, so why not capture the essence of the moment by turning it into something tangible? Photo jewellery is a great way to bring those memories with you wherever you go.
One of the main benefits of creating photo jewelry pendants is that you can create yourself without needing any special skills or expertise. With the right materials and tools, anyone can make beautiful and unique pieces that they can enjoy wearing. Additionally, when crafting photo jewelry pendants, you can customize them however you choose: add text or engravings, submit different finishes and shapes, or combine multiple photos into one design for a truly meaningful piece of wearable art.
No matter why someone chooses to craft their own photo jewelry pendants – for themselves or for another person – there’s no doubt that seeing familiar faces smile back at them from as an accessory will fill them up with joy and happiness knowing that those beloved memories are out there on display for everyone else to see!
Gather Supplies
Gather supplies: When making photo jewelry pendants, you need some special supplies in addition to the photos you will be using. Some of the items needed to complete the project include a printer, ink, paper, and glue.
Choose printer: Since these pendants are so small, it is important to choose a printer that can handle tiny prints without blurring or distorting them. Do your research and compare various models of printers to determine which one would suit your needs best.
Choose ink: You will most likely need special ink for this project because standard printing doesn’t usually produce vibrant colors and clarity on such a small scale. Investing in quality ink for your projects will help make sure that your jewelry comes out accurately and looks great when it’s finished.
Choose paper: Depending on the type of photo you are using, you may need to buy glossy or specialty paper in order to get the best results. Again, do some research before deciding which paper would work best with your initial image and printer settings.
Choose glue: Purchasing specialty glue specifically made for crafting projects like this is recommended. This type of glue is specifically designed to keep your items firmly together and hold up over time against normal wear-and-tear. Make sure that whatever glue you select is waterproof as well!
Save money: If cost is a concern when gathering supplies, there are several ways to save money while still ensuring that the quality of your final piece lives up to expectations. Look online for coupons or sales; shop around for bulk deals; or use household materials if applicable, such as an existing printer or scrapbooking supplies from past projects.
Printing and Cutting Out the Photo
When making photo jewelry pendants, it is important to get the perfect image resolution, crop, and print. If not approached with care, errors can occur which will make a unique pendant unattractive. Below are trouble-shooting tips for resolution, cropping, and printing mistakes.
Resolution: The photo should be at least 300 dpi for a sharp and clear appearance once printed on the pendant. To ensure this result is achieved, avoid images that have been downloaded from the internet as many of these have a lower resolution than desired. Instead, opt for higher quality photos taken with a digital camera or scanned photographs.
Cropping vs Aspect Ratio: To maintain clarity in your designs select an aspect ratio that corresponds with your photo shape beforehand and use a software like Adobe Photoshop to crop your image accordingly. You might also consider enlarging photos of small proportions so that they fix within the view box size of the desired shape pendant.
Printing Mistakes: For uneven or not-so-vibrant results when printing your design check to see if you’ve selected the correct paper setting (coated/uncoated) as well as check ink levels in printer cartridges before starting. Make sure to allow printouts enough time to dry before handling them–it’s best to let them sit without touching them for several hours prior to cutting out the shape desired for your finished photo jewelry pendant!
Design the Jewelry Back
It’s important to design a jewelry back that complements the picture you have chosen to display in your pendant. When designing the back of your pendant, there are many materials and finishing details to consider. Depending on the look you want, choose from copper, sterling silver, bronze or brass. Then decide what kind of finish or texture is best for the look you’re going for; a high polish for example if you want something modern looking, or texture and patterns for a more rustic feel.
The materials and textures don’t need to be limited to metals either! You can also choose creative additions such as genuine stones like agates and jaspers, wood pieces and even gems if desired. If employing precious stones in your design you could use them as an accent around the edge, perhaps repeating their shape to really make the jewel stand out. With so many options for materials, textures and finishes available, it’s easy to create a striking image on the back of your jewelry pendant that will accentuate any picture or image of yours!
Putting the Pendant Together
Step 1: Begin by applying a thin layer of adhesive to the back side of your chosen photo. You can use various types of adhesive, such as decoupage glue and Mod Podge, but be sure to use an appropriate amount and allow it to dry completely.
Step 2: Once the adhesive has dried, carefully press the photo onto the pendant setting. Ensure a proper seal by pressing all edges firmly against the edges of the pendant.
Step 3: Cut a piece of felt or craft foam, slightly larger than your pendant and adhere it to the back of your setting with an additional line of glue. This will serve as backing for your photo jewelry pendant and provide support for your creation once finished.
Step 4: To finish off, place one or two tiny magnets on either side of your pendant backing to hold everything in place securely. Place them directly over any previously applied adhesive line so that they bond properly with both surfaces. Finally, use a small jewelry loop or chain to create a necklace out of your unique photo jewelry pendant!
Adding a Chain
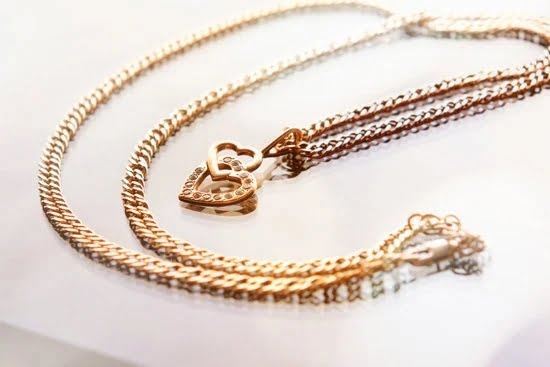
Adding a chain to your photo jewelry pendant is simple and easy, but there are several types of chains you can choose from. For example, you could go for a thin, delicate chain which will look elegant with the jewelry pendant. Alternatively, you could select a thicker, more decorative chain. Both types come in different lengths and thicknesses so you can opt for one that best fits your style.
When attaching the clasp to the end of your chain, try to make sure it is secure before wearing it. Take some time to inspect the connection between the two parts – twist them slightly on either side and test how tight they fit together. If necessary, you may need to add a drop of glue or putty near where they join. This will help ensure that the clasp holds up without coming apart as soon as you put it on. After this step is complete, be sure to clean off any excess glue or putty that may have spilled out when creating the connection between both pieces of the clasp.
Conclusion
Making photo jewelry pendants can be a rewarding and enjoyable activity, but it is important to remember that there are certain best practices to follow when making this type of jewelry. With the right combination of materials and tools, along with a healthy dose of creativity, you can create beautiful pieces of photo jewelry that will last a lifetime.
To ensure the longevity and quality of your work, first clean any materials like charms or bases and protect them from possible damage during crafting. Using a photo mat to cover heavy-duty cardstock creates more vivid prints than regular paper. Similarly, resin coating gives your project additional color and protection as well as making it waterproof. With easy accessibility for these materials, you can make one-of-a-kind pendants that stand out from the ordinary. Don’t be afraid to experiment with different combinations; the sky’s the limit!
Photo jewelry pendants offer a unique opportunity for creative expression depending on how you finish them off. Use colorful cords or strings for necklaces; attach clips for earrings to look like miniature artworks; or consider setting your creations in metal pieces for added weight and durability. When inspiration strikes at any time, start jotting down ideas as soon as possible – you never know what incredible creations may come out of daydreaming!
In conclusion, with these best practices in mind, anyone has the potential to make beautiful photo jewelry pendants using easy–to-acquire materials and tools combined with artistic vision. Whether it’s an heirloom piece meant to last through generations or an inspiring present just because – now is the time toget started!

Welcome to my jewelry blog! My name is Sarah and I am the owner of this blog.
I love making jewelry and sharing my creations with others.
So whether you’re someone who loves wearing jewelry yourself or simply enjoys learning about it, be sure to check out my blog for insightful posts on everything related to this exciting topic!


