Introduction
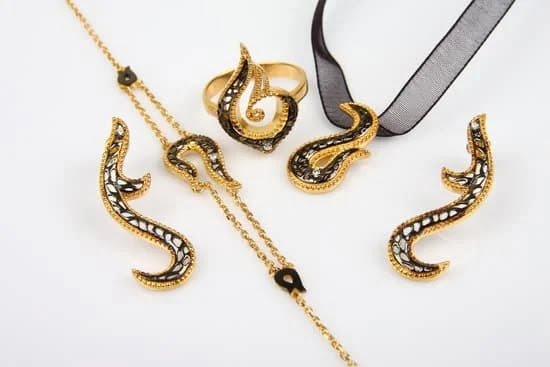
Layered paper jewelry can be a beautiful and affordable way to add a touch of art to your wardrobe. It’s easy to make, versatile, and surprisingly sturdy. With just a few sheets of construction paper, a few squares of wax paper, some craft glue, and some simple tools like scissors and a ruler, you can create earrings, necklaces and bracelets. The designs are endless — from abstract geometric shapes to delicate floral motifs — so you’ll never run out of ideas for your creations.
Furthermore, layered paper jewelry is lightweight and comfortable to wear due to its strength-to-weight ratio. Very little glue is needed during the design process so pieces are easy to make without feeling too bulky or heavy on the ears or around the neck. The variety of colors in construction paper give you near infinite variations between designs while allowing you to coordinate with any outfit. Another appealing feature is that this kind of jewelry is unique and original — no two pieces will ever look exactly the same! Finally, because it costs very little in supplies and materials to create your own layered paper jewelry, you can easily recreate certain pieces as gifts or simply add accessories as desired without having to break the bank.
Gather Your Materials
When it comes to making layered paper jewelry, the supplies you need are surprisingly minimal. Fortunately, these items are easy to find and generally inexpensive, making them perfect for beginner jewelry makers.
Start by gathering your basic supplies:
•Paper — You can use any type of paper or cardstock; construction paper, origami paper, digital scrapbooking papers, vellum or even magazine pages! Available at most stationery stores and online retailers.
•Scissors — Craft scissors or kitchen scissors will both work. Regular office scissors could also be used if they are sharp enough. Available in craft stores and home goods stores such as Walmart or Target.
•Glue — Glue sticks work great for keeping layers together, but you can also add a drop of liquid glue or adhesive tape between each layer (optional). Available in craft stores and home goods stores such as Walmart or Target.
•Jewelry findings — Jump rings and earring posts can help turn the paper art into a piece of wearable jewelry (optional). Available in craft stores and online retailers.
Once you have all your supplies gathered together, you’re ready to start crafting any type of layered bracelet, necklace or pair of earrings you desire!
Step-by-Step Instructions
Layered paper jewelry is a great way to add simple elegance and visual interest to any outfit. This type of jewelry not only looks stylish, but it’s incredibly easy to make too. In this article We’ll walk you through the tools you’ll need, provide some helpful techniques, plus share tips for crafting layered paper jewelry that looks store-bought.
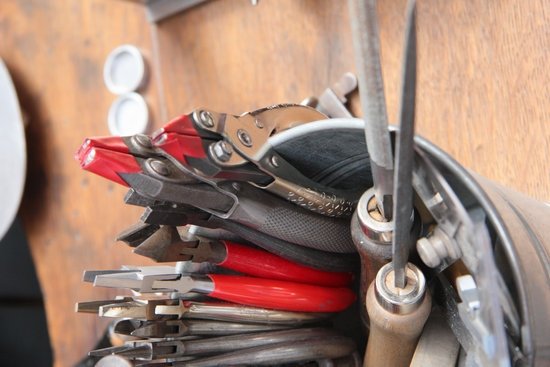
Tools: To begin making your layered paper jewelry, you’ll need a few basic tools. These include an x-acto knife or small scissors, craft glue (or glue stick), craft tape, hole punch, rubber stamps and ink pad (optional). You will also need crafting supplies such as lightweight cardstock or construction paper in various colors and patterns, decorative beads and charms, ribbons and lace trims.
Techniques: Start by cutting paper strips into different shapes to create layers and use your hole punch to add small holes where needed. Be creative when experimenting with shapes as unique layered designs will give your jewelry more dimension and personality. When layering multiple pieces of paper together it may be helpful to use heavy duty craft tape in place of glue so that the layers hold their shape without shifting. Once you have created stacks of layers you can add beads or charms in between each layer before gluing the stacks together for added texture and color.
Tips: For extra pizzazz try using rubber stamps or stencils to imprint images onto some of your layered cards for interesting visual effects. Also consider adding protruding elements like twine loops for hanging details on necklaces or bracelets made from thicker stock papers such as cardstock or poster board. Adding attractive ribbons and lace trims can also enhance the look of your layered designs—simply cut ribbon lengths that coordinate with the colors of each layer then tie them into knots around key elements within the stacked layers like chains, pendants, etc., ensuring all tassels are secure with craft glue.
Color Perfection
Choosing the right colors and combinations for your layered paper jewelry can make a huge difference in the end result. When selecting both the individual papers and their hues, it’s best to look for complementary shades and tints that can be mixed to create aesthetically pleasing color palettes. Choose two or three distinctively different shades of one color, such as multiple blues, purples, or pinks, then select a few more ‘accent’ pieces from those same ranges to add depth and contrast. Mixing in some metallics and earth tones is an excellent way to ensure a dynamic end product — try adding some silver components if you are using pastel shades and/or bronze components for richer jewel tones. Now that you have your supplies ready, it’s time to start crafting!
In-Depth How-To Guide
1. Gather materials: In addition to assorted colors and types of scrapbook paper, you will need glue or Mod Podge, acrylic sealer, scissors, a pencil, an exacto knife, and metal jewelry findings (earring hooks, jump rings and charms).
2. Trace circles: Use your pencil to trace circles onto the back of each sheet of scrapbook paper. The size of the circles should be determined by the size you want your final layered jewelry piece to be. For example, if making earrings then draw smaller circles; for a necklace pendant make a larger circle.
3. Cut out traced circles: Use your scissors or exacto knife to carefully cut out each circle so that you have one for each layer in the finished piece (most often three layers will be plenty).
4. Layer circles: Begin with the smallest circle at the bottom and the largest at the top and stack them in order from small to large (for example with 3 layers – small on bottom, medium in the middle and large on top). Using either glue or Mod Podge adhere all three pieces together making sure they are even with each other as they will dry stacked on top of one another.
5. Seal Jewelry Piece: After your adhesive dries brush acrylic sealer over both sides of your layered paper jewelry piece to help protect it from moisture damage, add shine and prevent fading or discoloration due to light exposure over time. Allow plenty of drying time before adding any type of findings as instructed below.
6 Add Findings: When working with earrings first punched hole into either side of our layered paper jewelry peace as needed ensuring that holes are evenly spaced apart from each other when finished simply add earring hooks through punched hole openings this time attaching jump rings through punched hole openings and attaching dangle charms or beads for added detail these findings can provide a unique finishing touch for what was once scraps of paper!
Showcase Design Ideas
Layered paper jewelry is the perfect way to express yourself with vibrant color and unusual design. With a few simple materials and some creativity, you can create one-of-a-kind pieces of art that will add a very personal touch to your wardrobe.
Before you start, take some time to look at various designs and find inspiration for your own unique designs. Magazines, websites, blogs and social media can provide great visual ideas for you to start with. Once you know what kind of layered paper jewelry piece you would like to create, it is time to gather the necessary supplies. You will need sturdy cardstock paper in various colors that correspond with your design choice. Plus scissors, a ruler, double sided tape or glue stick and a hole punch if the project needs holes in order to properly assemble the jewelry piece.
Start by cutting out each layer of your design using the ruler as a guide and measure carefully so they are all perfectly uniform shapes. Now build up each layer one at a time sticking them together with tape or glue until all layers have been adhered together. If possible use multiple layered pieces of different colored cardstock paper to create depth and texture in the design which can add some extra depth of life when seen through light or viewed from certain angles. Lastly, punch holes wherever needed so that any strings or ribbons can be connected afterwards for added stability and shape definition. And there you have it! Your layered paper jewelry masterpiece is now ready for wearing!
Make It Shine
Layered paper jewelry is a fun and unique way to make eye-catching pieces for yourself or for gifts. Once your base layers have been formed, there are endless possibilities for adding shine and bling to your creation! Here are some ideas to get you started:
Embellishments: Utilize items like feather, bows, beads, gems, sequins–really anything you can find that speaks to the aesthetic you’re trying to create. Glue these pieces in strategic places on your layered paper jewelry, or shape them onto wire and attach them; either way gives long-lasting color and brilliance.
Glitter: Give your jewelry extra zing by brushing glitter over it with adhesive glue or by sprinkling craft glitter over a layer of Mod Podge. For an interesting effect, try using two different colors of glitter on the same piece.
Finishes: Add a topcoat of varnish or sealant spray for an extra glossy finish. This is also a great time to enhance dimensional accents and 3D embellishments with paint or marker that will stand out beautifully in contrast with the high gloss of the sealant spray.
Bling: Don’t forget about genuine metal findings like wire snaps, connecting rings, bails and earring posts to give your layered jewelry a more interesting look and feel. All it takes is an appetite for experimentation – if you don’t like the results of one decoration idea, simply remove it and start again! Have fun and never be afraid to try something new when designing your own unique layered paper jewelry.
Final Thoughts
Making your own unique layered paper jewelry is a great way to let your personality shine and make a statement. Creating the most stunning pieces can be rewarding, whether you are giving them as a gift or wearing them yourself. With the right materials and supplies, there are endless possibilities for creating creative designs and color combinations. When you make something meaningful to you, it can become an even more treasured reminder of special occasions, milestones, relationships, and inspiring words that will last a lifetime. Plus, with so many ways to share your handmade jewelry—from displaying them on your walls to selling the pieces that you have made—it’s a fun way to explore using different shapes and colors of paper while getting creative. Whether on its own or combined with other elements like gems or metals, layering different kinds of paper adds dimension and texture to your jewelry designs. Express yourself by making as many pieces as you’d like!

Welcome to my jewelry blog! My name is Sarah and I am the owner of this blog.
I love making jewelry and sharing my creations with others.
So whether you’re someone who loves wearing jewelry yourself or simply enjoys learning about it, be sure to check out my blog for insightful posts on everything related to this exciting topic!


