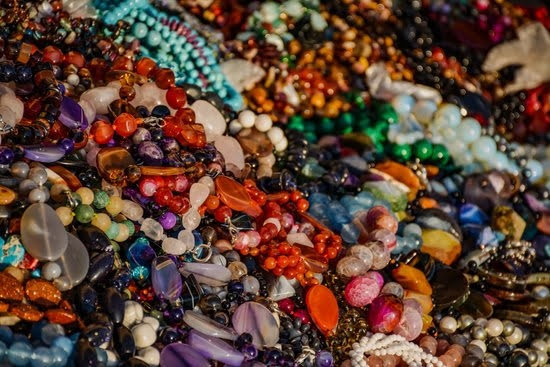
Bead embroidery jewelry is a popular and unique craft that allows individuals to create stunning and personalized accessories. Combining the art of embroidery with the beauty and versatility of beads, this technique offers endless possibilities for expressing creativity and style. Whether you are a seasoned jewelry maker or a beginner looking to explore a new skill, bead embroidery jewelry-making is a rewarding and fulfilling hobby.
In this article, we will guide you through the process of creating your own bead embroidery jewelry from start to finish. We will begin by discussing why this craft has become so popular among enthusiasts and the unique qualities that set it apart from other forms of jewelry-making. With its intricate designs, texture-rich surfaces, and exquisite attention to detail, bead embroidery jewelry has captured the hearts of many artisans around the world.
Before diving into the creative process, it is essential to gather all the necessary tools and materials for bead embroidery jewelry-making. In the second section of this article, we will provide you with a comprehensive list that covers everything you need to get started on your project. From needles and threads to beads and fabrics, having the right tools at hand will ensure a smooth and enjoyable crafting experience.
Join us as we delve into this captivating craft and embark on an exploration of color, texture, pattern, and design in the world of bead embroidery jewelry-making. Whether you want to create standout statement pieces or delicate heirlooms, bead embroidery offers endless opportunities for self-expression. So let’s dive in together as we unlock the secrets behind making beautiful bead embroidery jewelry that reflects your unique taste and style.
Gathering the Essential Tools
When starting a new craft project like bead embroidery jewelry-making, it’s crucial to gather all the essential tools and materials beforehand. Having everything you need at hand will not only make your creative process smoother but also prevent any unnecessary delays or trips to the store. Here is a comprehensive list of the key items you’ll need for bead embroidery jewelry-making:
- Beads: The centerpiece of your creations, beads come in various shapes, sizes, colors, and materials. It’s important to choose high-quality beads that suit your design aesthetic and desired outcome.
- Needles: Bead embroidery requires specialized needles with small eyes that can fit through bead holes. Thin beading needles or sharps are commonly used for this purpose.
- Thread: Strong yet flexible threads are essential for bead embroidery projects. Nylon threads like Nymo or Fireline are popular choices due to their durability and resistance to fraying.
- Foundation Fabric: The fabric serves as the base for your beadwork. Sturdy options like ultrasuede, linen, or cotton canvas work well for bead embroidery projects.
- Embroidery Hoop: Using an embroidery hoop helps keep the fabric taut and prevents wrinkles or puckering while working on your designs.
- Scissors: Sharp scissors are necessary for cutting threads and trimming excess fabric or thread tails.
- Bead Trays or Organizers: These tools help keep your beads organized and prevent them from rolling away or getting mixed up during the crafting process.
- Beading Mat: A soft beading mat provides a cushioned surface to work on and helps prevent beads from rolling off the table.
- Glue or Adhesive: Some designs may require adhesive to secure certain elements in place before stitching them onto the fabric.
- Clasps/Findings: Depending on your design, you may need clasps, jump rings, ear wires, or other findings to complete your jewelry pieces.
By gathering all of these essential tools and materials before you begin, you’ll have a solid foundation to create stunning bead embroidery jewelry. Remember to consider the specific needs of your project, such as bead size or fabric type, as some variations might require additional or specialized tools. With the right tools at hand, you can dive into this unique craft and explore the limitless possibilities of bead embroidery jewelry-making.
Choosing the Right Beads
Choosing the Right Beads for Your Jewelry
When it comes to bead embroidery jewelry-making, one of the most crucial steps is selecting the right beads. The beads you choose will determine the overall look and feel of your piece, so it’s important to consider various factors such as shapes, colors, and sizes. Here are some tips and tricks to help you find the perfect beads for your creations.
Consider Your Design and Style
Before diving into bead selection, it’s essential to have an idea of your design and style preferences. Are you going for a bold and vibrant statement piece or a delicate and subtle design? Do you want to create a traditional beaded pattern or something more contemporary? Understanding your desired outcome will guide you in picking the appropriate beads that align with your vision.
Explore Different Bead Shapes
Beads come in a wide variety of shapes such as round, oval, square, cylindrical, teardrop, and more. Each shape offers unique possibilities for creativity. Experimenting with different bead shapes can create visual interest and texture in your jewelry. For example, mixing round seed beads with faceted crystals can add sparkle and dimension to your piece.
Play with Colors
Color is another important aspect of bead selection. Consider the color palette that best complements your design and enhances its overall aesthetic. You can create harmonious color schemes by choosing analogous colors (colors next to each other on the color wheel) or contrasting combinations using complementary colors (colors opposite each other on the color wheel). Don’t be afraid to experiment with different color combinations to achieve the desired effect.
Vary Sizes for Depth
Using beads of different sizes can add depth and dimension to your jewelry. Mixing larger focal beads with smaller seed beads or accenting them with smaller-sized beads can create visual interest. It’s important to keep in mind the scale of your design and the intended purpose of the piece. For example, if you’re creating earrings, using smaller beads may be more appropriate to ensure comfort and wearability.
By taking these tips into consideration, you’ll be able to choose beads that perfectly complement your bead embroidery jewelry designs. Remember to trust your artistic instincts and have fun exploring the endless possibilities that different bead shapes, colors, and sizes can offer.
Preparing the Foundation
Choosing the Right Base Fabric
The choice of base fabric is an important aspect of bead embroidery jewelry-making. The right fabric will provide a stable foundation for your design while allowing the beads to be securely attached. One commonly used fabric is ultrasuede due to its soft texture and durability. It is available in various colors, allowing you to coordinate it with your bead selection.
Another option is using a stiffened felt or similar material. This type of fabric provides a solid structure and can help prevent any warping or distortion of your design. Additionally, if you want to create a more formal or elegant piece, silk fabrics such as silk dupioni or silk habotai can offer a luxurious backdrop for your beadwork.
Prepping the Base Fabric
Before starting any bead embroidery project, it is essential to prepare the base fabric properly. This involves stabilizing the fabric to ensure it can withstand the weight of the beads and maintain its shape over time.
To stabilize your base fabric, begin by applying an interfacing or fusible webbing onto the back side of the fabric. This will add strength and stability while preventing any stretching during the embroidery process. Securely iron or press the interfacing onto the fabric following the manufacturer’s instructions.
Next, cut your base fabric to the desired size and shape for your jewelry piece. Remember to leave extra allowance around the edges for finishing touches like edging or attaching clasps later on.
Marking Guidelines
To aid in creating a well-balanced design, it can be helpful to mark guidelines on your base fabric before beginning bead embroidery. Use a washable pen or pencil to lightly draw reference lines directly onto the front surface of your fabric. These guidelines will serve as visual markers for keeping your stitches straight and ensuring symmetry in your design.
Consider marking both horizontal and vertical axes as well as central points if needed. As you become more experienced, you may find that you can skip marking guidelines as your bead placement becomes more intuitive. However, for beginners or intricate designs, marking guidelines can be an invaluable tool.
By choosing the right base fabric and adequately preparing it, you will set a strong foundation for your bead embroidery project. With stability and a clear layout provided by the fabric, you can proceed confidently to bring your design to life with beautiful beads and stitches.
Basic Bead Embroidery Stitches
Introduction to Basic Bead Embroidery Stitches
Bead embroidery jewelry-making involves the careful stitching of beads onto a fabric or foundation to create beautiful and intricate designs. The fundamental stitches used in this craft enable artists to bring their creative visions to life. Whether you are a beginner or an experienced jewelry-maker, understanding and mastering basic bead embroidery stitches is essential for creating stunning pieces that showcase your unique style.
Backstitch
One of the most commonly used stitches in bead embroidery is the backstitch. This stitch is versatile and allows for precision in outlining shapes and creating clean lines. To execute the backstitch, start by bringing the needle up through the fabric from the backside.
Then, insert the needle back into the fabric a short distance away, creating a single bead on the surface. Bring the needle up through the fabric again at a point closer to where you started, passing it through the bead just added. Repeat this process until you have completed your desired line or shape.
Brick Stitch
The brick stitch is another popular technique used in bead embroidery jewelry-making. It is ideal for creating patterns and filling in spaces with rows of beads that resemble bricks stacked horizontally. To begin this stitch, pass your threaded needle through a single bead and then back down through it again, leaving a small loop on top.
Next, string another bead onto your thread and pass the needle under both threads between beads to secure it into place. Continue adding beads in this manner until you have completed your row.
Peyote Stitch
The peyote stitch is commonly used to create seamless and flexible beaded surfaces in bead embroidery projects. It involves weaving beads together using an alternating pattern between columns of beads stacked on each other. Start by threading your needle through two beads and then passing it back through them again, creating a loop.
Add another bead and pass the needle through the next two beads in the row, repeating this pattern until you have completed the desired length or shape. The peyote stitch can be executed in a flat, even-count, or odd-count manner, providing endless design possibilities.
Mastering these basic bead embroidery stitches will open up a world of creative possibilities for your jewelry-making endeavors. By understanding their techniques and practicing them, you can confidently explore more advanced stitch combinations and adapt them to suit your unique style. Experiment with different bead sizes, colors, and thread types to create intricately embellished pieces that showcase your artistic vision.
Remember, practice makes perfect, so don’t be discouraged by initial mistakes. With time and dedication, you can develop the skills necessary to create stunning and personalized bead embroidery jewelry.
Design and Pattern Selection
When it comes to bead embroidery jewelry-making, the design and pattern selection is a crucial step in creating unique and captivating pieces. The design of your jewelry not only reflects your personal style but also sets it apart from others. In this section, we will explore various design options and pattern sources that can inspire your bead embroidery creations.
One way to find inspiration for bead embroidery designs is by looking at traditional patterns. Traditional patterns are rooted in cultural heritage and often showcase intricate motifs or symbols that hold special meaning. Researching traditional designs from different cultures can open up a whole new world of possibilities for your bead embroidery jewelry. Whether it’s Native American tribal patterns or intricate Indian mehndi designs, incorporating traditional elements into your work can add a touch of history and storytelling.
On the other hand, if you prefer a more contemporary and modern look, there are countless sources of inspiration available. Fashion magazines, runway shows, and social media platforms such as Instagram and Pinterest are treasure troves of creative ideas. Experiment with different color palettes, shapes, and textures to give your bead embroidery jewelry a trendy twist.
To help you organize your ideas and create cohesive designs, consider creating a mood board or sketching out your concepts before starting any project. This way, you can visually see how different elements come together and make adjustments as needed. Remember that the design process is all about exploring possibilities, so don’t be afraid to try new things and push the boundaries of traditional bead embroidery.
| Source | Description |
|---|---|
| Nature | Flowers, animals, landscapes |
| Art and Architecture | Famous paintings, iconic buildings |
| Tribal and Cultural | Traditional patterns, symbols |
| Fashion Trends | Runway shows, designer collections |
| Vintage and Retro | Old photographs, retro fashion |
Remember, design and pattern selection is a personal process that allows you to showcase your creativity and individuality. Don’t be afraid to take risks and experiment with different ideas. Let your imagination run wild, and you’ll be amazed at the stunning bead embroidery jewelry pieces you can create.
Adding Embellishments and Accents
Once you have mastered the basic bead embroidery stitches and created a solid foundation for your jewelry piece, it’s time to take your designs to the next level by adding embellishments and accents. Embellishments serve as focal points in your jewelry and can enhance the overall aesthetic, giving it a unique and personalized touch. In this section, we will explore different techniques for incorporating additional elements into your bead embroidery jewelry.
Crystals
Crystals are a popular choice when it comes to adding sparkle and glamour to bead embroidery jewelry. They come in various shapes, sizes, and colors, allowing you to experiment with different combinations. To incorporate crystals into your design, you can use bezels or prong settings specifically made for crystals or sew them directly onto the fabric using invisible nylon thread.
Sequins
Sequins are versatile embellishments that can add texture and dimension to your jewelry. They come in various shapes, such as round, square, or star-shaped, and can be flat or cupped. Sewing sequins onto your fabric is relatively straightforward – simply thread a needle with matching thread and pass it through the center of each sequin before securing it to the fabric.
Charms
Charms are small decorative objects that can be attached to your bead embroidery jewelry using jump rings or loops specifically designed for charms. They add a personal touch to your creations and can reflect individual interests or themes. You can choose from a wide range of charm designs, including animals, letters, symbols, or gemstone charms.
Remember that when adding embellishments and accents to your bead embroidery jewelry, it’s important to consider balance and visual appeal. Experiment with different placement options before permanently attaching them to ensure they enhance the overall design instead of overpowering it.
By incorporating these techniques into your bead embroidery projects, you can create stunning and unique jewelry pieces that are sure to catch the eye. The possibilities are endless when it comes to adding embellishments and accents, so let your creativity soar and enjoy the process of making truly personalized jewelry.
Finishing Touches
When it comes to bead embroidery jewelry, the finishing touches are what truly elevate the piece from amateur to professional. Taking the time to properly finish your jewelry not only enhances its overall appearance but also ensures its durability and longevity. In this section, we will explore key steps to professionally finish your bead embroidery jewelry, from securing loose threads to attaching clasps or findings.
- Securing Loose Threads: One of the crucial steps in finishing your bead embroidery jewelry is securing any loose threads. This not only prevents the beads from coming undone but also adds a neat and polished look to your piece. To secure loose threads, use a needle and thread them through adjacent stitches on the backside of your embroidery. Make sure to make several small stitches and knot securely at the end.
- Attaching Clasps or Findings: Once you have completed your bead embroidery design, it’s time to attach clasps or findings to transform it into wearable jewelry. There are various types of clasps available, including lobster clasps, toggle clasps, and magnetic clasps. Choose one that complements your design aesthetic and fits securely with your finished piece.
To attach a clasp, thread your needle through several stitches at the edge of your embroidery where you want the clasp to be positioned. Sew back through these stitches several times for extra reinforcement. - Adding Jump Rings: Jump rings are small metal rings that allow you to connect different components of your jewelry together seamlessly. They are often used when attaching pendants, charms, or additional chains to your bead embroidery piece. To add jump rings, open the ring gently with pliers and slide it onto a stitch near the desired attachment point. Thread whatever component you wish onto the jump ring before closing it securely with pliers.
Remember that these finishing touches can greatly enhance both the appearance and functionality of your bead embroidery jewelry. By mastering these key steps, you can ensure that each piece you create is not only beautiful but also well-crafted and ready to be worn or gifted.
Troubleshooting Common Challenges
When starting out with bead embroidery jewelry-making, beginners may encounter some common challenges. However, these challenges can be overcome with a few troubleshooting techniques. In this section, we will address three of the most common issues faced by beginners: thread tangles, bead tensions, and pattern errors.
One of the frustrating challenges that beginners often encounter is thread tangles. These tangles can occur when working with multiple strands of thread or when using a low-quality thread. To avoid thread tangles, it is important to use a high-quality beading thread that has a smooth texture and strength.
Additionally, it is recommended to keep the length of your thread shorter to minimize tangling. If you do experience a tangled mess, gently untangle the threads using your fingers or a pair of small scissors.
Another challenge that beginners may face is improper bead tension. Beads that are too loose or too tight can affect the overall appearance and durability of your piece. To ensure proper bead tension, it is crucial to choose the right needle size for your beads.
A needle that is too thick will stretch the holes in your beads while an overly thin needle can result in loose beads. Experiment with different needle sizes until you find one that allows the beads to slide onto the thread easily but holds them securely in place.
Lastly, beginners may come across pattern errors while following design instructions or creating their own patterns. Mistakes in counting or positioning can disrupt the symmetry and balance of your design. To prevent pattern errors, double-check your measurements and counts before proceeding with each step. It can also be helpful to mark key points on your fabric using removable markers or pins as visual guides during stitching.
By addressing these common challenges head-on and implementing these troubleshooting tips, beginners will gain confidence in their bead embroidery jewelry-making skills. Remember that practice makes perfect, and with time and patience, these challenges will become easier to overcome.
Inspirational Gallery
Creating bead embroidery jewelry allows for endless possibilities when it comes to design and creativity. To provide inspiration and motivation for your own projects, take a look at the following collection of stunning bead embroidery jewelry pieces:
- Floral Delight Necklace: This breathtaking necklace features a delicate array of beaded flowers in various sizes and colors. The meticulous craftsmanship involved in creating each flower is truly awe-inspiring. The combination of seed beads, pearls, and crystals adds depth and sparkle to this elegant piece.
- Boho Chic Bracelet: Embrace the bohemian style with this vibrant and eclectic bracelet. The use of an assortment of beads, such as glass beads, gemstone chips, and metal charms, creates an effortlessly stylish accessory. The addition of a tassel as a focal point adds movement and playfulness to the overall design.
- Adorned Cuff Earrings: These statement earrings are sure to turn heads with their bold and intricate design. The cuff style ensures a secure fit while providing a unique aesthetic appeal. Embellished with seed beads in various patterns and colors, these earrings are a true testament to the artistry of bead embroidery.
- Geometric Pendant Necklace: If you prefer clean lines and modern designs, this geometric pendant necklace will speak to your minimalist sensibilities. The combination of geometric shapes created using brick stitch or peyote stitch technique forms an eye-catching centerpiece for the necklace. Experiment with different color schemes to personalize this contemporary piece.
- Whimsical Charm Bracelet: Let your imagination soar with a whimsical charm bracelet adorned with charms representing your favorite hobbies or symbols that hold special meaning to you. Incorporate miniature beaded animals or objects into the bracelet for added charm and personality.
Remember, these examples are just starting points for your own creations – feel free to experiment with different colors, textures, materials, and techniques to make each piece uniquely yours.
Now that you have seen the incredible possibilities of bead embroidery jewelry, let your creativity take flight. Use these examples as a starting point to inspire your own designs and explore the limitless options within this craft.
With patience, practice, and a touch of artistic flair, you will be able to create stunning pieces of bead embroidery jewelry that reflect your personal style and become cherished treasures for years to come. So pick up your needles, gather your beads, and let the artistry begin.
Tips for Selling Your Bead Embroidery Jewelry
Selling your bead embroidery jewelry can be a rewarding and profitable venture. Whether you want to start a small business or sell your creations online, there are various practical tips and strategies that can help you succeed. This section will provide valuable advice on starting a small business, marketing your jewelry, and finding the right target audience.
Starting a small business:
- Define your brand: Before you begin selling your bead embroidery jewelry, it’s important to define your brand identity. Consider what makes your creations unique and how you want to position yourself in the market. This will help you establish a cohesive brand image that will attract customers.
- Set clear goals: Determine what you want to achieve with your business and set realistic goals accordingly. These goals can include sales targets, expanding into new markets, or launching new product lines. Having clear objectives will guide your actions and motivate you to stay focused.
- Pricing your jewelry: Calculate the cost of materials and labor involved in making each piece of bead embroidery jewelry. Factor in other expenses such as packaging and marketing materials. Research the market to ensure that your pricing is competitive while still allowing for a reasonable profit margin.
Marketing strategies:
- Build an online presence: In today’s digital age, having an online presence is crucial for reaching potential customers. Create a website or online store where customers can browse and purchase your bead embroidery jewelry. Utilize social media platforms to showcase your work, engage with customers, and promote upcoming collections or events.
- Collaborate with influencers: Partnering with influencers who have a strong following within the crafting or fashion industry can greatly expand your reach. Consider providing them with complimentary pieces of bead embroidery jewelry in exchange for promotional posts or reviews on their platforms.
- Participate in craft shows or exhibitions: Local craft shows and exhibitions provide an opportunity for you to display and sell your bead embroidery jewelry directly to interested buyers. It also allows you to network with other artisans and gain exposure within the crafting community.
Finding the right target audience:
- Identify your ideal customer: Take the time to identify and understand your ideal customer. Consider factors such as age, gender, and personal style preferences. This information will help you tailor your marketing efforts and product offerings to attract your target audience.
- Research market trends: Stay updated on current fashion and jewelry trends to ensure that your creations are in line with what customers are looking for. Use this knowledge to offer unique designs that meet the demands of your target audience.
- Engage with your customers: Build relationships with your customers by providing exceptional customer service. Encourage feedback and respond to inquiries promptly. Personalize their shopping experience by offering customization options or exclusive deals for repeat customers.
By following these practical tips for starting a small business, implementing effective marketing strategies, and finding the right target audience, you can increase the success of selling your bead embroidery jewelry. Whether you choose to sell locally or online, remember to be patient, consistent, and passionate about showcasing the beauty of bead embroidery through your unique creations.
| Starting a Small Business | Marketing Strategies | Finding the Right Target Audience |
|---|---|---|
| – Define your brand | – Build an online presence | – Identify your ideal customer |
| – Set clear goals | – Collaborate with influencers | – Research market trends |
| – Pricing your jewelry | – Participate in craft shows or exhibitions |
Conclusion
In conclusion, bead embroidery jewelry-making is a versatile and artistic craft that can bring joy and fulfillment to your life. Through this article, we have explored the various aspects of this unique craft, including gathering the essential tools, choosing the right beads, preparing the foundation, learning basic stitches, selecting designs and patterns, adding embellishments and accents, perfecting finishing touches, troubleshooting common challenges, and even obtaining tips for selling your creations.
By delving into bead embroidery jewelry-making, you are entering a world where creativity knows no bounds. The possibilities are endless when it comes to designing unique pieces that reflect your personal style and taste. With a comprehensive list of materials and tools at your disposal, selecting the perfect beads in terms of shape, color, and size becomes an exciting endeavor. Moreover, mastering basic stitches like backstitching or brick stitch paves the way for intricate designs that captivate the eye.
Not only is creating bead embroidery jewelry a rewarding experience on its own but also it offers potential business opportunities. With practical advice for starting a small business or selling your creations online provided in this article, you can turn your passion into profit. Marketing strategies will help you attract the right target audience while showcasing stunning examples from an inspirational gallery will provide motivation.

Welcome to my jewelry blog! My name is Sarah and I am the owner of this blog.
I love making jewelry and sharing my creations with others.
So whether you’re someone who loves wearing jewelry yourself or simply enjoys learning about it, be sure to check out my blog for insightful posts on everything related to this exciting topic!

