Getting started with any new craft can be both exciting and overwhelming, and learning how to get started with jewelry making: tools and materials is no exception. This comprehensive guide is designed to help beginners navigate the world of jewelry making by providing crucial insights into the essential tools and materials you’ll need. By starting with the right equipment, you’ll set yourself up for success, ensuring your initial projects are both enjoyable and rewarding.
In this blog post, you’ll learn about fundamental jewelry-making techniques such as stringing, wire wrapping, and beading. Mastering these basics is critical for building a strong foundation in your new hobby. We’ll also delve into recommendations on must-have tools, how to choose quality materials, and tips for organizing a dedicated workspace that will inspire creativity.
By following this guide step-by-step, you’ll come away equipped not only with the knowledge of how to start but also with actionable advice for tackling beginner projects. From troubleshooting common issues to exploring resources that can help you expand your skills further down the line, our aim is to make your journey into jewelry making as smooth and enjoyable as possible.
Whether you’re creating handmade gifts or looking to turn your passion into a small business, this guide provides everything you need to get started on the right foot.
Understanding Basic Jewelry Making Techniques
Stringing
Stringing is one of the most fundamental techniques in jewelry making, perfect for beginners. It involves threading beads onto a stringing material such as wire, thread, or elastic cord. This method is commonly used in creating necklaces and bracelets.
Start by selecting your beads and stringing materials-popular choices include beading wire for its durability and silk thread for its flexibility. You’ll need basic tools such as crimp bead pliers to secure your design with crimp beads. Learning how to get started with jewelry making: tools and materials for stringing will set the foundation for more advanced techniques in the future.
Wire Wrapping
Wire wrapping is another essential technique where you use metal wire to create loops, links, and intricate designs around beads or gemstones. Beginners can start by mastering simple wire loops that serve as connectors in earrings or other pieces of jewelry.
For this technique, you’ll need round nose pliers to help shape the wire into smooth loops, chain nose pliers to hold and manipulate the wire, and flush cutters to trim excess wire cleanly. Practicing basic wire wrapping forms not only strengthens your skills but also adds a unique handmade touch to your creations.
Beading
Beading requires precise placement of small beads to form intricate patterns or elaborate designs. Whether you’re stitching beads together using a loom or freehand techniques like peyote stitch or brick stitch, having the right tools is crucial.
Start with beading needles, which are thin enough to go through multiple bead holes yet sturdy enough to maneuver easily through various stitches. It’s also helpful to have different types of beading threads or fibers like Nymo or FireLine suited for various projects.
To effectively learn these basic techniques, consider investing time in instructional resources such as beginner-friendly books, online tutorials, and videos that provide step-by-step guidance. Mastering these foundational practices opens up endless possibilities in jewelry design and sets the stage for creating personalized pieces you’ll cherish or even sell down the line.
Essential Jewelry Making Tools
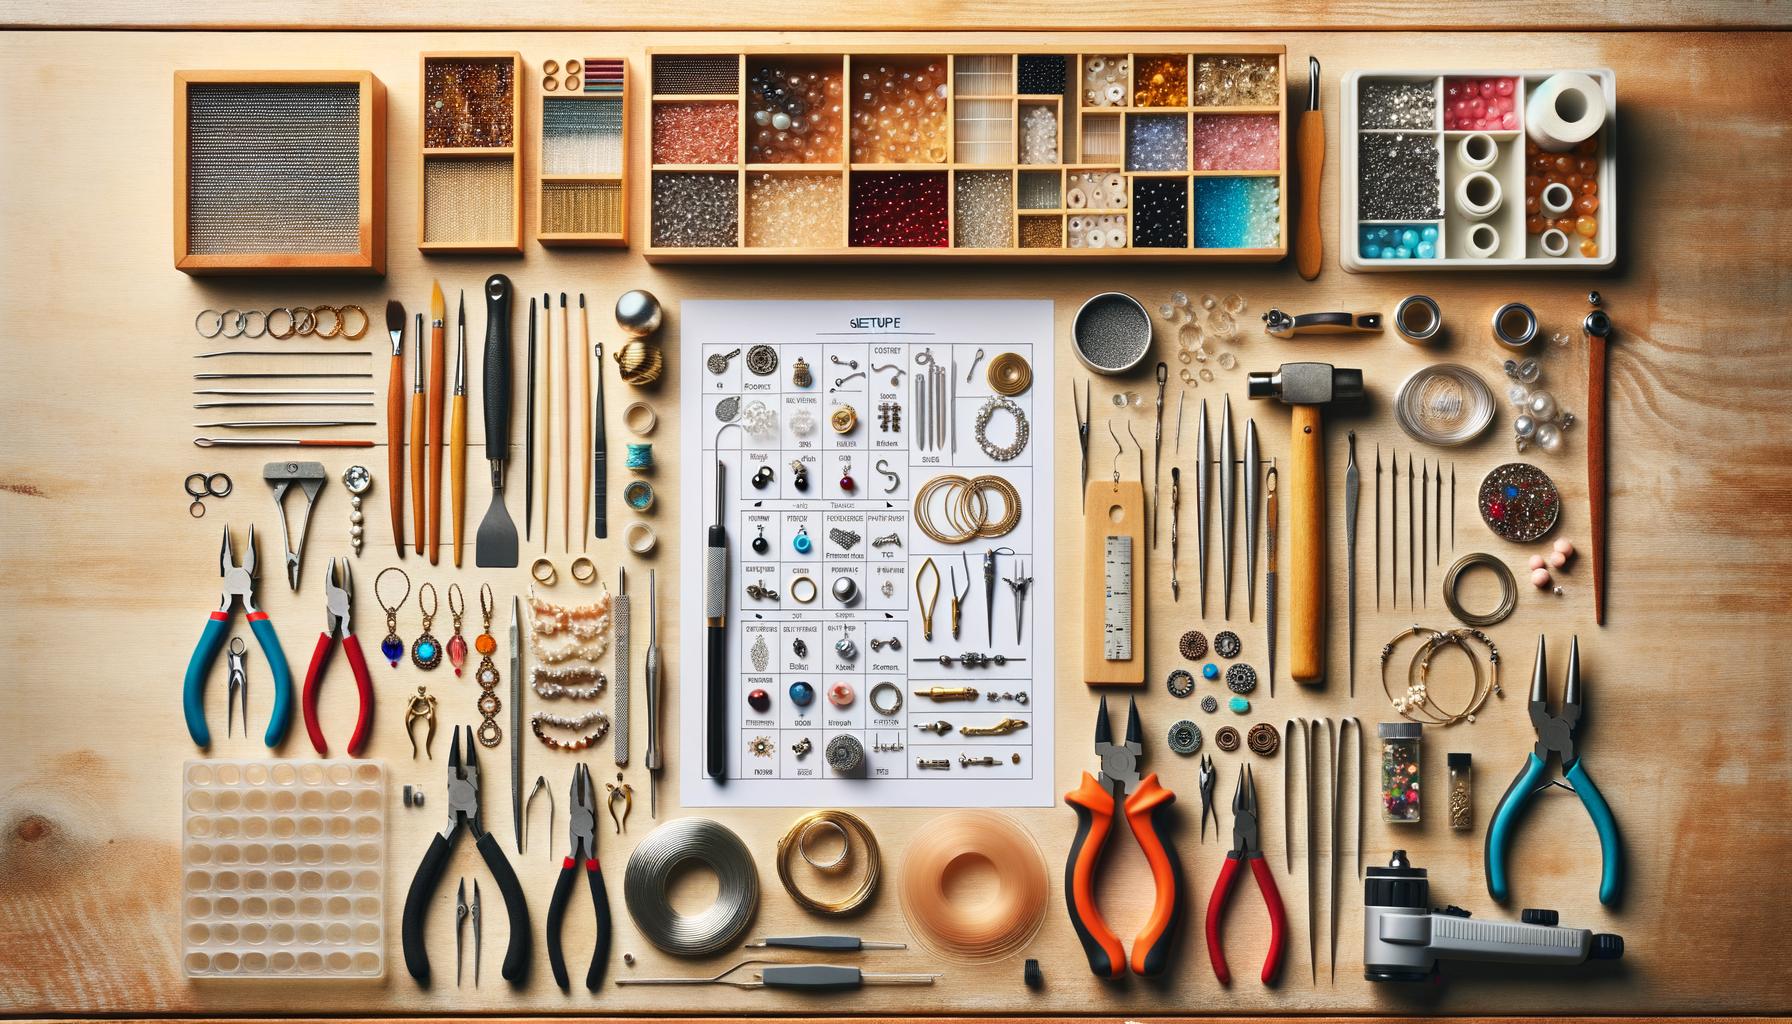
When embarking on your jewelry-making journey, having the right tools in your arsenal is crucial. The first must-have tool is a set of pliers. Round-nose pliers, chain-nose pliers, and flat-nose pliers are essential for various tasks like opening and closing jump rings, bending wire, and gripping small components. For instance, round-nose pliers are particularly useful when forming loops while wire wrapping or creating intricate patterns with wires.
Another indispensable tool for beginners is a reliable pair of wire cutters. Precision is key when cutting different gauges of wire to ensure clean edges that do not fray or weaken your design structure. Additionally, investing in bead crimpers can significantly improve the durability and finish of your beaded projects. Bead crimpers come in handy for securing crimps onto wires or cords, ensuring that beads stay securely in place.
To source these tools affordably and find beginner-friendly brands, shop at well-known suppliers like Beadalon or The Beadsmith available online or at local craft stores. These brands offer comprehensive kits perfect for novices just learning how to get started with jewelry making: tools and materials specifically designed for ease of use without compromising quality.
| Tool | Usage |
|---|---|
| Pliers (Round-Nose) | Forming loops; Wire wrapping |
| Pliers (Chain-Nose & Flat-Nose) | Opening/closing jump rings; Bending wire; Gripping components |
| Wire Cutters | Cutting different gauges of wire cleanly |
| Bead Crimpers | Securing crimps on wires or cords |
Selecting the Right Materials
When starting your journey into jewelry making, selecting the right materials is as crucial as having the proper tools. Knowing what materials to use can greatly impact the quality and durability of your creations. Beginners should take time to understand the various types of beads, wires, clasps, and chains available in the market, as this will help you make informed decisions for your projects.
Types of Beads
Beads come in an array of shapes, sizes, and materials. Some of the most common options include glass beads, acrylic beads, wooden beads, gemstone beads, and metal beads. Glass beads are popular due to their aesthetic appeal and variety of colors; they’re perfect for adding a touch of elegance to your designs.
Acrylic beads are lightweight and cost-effective, often used for playful or colorful projects. Wooden beads provide a natural look that’s ideal for bohemian styles, while gemstone beads offer natural beauty with metaphysical properties that many find attractive.
Understanding Wires and Chains
Wires serve as the backbone of many jewelry pieces. They come in different gauges (thicknesses) and materials like copper, silver, gold-plated wire, and more. Thin wires (24-26 gauge) are great for stringing small beads or intricate wire wrapping techniques.
Thicker wires (20-22 gauge) are sturdier and useful for creating base structures or heavier components like clasps and rings. Chains also vary widely in style-from delicate link chains perfect for dainty necklaces to more robust options suited for chunkier designs.
Sourcing Materials Affordably
One challenge beginners might face is sourcing quality materials without breaking the bank. An excellent place to start is local craft stores where you can physically inspect items before purchase. Online marketplaces such as Etsy or specialized bead stores offer an extensive selection but require careful reading of reviews and specifications to ensure quality. Additionally, buying mixed packs or bulk can be a budget-friendly option when experimenting with different types of materials.
Learning how to get started with jewelry making: tools and materials will make your crafting experience smoother and much more enjoyable. Being mindful about what you choose will not only improve your skills but also significantly enhance the final look of your handmade jewelry pieces.
Organizing Your Workspace
Creating an efficient and inspiring workspace is fundamental for every jewelry maker, regardless of skill level. A dedicated area allows you to focus on your craft without interruptions, ensuring that all your tools and materials are within reach. Start by identifying a spot in your home where you can set up a small table or desk exclusively for jewelry making. Make sure it’s well-lit and has enough space to spread out your projects comfortably.
One of the first things you’ll need is proper storage solutions to keep your tools and materials organized. Consider investing in stackable containers or drawer units to store different types of beads, wires, and findings separately. Label each compartment clearly so you can quickly find what you need when inspiration strikes. Pegboards are another excellent option for hanging tools like pliers, scissors, and wire cutters; this not only saves desk space but also keeps everything visible at a glance.
To keep your workspace neat and prevent clutter, designate specific areas for various activities like designing, assembling, and finishing pieces. Use trays or mats for current projects to avoid mixing up components. Efficient organization not only streamlines your workflow but also enhances creativity by providing a clear mind-space to design new pieces. Knowing how to get started with jewelry making: tools and materials will require an organized setup that facilitates learning and experimentation.
| Storage Solutions | Benefits |
|---|---|
| Stackable Containers | Keeps different materials separate and organized |
| Pegboards | Saves desk space and keeps tools visible |
| Labeled Drawers | Makes finding specific items quicker and easier |
Beginner Projects to Get You Started
Embarking on your jewelry-making journey can be immensely rewarding, especially when you start with beginner-friendly projects that build confidence and skill. One of the simplest yet satisfying projects is creating a basic beaded bracelet. This project introduces you to fundamental techniques such as stringing beads and attaching clasps.
To get started, you’ll need stretch cord, assorted beads of your choice, scissors, and crimp beads. Simply measure the stretch cord around your wrist, add an extra inch for tying off, string your chosen beads in a pattern that appeals to you, and secure the ends with crimp beads.
Another popular beginner project is making wire-wrapped pendants. This technique might seem intimidating at first glance but is straightforward once you get the hang of it. For this project, you’ll require some basic tools: round-nose pliers, chain-nose pliers, wire cutters, and jewelry-quality wire (24-gauge is a good starting point).
Select a focal bead or stone that you’d like to wrap. Begin by cutting about 12 inches of wire and threading it through your focal piece’s hole or wrapping it firmly around its base if it’s irregularly shaped. From here, use the pliers to twist and mold the wire into an artistic design around the bead or stone.
If you’re wondering how to get started with jewelry making: tools and materials are crucial to ensure smooth progress in any project. Simple earrings offer an excellent opportunity for beginners to practice using their new tools while creating stylish pieces they can wear or gift. Start by selecting earring hooks and headpins along with small decorative beads or charms.
Use round-nose pliers to create loops at one end of each headpin after threading on your beads or charms. Attach these loops directly onto the earring hooks using chain-nose pliers for a polished finish.
These introductory projects not only help build foundational skills but also provide a sense of accomplishment as you see tangible results from your efforts. Remember that every piece you create adds value to your learning experience-so don’t hesitate to experiment and enjoy the process.
Troubleshooting Common Problems
Even with the best preparation and tools, beginners in jewelry making often encounter a variety of issues. Understanding how to recognize and solve these common problems can help you quickly improve your skills and avoid frustration.
One frequent challenge is managing uneven wire loops or shapes, which can be particularly troublesome when learning techniques like wire wrapping. To correct this, ensure you’re using high-quality pliers with smooth jaws to prevent marking your wire, and practice consistently applying even pressure.
Another issue arises from bead stringing tension; if strung too loosely, beads can shift or droop, while overly tight stringing can cause breakage or stiffness in your piece. The key here is to find the right balance by practicing on small projects first. Use bead stoppers to secure your work as you go along, ensuring that each section maintains an even tension without pulling too tightly.
Beginners also frequently struggle with finding and maintaining a comfortable setup for their tools and materials. Learning how to get started with jewelry making: tools and materials includes choosing appropriate storage solutions to avoid a cluttered workspace which can significantly affect the quality of your work.
Utilize labeled compartment boxes for different types of beads and findings and keep essential tools within easy reach on a pegboard or magnetic strip. This organization not only saves time but helps you focus more effectively on honing your craft.
Expanding Your Skills and Knowledge
Once you’ve mastered the basics and completed a few beginner projects, you may find yourself eager to expand your skills and knowledge. One of the best ways to do this is by delving into the wealth of books, online courses, and workshops available for jewelry making. Renowned authors and jewelry artists have penned comprehensive guides that can take your craftsmanship to the next level.
Additionally, many online platforms offer structured courses covering advanced techniques such as metalworking, soldering, and gemstone setting. Platforms like Skillshare, Udemy, and Coursera have specialized jewelry making classes that cater to various skill levels.
Joining jewelry-making communities can also be incredibly beneficial for expanding your skills and gaining inspiration. Online forums, social media groups, and local craft clubs provide opportunities to connect with other enthusiasts who share your passion. These communities are invaluable for exchanging ideas, getting feedback on your work, and discovering new trends in the field. Participating in group challenges or collaborative projects can push you out of your comfort zone and help improve your skills faster than working alone.
Lastly, taking on more complex projects can be a natural progression once you’re comfortable with basic techniques. Look for intermediate projects that challenge you just enough without being overwhelming. For instance, try creating more intricate wire-wrapped designs or experiment with different types of materials like resin or polymer clay.
Understanding how to get started with jewelry making: tools and materials will make these complex projects feel achievable because you’ll know exactly what supplies are needed. Investing time in higher-level tutorials will not only enhance your skills but also increase the variety of jewelry pieces you can create.
Conclusion
Recapping the essentials, we’ve journeyed through the important steps and knowledge you need to embark on your jewelry making adventure. Starting with understanding basic techniques such as stringing, wire wrapping, and beading sets a solid foundation for any beginner. These fundamental skills are not only essential but also form the bedrock upon which more complex creations can be built. Utilizing resources like online tutorials, books, or local workshops can further enhance your mastery of these techniques.
Equipping yourself with the right tools can’t be stressed enough when discussing how to get started with jewelry making: tools and materials make all the difference in not only quality but also in your overall experience. From pliers and wire cutters to bead crimpers, having a detailed list of must-have tools ensures you’re well-prepared from the get-go.
Buying beginner-friendly brands from reputable stores can save both time and frustration while ensuring you have durable and reliable equipment at hand.
Material selection is another crucial aspect; knowing which beads, wires, clasps, and chains match your project needs is vital. Tips for choosing quality materials assist beginners in making informed decisions that affect both the aesthetic appeal and durability of their creations.
Additionally, finding affordable sources for these materials helps keep costs down while you’re learning. As you delve deeper into projects tailored for novices and gradually tackle more complex ones, remember that practice coupled with patience is key to honing your craft.
Additional Resources
As we conclude our guide on how to get started with jewelry making: tools and materials, it’s important to revisit the key points we’ve covered. Starting with the basics ensures that you have a strong foundation in the essential techniques such as stringing, wire wrapping, and beading. These techniques form the core of your craftsmanship and open up endless possibilities for creativity.
Also crucial is understanding the range of tools you’ll need-pliers, wire cutters, bead crimpers-and selecting good quality materials. These basics set the stage for your journey into this intricate and rewarding craft.
Dedicating a specific workspace allows not only for better organization but also fosters a conducive environment for creativity. We’ve provided insights into setting up an efficient work area equipped with adequate storage solutions for your ever-growing collection of tools and materials. This attention to detail in your setup can make a significant difference in both productivity and enjoyment while working on various projects.
To round off, we encourage you not just to practice consistently but also to seek out additional resources such as books, online courses, and workshops that can help expand your skillset further. Engaging with jewelry-making communities provides support and inspiration to continue learning and improving your craft. Remember, every expert once started as a beginner-embrace each challenge as an opportunity to grow.
We would love to see what you’ve created. Feel free to share your projects or any questions you may have in the comments section below. Jewelry making is not just about creating beautiful pieces; it’s also about building a community where ideas are exchanged and skills are developed together.
Frequently Asked Questions
What Are the Basic Tools Needed for Jewelry-Making?
The basic tools needed for jewelry-making include a set of pliers, which typically comprises round-nose, chain-nose, and flat-nose pliers. Additionally, a wire cutter is essential for trimming wire and head pins. A jeweler’s saw is useful for cutting metal sheets and intricate designs, while files help smooth rough edges.
A bead board can assist in designing necklaces and bracelets by allowing you to arrange beads before stringing them. Needle files are great for detail work. Finally, having a sturdy workbench or mat provides a stable foundation to work on your projects.
How Do I Start Learning Jewelry-Making?
To start learning jewelry-making, one could begin by taking a basic class at a local community center or craft store where hands-on guidance is provided. Online tutorials and instructional videos can also be valuable resources that allow you to learn at your own pace from home.
Reading books or subscribing to magazines on the subject can deepen your understanding of techniques and materials. Practicing with starter kits available from craft stores can provide you with essential supplies and step-by-step instructions for beginner-friendly projects.
What Supplies Do I Need to Start a Jewelry Business?
Starting a jewelry business requires sourcing various supplies beyond the tools needed for creating pieces. Quality materials such as beads, gemstones, metals (like silver, gold, and copper), wires, chains, clasps, and findings are necessary for crafting high-quality items that appeal to customers. Additionally, branding elements like packaging materials—boxes or pouches—can elevate the customer experience.
Business essentials include marketing materials like business cards and social media profiles to create an online presence, as well as bookkeeping software to manage finances effectively. Lastly, securing proper licenses or permits ensures that your business operates legally.

Welcome to my jewelry blog! My name is Sarah and I am the owner of this blog.
I love making jewelry and sharing my creations with others.
So whether you’re someone who loves wearing jewelry yourself or simply enjoys learning about it, be sure to check out my blog for insightful posts on everything related to this exciting topic!


