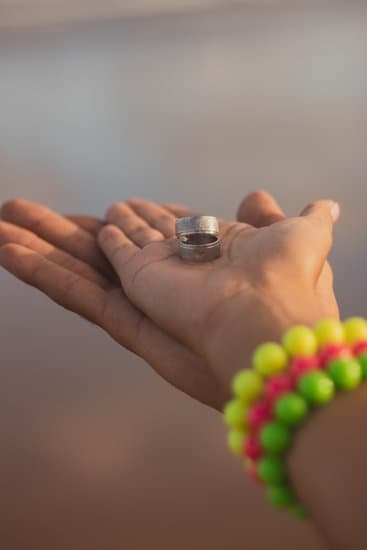
In recent years, do-it-yourself (DIY) jewelry making has become increasingly popular among enthusiasts and crafters alike. The ability to create unique and personalized pieces of jewelry has captured the imagination of many, resulting in a boom in the DIY jewelry market. One crucial component that is often used in these projects is the humble eye pin.
Eye pins are versatile findings that play a vital role in jewelry making. They allow for easy attachment of beads, charms, and other components, making them an indispensable tool for any aspiring jewelry maker. However, using eye pins effectively requires a fundamental understanding of their different types and proper techniques.
To delve deeper into this subject, we will explore the basics of eye pins and how they can be applied creatively to enhance your jewelry designs. We will also provide step-by-step instructions on using DIY eye pins in jewelry making, ensuring that you can master this skill with confidence and precision.
Whether you are a novice or an experienced crafter, understanding how to use DIY eye pins effectively opens up a world of design possibilities. Stay with us as we uncover everything you need to know about these small-but-mighty tools and unlock your creativity in the realm of DIY jewelry making.
Understanding the Basics
Eye pins are an essential component in jewelry making, particularly in the realm of do-it-yourself (DIY) projects. Understanding the basics of eye pins is crucial for jewelry makers to effectively incorporate them into their designs.
Eye pins, also known as wire loops or wire connectors, are small metal wires with a loop at one end, resembling a lowercase letter “e”. These loops serve as connections for various elements in jewelry making, such as beads, charms, pendants, or even other findings.
There are different types of eye pins that serve different purposes in jewelry making. The most common types include headpins and eyepins with loops. Headpins are straight wires with a flat or rounded head at one end to prevent beads from sliding off.
They are often used to create dangles or drops by threading beads onto the straight portion and creating a loop at the other end. Eyepins with loops, on the other hand, already come with pre-formed loops on both ends. These eyepins are convenient for connecting multiple components together in earrings or creating beaded chains.
Eye pins come in various lengths and gauges to accommodate different design needs and preferences. The length of an eye pin depends on the intended use and design aesthetic. Shorter eye pins are suitable for creating simple dangles or connecting small components together, while longer ones work well for incorporating multiple beads or creating longer pendant necklaces.
Gauges refer to the thickness or diameter of the wire used for eye pins. Thicker gauges provide sturdier support but may be more difficult to manipulate around tight curves.
| Type | Description |
|---|---|
| Headpins | Straight wires with a flat or rounded head at one end |
| Eyepins with loops | Eye pins with pre-formed loops on both ends |
Essential Tools and Materials
In order to effectively use DIY eye pins in jewelry making, it is important to have the necessary tools and materials on hand. There are a few essential tools that every jewelry maker should have in their toolkit.
One of the most important tools for working with eye pins is round nose pliers. These pliers have conical jaws that are perfect for creating loops on both ends of the eye pin. The rounded shape of the jaws ensures that the loops are smooth and uniform in size. Another essential tool is wire cutters, which are used to trim excess wire from the eye pin after creating the desired loop.
When it comes to choosing eye pins, it is crucial to consider both length and gauge. Eye pins come in different lengths, ranging from as short as 1 inch to as long as 3 inches or more. The length you choose will depend on your specific design needs and preferences.
Additionally, eye pins also come in various gauges, which refers to the thickness of the wire. Thicker gauges, such as 18 or 20 gauge, are more sturdy and suitable for heavier beads or larger loops, while thinner gauges like 24 or 26 gauge are better suited for delicate designs or smaller beads.
Aside from round nose pliers, wire cutters, and eye pins of varying lengths and gauges, there are other tools that may come in handy when working with DIY eye pins. For example, chain nose pliers can be useful for opening and closing jump rings or attaching other findings to your eye pin jewelry. Additionally, flat nose pliers can be useful for holding components steady while working with round nose pliers or wire cutters.
By having these essential tools at your disposal, you’ll be well-equipped to effectively use DIY eye pins in your jewelry making projects. The right tools will not only make the process easier but will also help ensure that your finished pieces are professionally crafted and durable.
Step-by-Step Guide
Using eye pins in jewelry making is a versatile and essential technique for creating beautiful and unique pieces. In this step-by-step guide, we will walk you through the process of effectively using DIY eye pins to elevate your jewelry designs. Whether you are a beginner or an experienced jewelry maker, mastering this technique will open up endless possibilities for creating stunning accessories.
The first step in using DIY eye pins is choosing the appropriate length. Eye pins come in various lengths, typically ranging from 1 inch to 3 inches. The length you choose will depend on your specific design and the number of beads you want to incorporate. It’s important to select a length that allows enough space for the beads without leaving too much excess wire.
Once you have chosen the right eye pin length, it’s time to thread your beads onto the pin. Begin by sliding one bead onto the eye pin, ensuring that it rests securely against the looped end. If you plan to include multiple beads, continue adding them one by one, spacing them out evenly along the wire. Be mindful of the size and weight of your beads to maintain balance and prevent any strain on the eye pin.
After threading all your desired beads onto the eye pin, it’s time to create loops on both ends. This will ensure that your beads are secure and won’t fall off. Using round nose pliers, grip the wire just above the last bead tightly. Bend the wire at a 90-degree angle away from you, forming a sharp bend. Reposition the pliers so that they are inside this bend and close to where it meets with the bead.
With good grips on your pliers, begin rotating your wrist away from your body while keeping a firm hold on the wire with your pliers until you complete half of the loop or circle shape. Remove your pliers from inside of this half-formed loop and reposition them so that they’re gripping across this shaped curve.
Continue rotating your wrist until the loop is complete, making sure that the loop is tightly closed and neat. Repeat this process on the other end of the eye pin to create a matching loop.
By following these steps, you have successfully used DIY eye pins to incorporate beads into your jewelry design. This technique is a fundamental skill that can be applied in various ways to achieve different styles and looks.
With practice and experimentation, you can take this basic method and create intricate and beautiful designs that showcase your creativity and personal style. Whether you’re making earrings, necklaces, or bracelets, mastering the use of eye pins will elevate your jewelry-making projects to a whole new level.
Creative Design Ideas
Creating Eye Pin Dangles
One of the most popular and versatile ways to incorporate DIY eye pins in jewelry designs is by creating eye pin dangles. Eye pin dangles are small decorative elements that can be added to necklaces, bracelets, earrings, or even used as pendants. To make an eye pin dangle, start by selecting a bead or charm that you want to showcase.
Thread the chosen bead onto an eye pin and use round nose pliers to create a loop on one end. Then, attach the looped end of the eye pin to your desired jewelry component using jump rings or other connectors. Eye pin dangles can add movement, color, and visual interest to your creations.
Making Cluster Earrings with Eye Pin Connectors
Cluster earrings are a trendy and chic style of earrings that can be easily made using DIY eye pins. These earrings are created by connecting multiple beads or charms together in a cluster formation. To make cluster earrings with eye pin connectors, start by selecting several beads or charms that complement each other in terms of color, shape, or theme.
Thread each bead onto a separate eye pin and create a loop on one end using round nose pliers. Once all the beads have been threaded and looped, connect them together using jump rings or chain links. Finally, attach earring hooks to the top loops of the cluster for a finished set of beautiful cluster earrings.
Using Eye Pins as Connectors in Bracelets or Necklaces
Eye pins can also serve as connectors in bracelets or necklaces, allowing you to join different components together seamlessly. For example, if you have a bracelet design that includes multiple strands or focal pieces, you can use eye pins as connectors to bring everything together. Simply thread beads onto an appropriate length of eye pin and create loops on both ends using round nose pliers.
Attach one end of the eye pin to one component of your bracelet or necklace, and then attach the other end to another component using jump rings or other connectors. This technique not only adds visual interest but also ensures that the different components of your jewelry are securely connected.
By incorporating these creative design ideas into your DIY eye pin jewelry making, you can elevate your designs and create unique pieces that reflect your personal style. Experiment with different bead combinations, colors, and textures to create eye-catching jewelry that stands out.
Don’t be afraid to mix metals, add gemstones or pearls, or even incorporate charms onto your eye pins for an extra touch of personality. The possibilities are endless when it comes to using DIY eye pins in jewelry making.
Troubleshooting Tips
When it comes to using DIY eye pins in jewelry making, there are some common challenges that you might encounter. However, with a few troubleshooting tips, you can overcome these challenges and create beautiful pieces of jewelry. Here are some solutions to address the most commonly faced issues:
- Preventing beads from sliding off: One of the main concerns when using eye pins is making sure that the beads stay in place. To prevent beads from sliding off, you can use different techniques. Firstly, make sure that your eye pin is the appropriate length for the number of beads you want to thread onto it.
If the eye pin is too short, there won’t be enough space for all the beads and they may come loose. Additionally, you can add a small loop at the end of the pin before threading on your beads. This will act as a stopper to prevent them from slipping off. - Avoiding bent or misshapen eye pins: Sometimes when working with wire, especially if it’s thin or soft, it can become bent or misshapen during the jewelry-making process. To avoid this issue, make sure to use good quality eye pins made from sturdy wire with an appropriate gauge for your project. Additionally, handle them gently and avoid excessive bending or twisting motions while working with them using round nose pliers or other suitable tools.
- Ensuring secure connections: It’s important to ensure that your eye pin loops are properly closed and securely connected to other components in your jewelry design. An open loop can result in beads falling off or even losing the entire piece of jewelry.
To create secure connections, make sure that your loops are tightly closed by using round nose pliers to bend the wire ends back towards each other. You can also use jump rings or other connectors to attach the eye pins to other elements in your design, such as chains, pendants, or earring hooks.
By following these troubleshooting tips, you can overcome challenges and create eye-catching jewelry using DIY eye pins. Remember to practice and experiment with different techniques to find what works best for you. With patience and perseverance, you’ll be able to create stunning jewelry pieces that showcase your creativity and style.
Adding Personal Touch
Personalizing eye pin jewelry is a fun and creative way to make your pieces unique and reflect your personal style. By experimenting with different materials, colors, and textures, you can transform simple eye pin designs into stunning accessories that truly stand out. Here are some ideas to help you add a personal touch to your eye pin jewelry:
- Incorporating gemstones: One of the easiest ways to enhance the look of your eye pin jewelry is by adding gemstone beads. You can choose gemstones in various shapes, sizes, and colors to create different effects. For example, using vibrant colored gemstones like amethyst or citrine can add a pop of color to your necklace or bracelet designs. Alternatively, you can opt for more subtle tones like rose quartz or labradorite for a soft and elegant look.
- Adding pearls: Pearls are known for their timeless beauty and can add an elegant touch to any piece of jewelry. Consider using freshwater pearls or cultured pearls as accents on your eye pins. You can either use them individually or combine them with other beads for a more intricate design. Pearls work particularly well in classic styles such as bridal jewelry or vintage-inspired pieces.
- Including charms: Charms are a great way to personalize eye pin jewelry and create meaningful pieces that tell a story. Whether it’s a symbol that represents something special to you or an initial charm that adds a personalized touch, there are countless options available. You can attach the charms directly onto the eye pin loops or use jump rings to connect them.
In addition to these ideas, don’t be afraid to mix and match different materials like crystals, glass beads, or even ceramic beads for an unconventional look. Experimenting with various textures such as matte finishes, metallic accents, or even fabric elements can also add an interesting twist to your designs.
Remember that the key is to have fun with your creations and let your imagination guide you. Don’t be afraid to step out of your comfort zone and try new combinations. With a little experimentation, you can create eye pin jewelry that truly reflects your own unique style and personality.
Finishing Techniques
Now that you’ve mastered the art of creating beautiful jewelry using DIY eye pins, it’s time to learn about the finishing techniques that will give your pieces a polished and professional look. Properly finishing eye pin jewelry is essential for ensuring that your creations are not only aesthetically pleasing but also durable and functional.
Using Jump Rings and Lobster Clasps
One common way to finish eye pin jewelry, especially necklaces or bracelets, is by using jump rings and lobster clasps. Jump rings are small circular metal rings that can be easily opened and closed with pliers. They serve as connectors between different components in your jewelry piece.
To use jump rings, simply open them using two pairs of pliers by holding one side of the ring with one pair and twisting the other side in the opposite direction. Slide one end of the eye pin onto the jump ring, then attach the lobster clasp on the other end. Close the jump ring securely before wearing or selling your jewelry.
Attaching Earring Hooks
If you’re making earrings using eye pins, attaching earring hooks is a crucial step in completing your design. Earring hooks come in different styles, including fishhooks, lever backs, and ear wires. To attach an earring hook to an eye pin dangle, simply slide the loop at the top of the earring hook onto one end of the eye pin.
Then use pliers to close the loop securely. Make sure that your loops are tightly shut so that there is no risk of losing your earrings.
By properly finishing your eye pin jewelry with jump rings, lobster clasps, and earring hooks, you ensure that all components are securely connected and ready for wear or sale. Remember to choose high-quality findings to ensure durability and longevity for your finished pieces.
While these are commonly used finishing techniques for eye pin jewelry, don’t be afraid to explore other options and get creative. Experiment with different findings, such as toggle clasps or magnetic clasps, to add a unique touch to your designs. The possibilities are endless when it comes to finishing eye pin jewelry, so have fun and let your imagination run wild.
Maintenance and Care
Eye pin jewelry, like any other type of jewelry, requires regular maintenance and care to ensure its longevity and beauty. Proper maintenance not only keeps the eye pins themselves in good condition but also helps to prevent tarnishing or damage to the other components of the jewelry, such as beads and connectors. In this section, we will highlight the importance of maintaining eye pin jewelry and provide tips on cleaning, storing, and preventing tarnishing or damage.
One crucial aspect of maintaining eye pin jewelry is regular cleaning. Over time, dirt, oils, and sweat can build up on the surface of the jewelry, leading to a dull appearance. To clean eye pin jewelry effectively, it is recommended to use a mild soap or detergent mixed with warm water. Gently scrub the piece with a soft brush or cloth to remove any dirt or residue. Rinse thoroughly with clean water and pat it dry using a soft towel.
Storing eye pin jewelry properly is also essential in maintaining its condition. It is best to store each piece separately to avoid tangling or scratching. You can use small ziplock bags or individual jewellery boxes with compartments for this purpose. Additionally, consider storing your eye pin jewelry in a cool, dry place away from direct sunlight or moisture as these factors can accelerate tarnishing.
Preventing tarnishing and damage to the eye pins and associated components requires some proactive measures. One effective way to protect your jewelry from tarnish is by storing it with anti-tarnish strips or pouches that absorb moisture and neutralize air pollutants that cause oxidation. Avoid exposing your eye pin jewelry to harsh chemicals such as perfume, hairspray, or cleaning agents as these can corrode both metal components and certain types of beads.
Regularly inspecting your eye pin jewelry for signs of wear and tear is also important for maintenance purposes. Check for loose connections between beads and make sure that loops on the ends of the eye pins are secure. If you notice any issues, it is best to address them promptly by repairing or replacing the affected components.
By following these maintenance and care tips, you can ensure that your eye pin jewelry remains beautiful and in good condition for years to come. Remember to clean your jewelry regularly, store it properly, and take preventative measures against tarnishing and damage. With proper care, your eye pin creations will continue to bring joy and style to your everyday looks.
| Maintenance Tips | Care Tips |
|---|---|
| Regular cleaning with mild soap and warm water | Store each piece separately in a ziplock bag or jewellery box |
| Avoid exposure to harsh chemicals such as perfume or hairspray | Use anti-tarnish strips or pouches when storing to prevent tarnishing |
| Inspect for loose connections or damaged components regularly | Avoid storing in direct sunlight or areas with high moisture |
Taking it Further
Conclusion:
In conclusion, using DIY eye pins in jewelry making opens up a world of creative possibilities. By incorporating different materials, colors, and textures onto eye pins, you can truly personalize your jewelry to reflect your unique style. With the step-by-step guide provided and the troubleshooting tips offered, you now have all the tools and knowledge necessary to start creating stunning pieces using eye pins.
However, if you’re eager to explore this art form further and refine your skills, there are plenty of resources available to help you on your journey. Online tutorials can offer in-depth demonstrations and guidance on specific techniques or designs. Additionally, books dedicated to DIY jewelry making can provide inspiration and instructions for more advanced projects.
Remember to also take care of your eye pin jewelry once it’s complete. By implementing proper maintenance techniques such as cleaning regularly and storing appropriately, you can ensure that your pieces remain beautiful for years to come.
So don’t hesitate. Continue exploring the world of DIY eye pin jewelry making by seeking out additional resources, tutorials, and books. With dedication and practice, you’ll continue to refine your skills and create stunning pieces that showcase your personal style.
Frequently Asked Questions
How do you use an eye pin in jewelry making?
Eye pins are commonly used in jewelry making as a versatile component for creating different types of jewelry pieces. To use an eye pin, you first need to slide beads onto the straight part of the pin.
Once the desired number of beads is in place, you can then use pliers to create a loop at the open end of the pin, forming a connection point for attaching to other components or findings within your jewelry design. This loop can be left open or closed depending on your design preference and how you plan to incorporate it into your piece.
What do you use screw eye pins for in jewelry making?
Screw eye pins serve a specific purpose in jewelry making. They have a spiral threaded structure that allows them to be twisted into various materials such as wood, cork, or even polymer clay.
When used in this way, screw eye pins provide a secure and durable attachment point for adding small charms, pendants, or beads to these unique materials. The ability to create a secure hold makes them ideal for creating earrings with polymer clay elements or adding decorative elements to wooden pendants.
What can you do with eye pins?
There are numerous possibilities when it comes to what you can do with eye pins in jewelry making. One common use is creating bead dangles by simply threading beads onto an eye pin and then creating a simple loop at the other end using pliers. These bead dangles can be attached to ear wires, bracelet chains, or necklace chains to add color and movement to your designs.
Eye pins can also be used as connectors between different components, linking together beads or charms within a necklace or bracelet design. Furthermore, by combining several eye pins together with jump rings, you can create more complex designs such as chain earrings or multi-strand bracelets where each strand is connected by individual eye pins. The versatility of eye pins makes them an essential component for any jewelry maker looking to add depth and complexity to their designs.

Welcome to my jewelry blog! My name is Sarah and I am the owner of this blog.
I love making jewelry and sharing my creations with others.
So whether you’re someone who loves wearing jewelry yourself or simply enjoys learning about it, be sure to check out my blog for insightful posts on everything related to this exciting topic!

